Popular Woodworking 2004-06 № 141, страница 62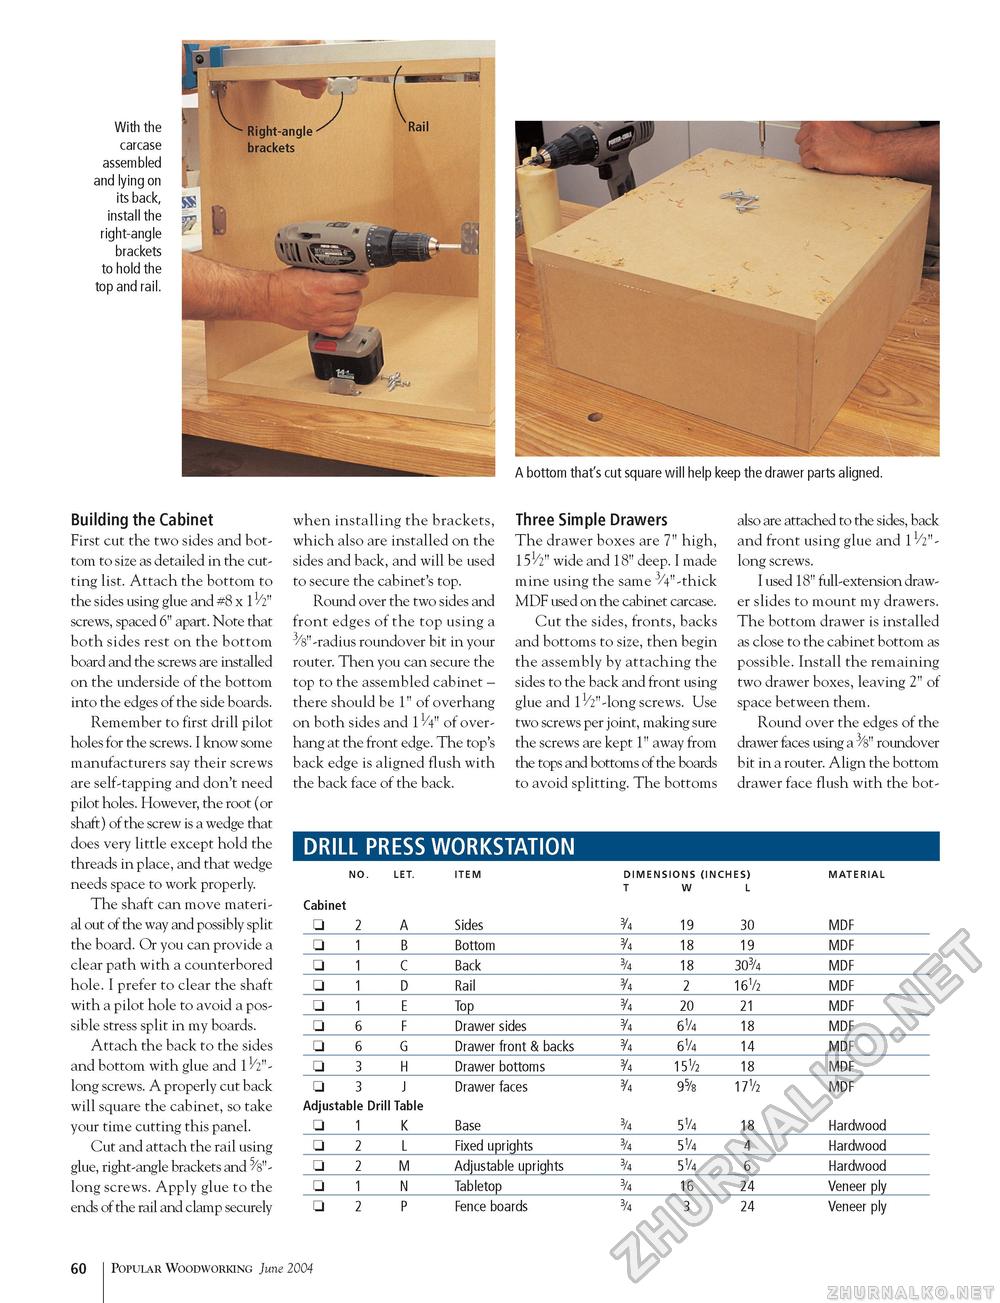
With the carcase assembled and lying on its back, install the right-angle brackets to hold the top and rail. A bottom that's cut square will help keep the drawer parts aligned. Building the Cabinet First cut the two sides and bottom to size as detailed in the cutting list. Attach the bottom to the sides using glue and #8 x 11/2" screws, spaced 6" apart. Note that both sides rest on the bottom board and the screws are installed on the underside of the bottom into the edges of the side boards. Remember to first drill pilot holes for the screws. I know some manufacturers say their screws are self-tapping and don't need pilot holes. However, the root (or shaft) of the screw is a wedge that does very little except hold the threads in place, and that wedge needs space to work properly. The shaft can move material out of the way and possibly split the board. Or you can provide a clear path with a counterbored hole. I prefer to clear the shaft with a pilot hole to avoid a possible stress split in my boards. Attach the back to the sides and bottom with glue and 11/2"-long screws. A properly cut back will square the cabinet, so take your time cutting this panel. Cut and attach the rail using glue, right-angle brackets and ^s"-long screws. Apply glue to the ends of the rail and clamp securely when installing the brackets, which also are installed on the sides and back, and will be used to secure the cabinet's top. Round over the two sides and front edges of the top using a 3/8"-radius roundover bit in your router. Then you can secure the top to the assembled cabinet -there should be 1" of overhang on both sides and 1V4" of overhang at the front edge. The top's back edge is aligned flush with the back face of the back. Three Simple Drawers The drawer boxes are 7" high, wide and 18" deep. I made mine using the same 3/4"-thick MDF used on the cabinet carcase. Cut the sides, fronts, backs and bottoms to size, then begin the assembly by attaching the sides to the back and front using glue and 11/2"-long screws. Use two screws per joint, making sure the screws are kept 1" away from the tops and bottoms of the boards to avoid splitting. The bottoms also are attached to the sides, back and front using glue and 11/2"-long screws. I used 18" full-extension drawer slides to mount my drawers. The bottom drawer is installed as close to the cabinet bottom as possible. Install the remaining two drawer boxes, leaving 2" of space between them. Round over the edges of the drawer faces using a ^^8" roundover bit in a router. Align the bottom drawer face flush with the bot- DRILL PRESS WORKSTATION
60 Popular Woodworking June 2004 |
||||||||||||||||||||||||||||||||||||||||||||||||||||||||||||||||||||||||||||||||||||||||||||||||||||||||||||||||||||||||||||||||||||||||||||||||


