Popular Woodworking 2004-08 № 142, страница 22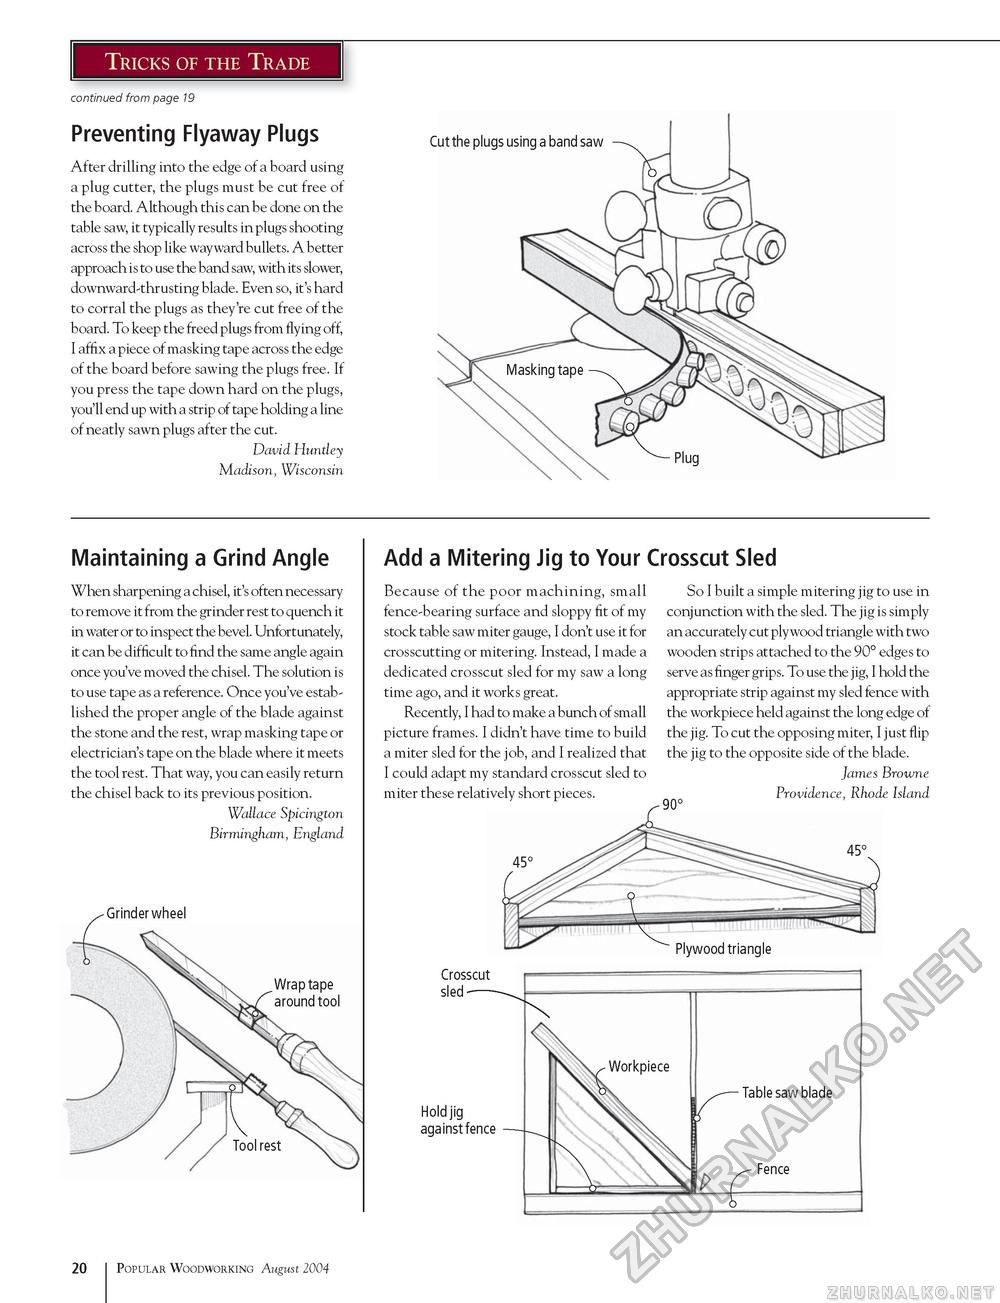
Tricks of the Trade continued from page 19 Preventing Flyaway Plugs After drilling into the edge of a board using a plug cutter, the plugs must be cut free of the board. Although this can be done on the table saw, it typically results in plugs shooting across the shop like wayward bullets. A better approach is to use the band saw, with its slower, downward-thrusting blade. Even so, it's hard to corral the plugs as they're cut free of the board. To keep the freed plugs from flying off, I affix a piece of masking tape across the edge of the board before sawing the plugs free. If you press the tape down hard on the plugs, you'll end up with a strip of tape holding a line of neatly sawn plugs after the cut. David Huntley Madison, Wisconsin Cut the plugs using a band saw Maintaining a Grind Angle When sharpening a chisel, it's often necessary to remove it from the grinder rest to quench it in water or to inspect the bevel. Unfortunately, it can be difficult to find the same angle again once you've moved the chisel. The solution is to use tape as a reference. Once you've established the proper angle of the blade against the stone and the rest, wrap masking tape or electrician's tape on the blade where it meets the tool rest. That way, you can easily return the chisel back to its previous position. Wallace Spicington Birmingham, England -Grinder wheel Wrap tape around tool Add a Mitering Jig to Your Crosscut Sled Because of the poor machining, small fence-bearing surface and sloppy fit of my stock table saw miter gauge, I don't use it for crosscutting or mitering. Instead, I made a dedicated crosscut sled for my saw a long time ago, and it works great. Recently, I had to make a bunch of small picture frames. I didn't have time to build a miter sled for the job, and I realized that I could adapt my standard crosscut sled to miter these relatively short pieces. So I built a simple mitering jig to use in conjunction with the sled. The jig is simply an accurately cut plywood triangle with two wooden strips attached to the 90° edges to serve as finger grips. To use the jig, I hold the appropriate strip against my sled fence with the workpiece held against the long edge of the jig. To cut the opposing miter, I just flip the jig to the opposite side of the blade. James Browne Providence, Rhode Island 90° Crosscut sled Hold jig against fence 20 Popular Woodworking August 2004 |


