Popular Woodworking 2004-11 № 144, страница 43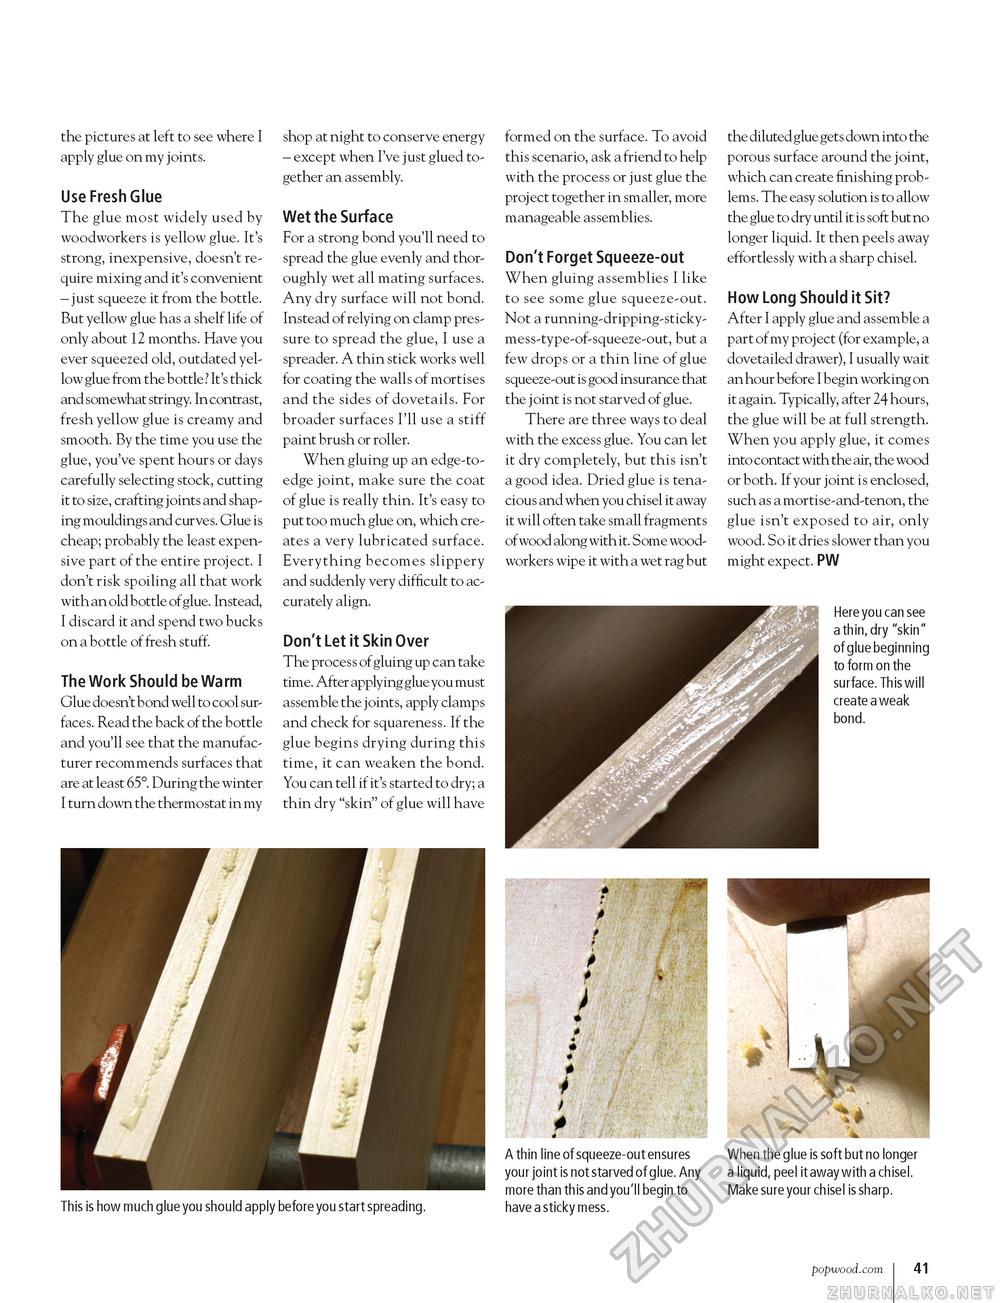
the pictures at left to see where I apply glue on my joints. Use Fresh Glue The glue most widely used by woodworkers is yellow glue. It's strong, inexpensive, doesn't require mixing and it's convenient - just squeeze it from the bottle. But yellow glue has a shelf life of only about 12 months. Have you ever squeezed old, outdated yellow glue from the bottle ? It's thick and somewhat stringy. In contrast, fresh yellow glue is creamy and smooth. By the time you use the glue, you've spent hours or days carefully selecting stock, cutting it to size, crafting joints and shaping mouldings and curves. Glue is cheap; probably the least expensive part of the entire project. I don't risk spoiling all that work with an old bottle of glue. Instead, I discard it and spend two bucks on a bottle of fresh stuff. The Work Should be Warm Glue doesn't bond well to cool surfaces. Read the back of the bottle and you'll see that the manufacturer recommends surfaces that are at least 65°. During the winter I turn down the thermostat in my shop at night to conserve energy - except when I've just glued together an assembly. Wet the Surface For a strong bond you'll need to spread the glue evenly and thoroughly wet all mating surfaces. Any dry surface will not bond. Instead of relying on clamp pressure to spread the glue, I use a spreader. A thin stick works well for coating the walls of mortises and the sides of dovetails. For broader surfaces I'll use a stiff paint brush or roller. When gluing up an edge-to-edge joint, make sure the coat of glue is really thin. It's easy to put too much glue on, which creates a very lubricated surface. Everything becomes slippery and suddenly very difficult to accurately align. Don't Let it Skin Over The process of gluing up can take time. After applying glue you must assemble the joints, apply clamps and check for squareness. If the glue begins drying during this time, it can weaken the bond. You can tell if it's started to dry; a thin dry "skin" of glue will have formed on the surface. To avoid this scenario, ask a friend to help with the process or just glue the project together in smaller, more manageable assemblies. Don't Forget Squeeze-out When gluing assemblies I like to see some glue squeeze-out. Not a running-dripping-sticky-mess-type-of-squeeze-out, but a few drops or a thin line of glue squeeze-out is good insurance that the joint is not starved of glue. There are three ways to deal with the excess glue. You can let it dry completely, but this isn't a good idea. Dried glue is tenacious and when you chisel it away it will often take small fragments of wood along with it. Some woodworkers wipe it with a wet rag but the diluted glue gets down into the porous surface around the joint, which can create finishing problems. The easy solution is to allow the glue to dry until it is soft but no longer liquid. It then peels away effortlessly with a sharp chisel. How Long Should it Sit? After I apply glue and assemble a part of my project (for example, a dovetailed drawer), I usually wait an hour before I begin working on it again. Typically, after 24 hours, the glue will be at full strength. When you apply glue, it comes into contact with the air, the wood or both. If your joint is enclosed, such as a mortise-and-tenon, the glue isn't exposed to air, only wood. So it dries slower than you might expect. PW Here you can see a thin, dry "skin" of glue beginning to form on the surface. This will create a weak bond. This is how much glue you should apply before you start spreading. A thin line of squeeze-out ensures your joint is not starved of glue. Any more than this and you'll begin to have a sticky mess. When the glue is soft but no longer a liquid, peel it away with a chisel. Make sure your chisel is sharp. popwood.com 41 |


