Popular Woodworking 2007-10 № 164, страница 63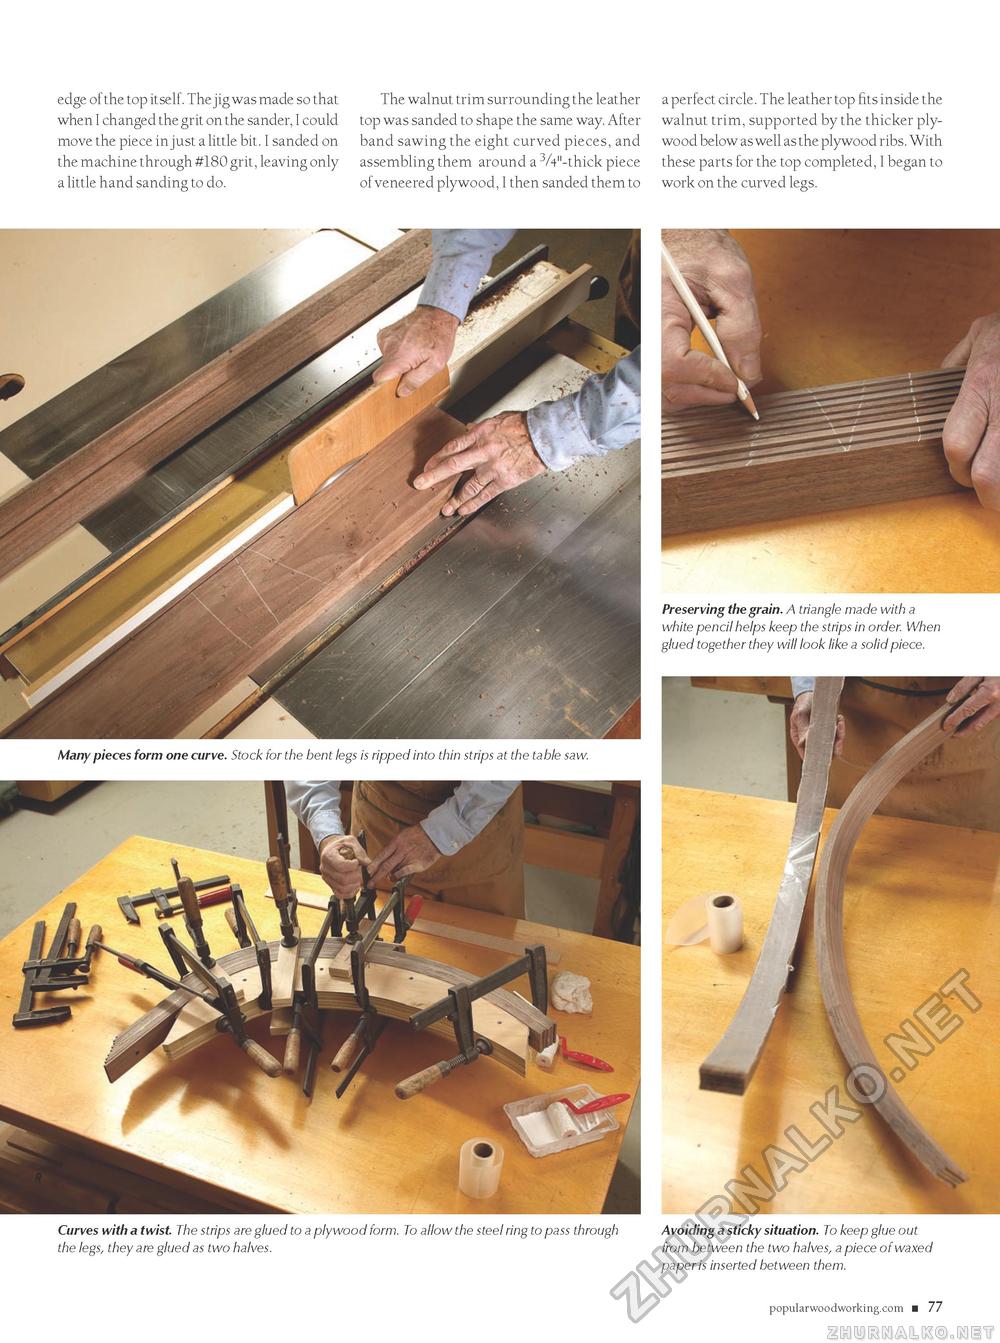
edge of the top itself. The jig was made so that when I changed the grit on the sander, I could move the piece in just a little bit. I sanded on the machine through #180 grit, leaving only a little hand sanding to do. The walnut trim surrounding the leather top was sanded to shape the same way. After band sawing the eight curved pieces, and assembling them around a VV'-thick piece of veneered plywood, I then sanded them to a perfect circle. The leather top fits inside the walnut trim, supported by the thicker plywood below as well as the plywood ribs. With these parts for the top completed, I began to work on the curved legs. Curves with a twist. The strips are glued to a plywood form. To allow the steel ring to pass through Avoiding a sticky situation. To keep glue out the legs, they are glued as two halves. from between the two halves, a piece of waxed paper is inserted between them. popularwoodworking.com ■ 77 CIRCLE #152 ON FREE INFORMATION CARD. |


