Popular Woodworking 2007-11 № 165, страница 38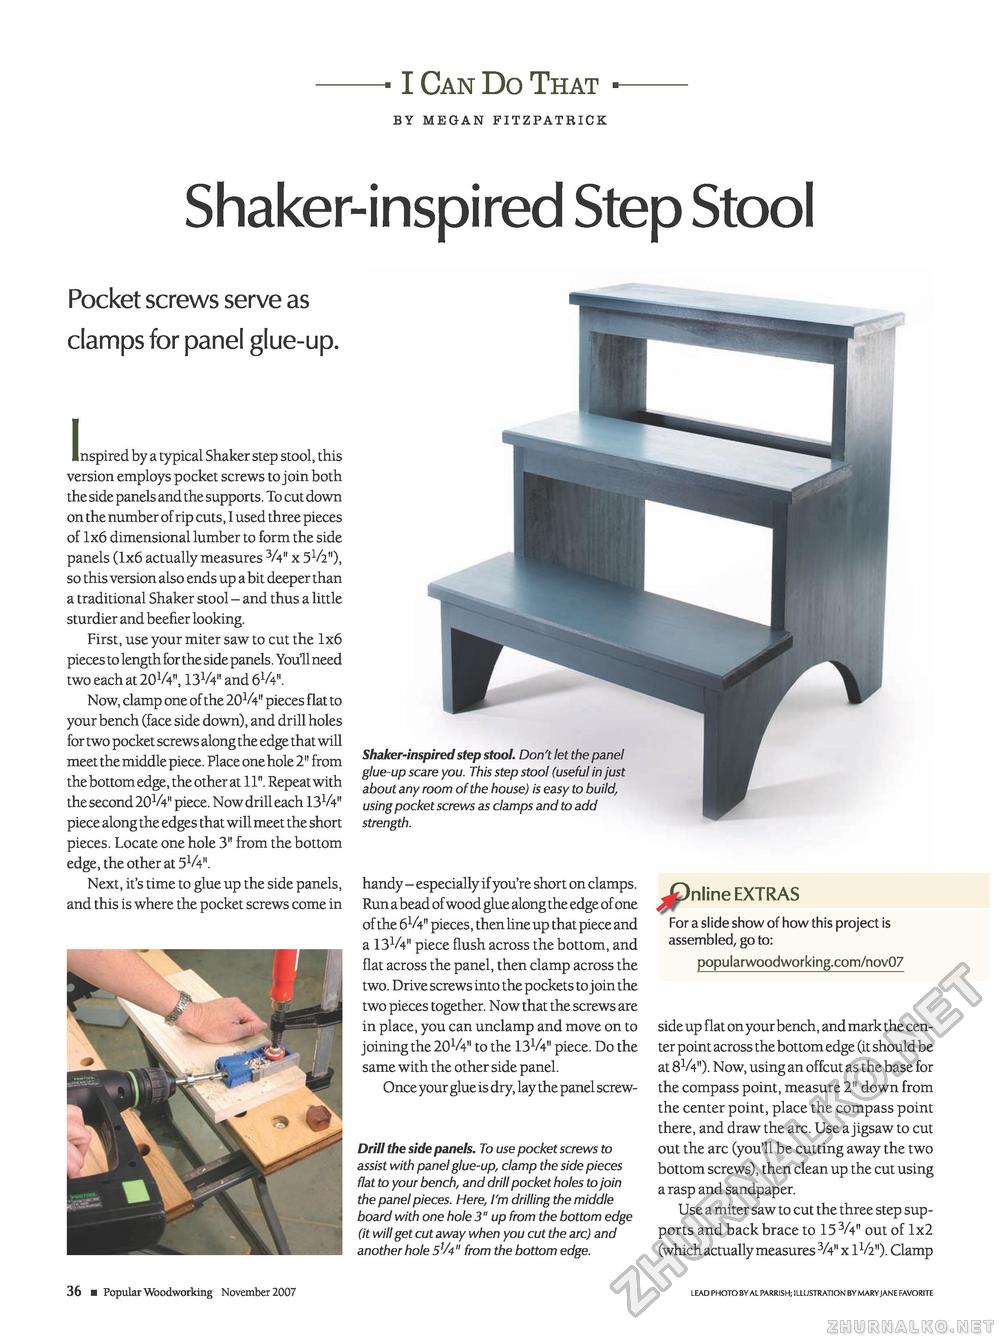
I Can Do That BY MEGAN FITZPATRICK Shaker-inspired Step Stool Pocket screws serve as clamps for panel glue-up. inspired by a typical Shaker step stool, this version employs pocket screws to join both the side panels and the supports. To cut down on the number of rip cuts, I used three pieces of 1x6 dimensional lumber to form the side panels (1x6 actually measures 3A" x 5V2"), so this version also ends up a bit deeper than a traditional Shaker stool - and thus a little sturdier and beefier looking. First, use your miter saw to cut the 1x6 pieces to length for the side panels. You'll need two each at 20 V4", I3V4" and 6V4". Now, clamp one of the 20V4" pieces flat to your bench (face side down), and drill holes for two pocket screws along the edge that will meet the middle piece. Place one hole 2" from the bottom edge, the other at 11". Repeat with the second 20V4" piece. Now drill each I3V4" piece along the edges that will meet the short pieces. Locate one hole 3" from the bottom edge, the other at 51A". Next, it's time to glue up the side panels, and this is where the pocket screws come in Shaker-inspired step stool. Don't let the panel glue-up scare you. This step stool (useful in just about any room of the house) is easy to build, using pocket screws as clamps and to add strength. handy - especially if you're short on clamps. Run a bead of wood glue along the edge of one of the 61A" pieces, then line up that piece and a I3V4" piece flush across the bottom, and flat across the panel, then clamp across the two. Drive screws into the pockets to join the two pieces together. Now that the screws are in place, you can unclamp and move on to joining the 201/4" to the 13 V4'1 piece. Do the same with the other side panel. Once your glue is dry, lay the panel screw- Drill the side panels. To use pocket screws to assist with panel glue-up, clamp the side pieces flat to your bench, and drill pocket holes to join the panel pieces. Here, I'm drilling the middle board with one hole 3" up from the bottom edge (it will get cut away when you cut the arc) and another hole 5*A" from the bottom edge. ^)nline EXTRAS For a slide show of how this project is assembled, goto: popularwoodworking.com/nov07 side up flat on your bench, and mark the center point across the bottom edge (it should be at 8V4"). Now, using an offcut as the base for the compass point, measure 2" down from the center point, place the compass point there, and draw the arc. Use a jigsaw to cut out the arc (you'll be cutting away the two bottom screws), then clean up the cut using a rasp and sandpaper. Use a miter saw to cut the three step supports and back brace to 15 V4" out of 1x2 (which actually measures 3A" x IV2"). Clamp 36 ■ Popular Woodworking November 2007 LEAD PHOTO BY AL PARRISH; ILLUSTRATION BY MARY JANE FAVORITE |


