25 - Special Table Saw Issue, страница 30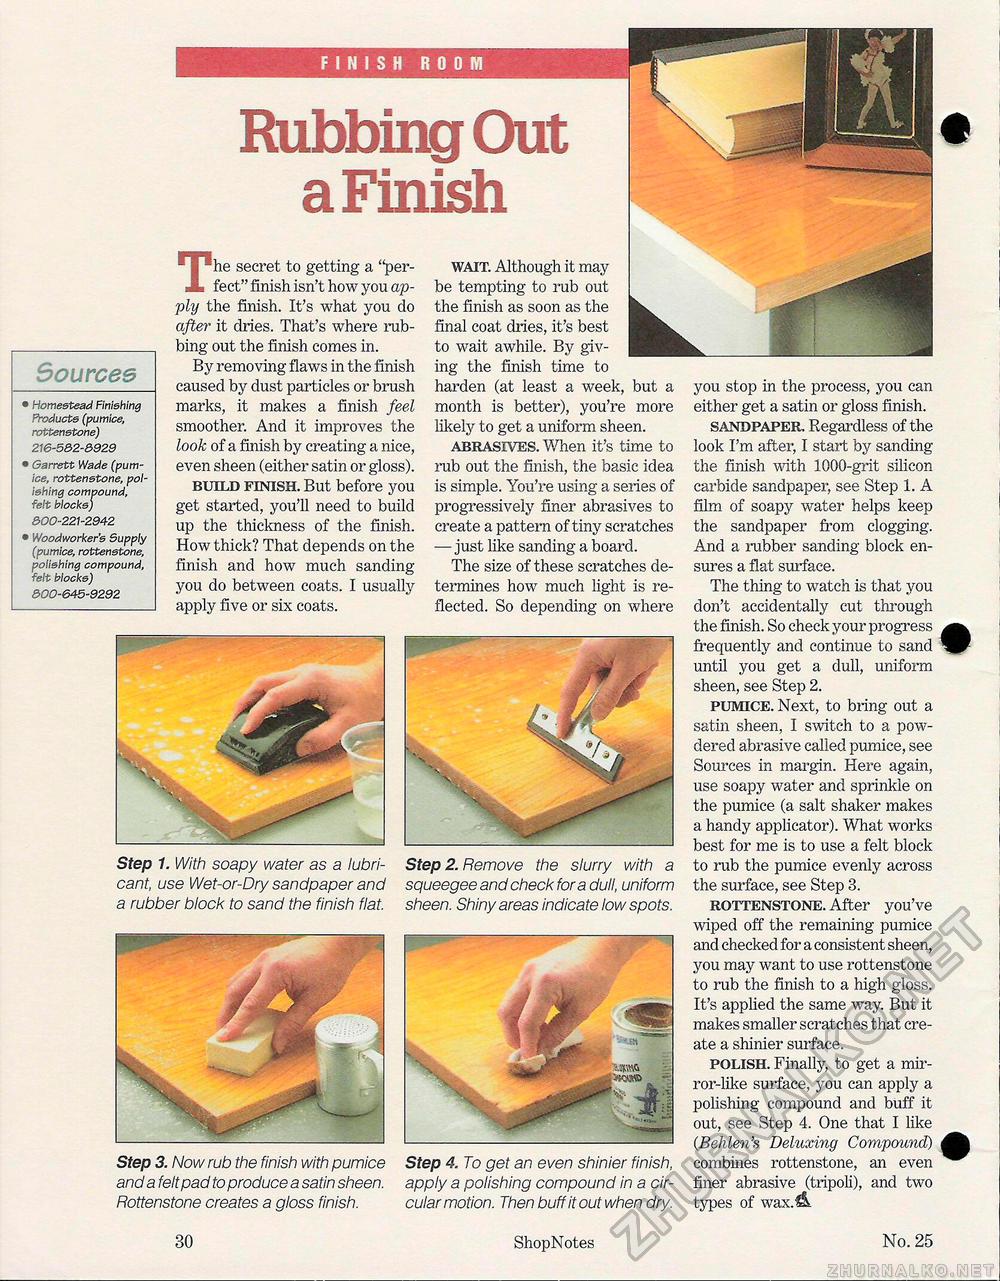
Sources • Homestead finishing Products (pumice, rottenstone) 216-5&2-&929 • Garrett Wade (pumice, rottenstone, polishing compound, felt blocks) 300-221-2942 • Woodworker's Supply (pumice, rottenstone, polishing compound, felt Hocks) &00-&45-9292 Step 1. With soapy water as a lubricant, use Wet-or-Dry sandpaper and a rubber block to sand the finish flat. Step 2. Remove the slurry with a squeegee and check for a dull, uniform sheen. Shiny areas indicate low spots. Step 3. Now rub the finish with pumice and a felt pad to produce a satin sheen. Rottenstone creates a gloss finish. Step 4. To get an even shinier finish, apply a polishing compound in a circular motion. Then buff it out when dry. Rubbing Out a Finish you stop in the process, you can either get a satin or gloss finish. sandpaper. Regardless of the look I'm after, I start by sanding the finish with 1000-grit silicon carbide sandpaper, see Step 1. A film of soapy water helps keep the sandpaper from clogging. And a rubber sanding block ensures a flat surface. The thing to watch is that you don't accidentally cut through the finish. So check your progress ^^ frequently and continue to sand ^r until you get a dull, uniform sheen, see Step 2. pumice. Next, to bring out a satin sheen, I switch to a powdered abrasive called pumice, see Sources in margin. Here again, use soapy water and sprinkle on the pumice (a salt shaker makes a handy applicator). What works best for me is to use a felt block to rub the pumice evenly across the surface, see Step 3. rottenstone. After you've wiped off the remaining pumice and checked for a consistent sheen, you may want to use rottenstone to rub the finish to a high gloss. It's applied the same way. But it makes smaller scratches that create a shinier surface. polish. Finally, to get a mirror-like surface, you can apply a polishing compound and buff it out, see Step 4. One that I like CBehlen's Deluxing Compound) combines rottenstone, an even ^^ finer abrasive (tripoli), and two types of wax.£&. The secret to getting a "perfect" finish isn't how you apply the finish. It's what you do after it dries. That's where rubbing out the finish comes in. By removing flaws in the finish caused by dust particles or brush marks, it makes a finish feel smoother. And it improves the look of a finish by creating a nice, even sheen (either satin or gloss). build finish. But before you get started, you'll need to build up the thickness of the finish. How thick? That depends on the finish and how much sanding you do between coats. I usually apply five or six coats. wait. Although it may be tempting to rub out the finish as soon as the final coat dries, it's best to wait awhile. By giving the finish time to harden (at least a week, but a month is better), you're more likely to get a uniform sheen. abrasives. When it's time to rub out the finish, the basic idea is simple. You're using a series of progressively finer abrasives to create a pattern of tiny scratches — just like sanding a board. The size of these scratches determines how much light is reflected. So depending on where 30 ShopNotes No. 25 |


