83, страница 9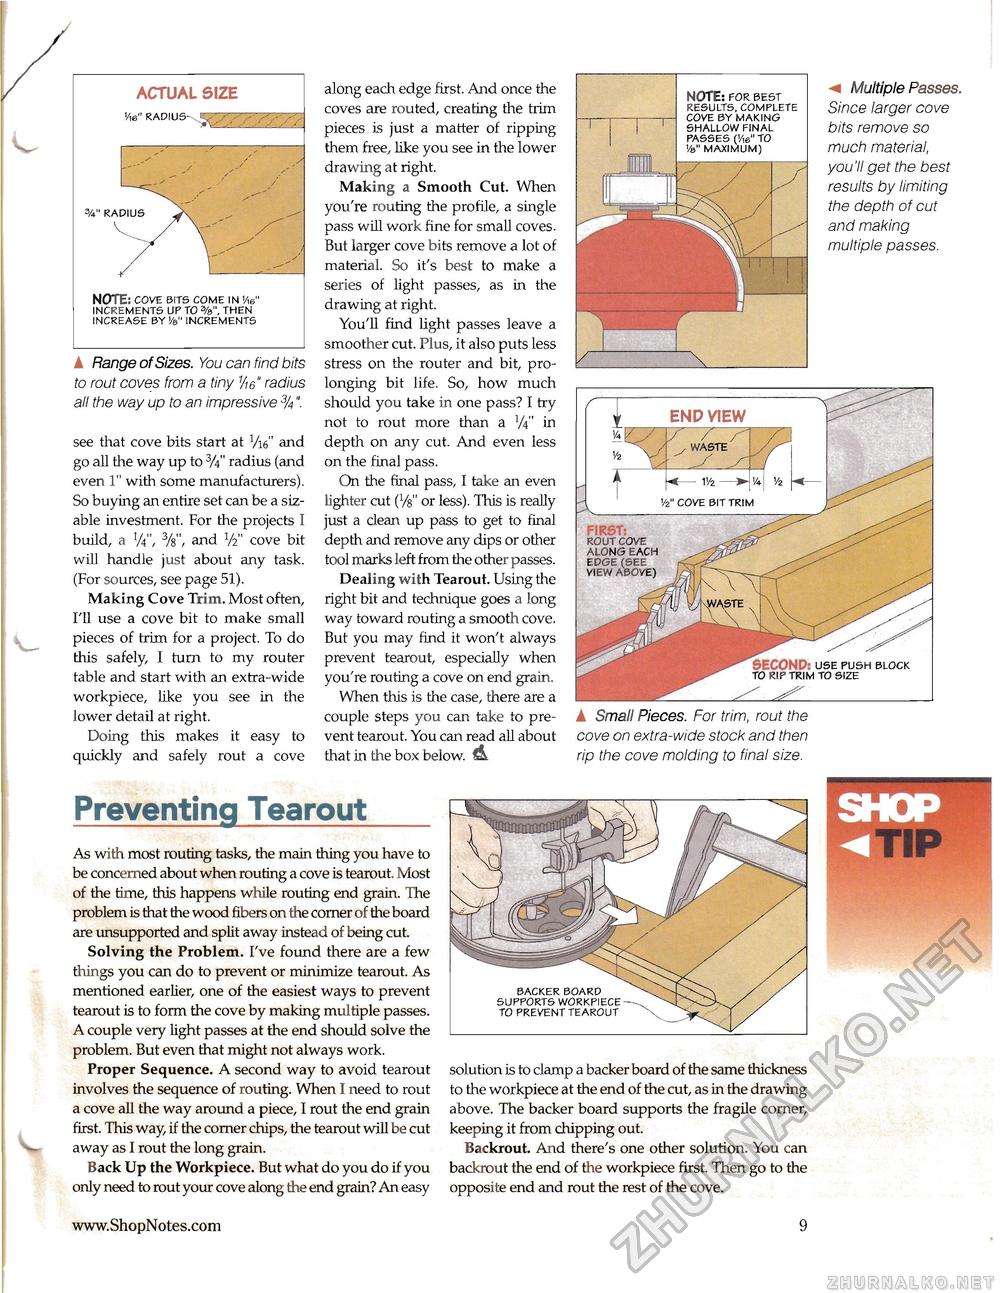
▲ Range of Sizes. You can find bits to rout coves from a tiny Vm" radius all the way up to an impressive 3A". see that cove bits start at Vi6" and go all the way up to 3/i" radius (and even 1" with some manufacturers). So buying an entire set can be a sizable investment. For the projects I build, a l/i", 3/s", and l/i cove bit will handle just about any task. (For sources, see page 51). Making Cove Trim. Most often, I'll use a cove bit to make small pieces of trim for a project. To do this safely, I turn to my router table and start with an extra-wide workpiece, like you see in the lower detail at right. Doing this makes it easy to quickly and safely rout a cove along each edge first. And once the coves are routed, creating the trim pieces is just a matter of ripping them free, like you see in the lower drawing at right. Making a Smooth Cut. When you're routing the profile, a single pass will work fine for small coves. But larger cove bits remove a lot of material. So it's best to make a series of light passes, as in the drawing at right. You'll find light passes leave a smoother cut. Plus, it also puts less stress on the router and bit, prolonging bit life. So, how much should you take in one pass? I try not to rout more than a W in depth on any cut. And even less on the final pass. On the final pass, I take an even lighter cut (Vfe" or less). This is really just a clean up pass to get to final depth and remove any dips or other tool marks left from the other passes. Dealing with Tearout. Using the right bit and technique goes a long way toward routing a smooth cove. But you may find it won't always prevent tearout, especially when you're routing a cove on end grain. When this is the case, there are a couple steps you can take to prevent tearout. You can read all about that in the box below. & NOTE: for best results, complete COVE by making shallow final passes QAe" to vb" maximum) Multiple Passes Since larger cove bits remove so much material, you'll get the best results by limiting the depth of cut and making multiple passes.
v2" cove bit trim FIRST: rout cove along each edge (see view above) v2" cove bit trim FIRST: rout cove along each edge (see view above) A Small Pieces. For trim, rout the cove on extra-wide stock and then rip the cove molding to final size. Preventing Tearout As with most routing tasks, the main thing you have to be concerned about when routing a cove is tearout. Most of the time, this happens while routing end grain. The problem is that the wood fibers on the corner of the board are unsupported and split away instead of being cut. Solving the Problem. I've found there are a few things you can do to prevent or minimize tearout. As mentioned earlier, one of the easiest ways to prevent tearout is to form the cove by making multiple passes. A couple very light passes at the end should solve the problem. But even that might not always work. Proper Sequence. A second way to avoid tearout involves the sequence of routing. When I need to rout a cove all the way around a piece, I rout the end grain first. This way, if the corner chips, the tearout will be cut away as I rout the long grain. Back Up the Workpiece. But what do you do if you only need to rout your cove along the end grain? An easy backer board supports workpiece to prevent tearout solution is to clamp a backer board of the same thickness to the workpiece at the end of the cut, as in the drawing above. The backer board supports the fragile corner, keeping it from chipping out. Backrout. And there's one other solution. You can backrout the end of the workpiece first. Then go to the opposite end and rout the rest of the cove. |
|||||||||||||||||||||||||||||||


