85 - Router Table, страница 45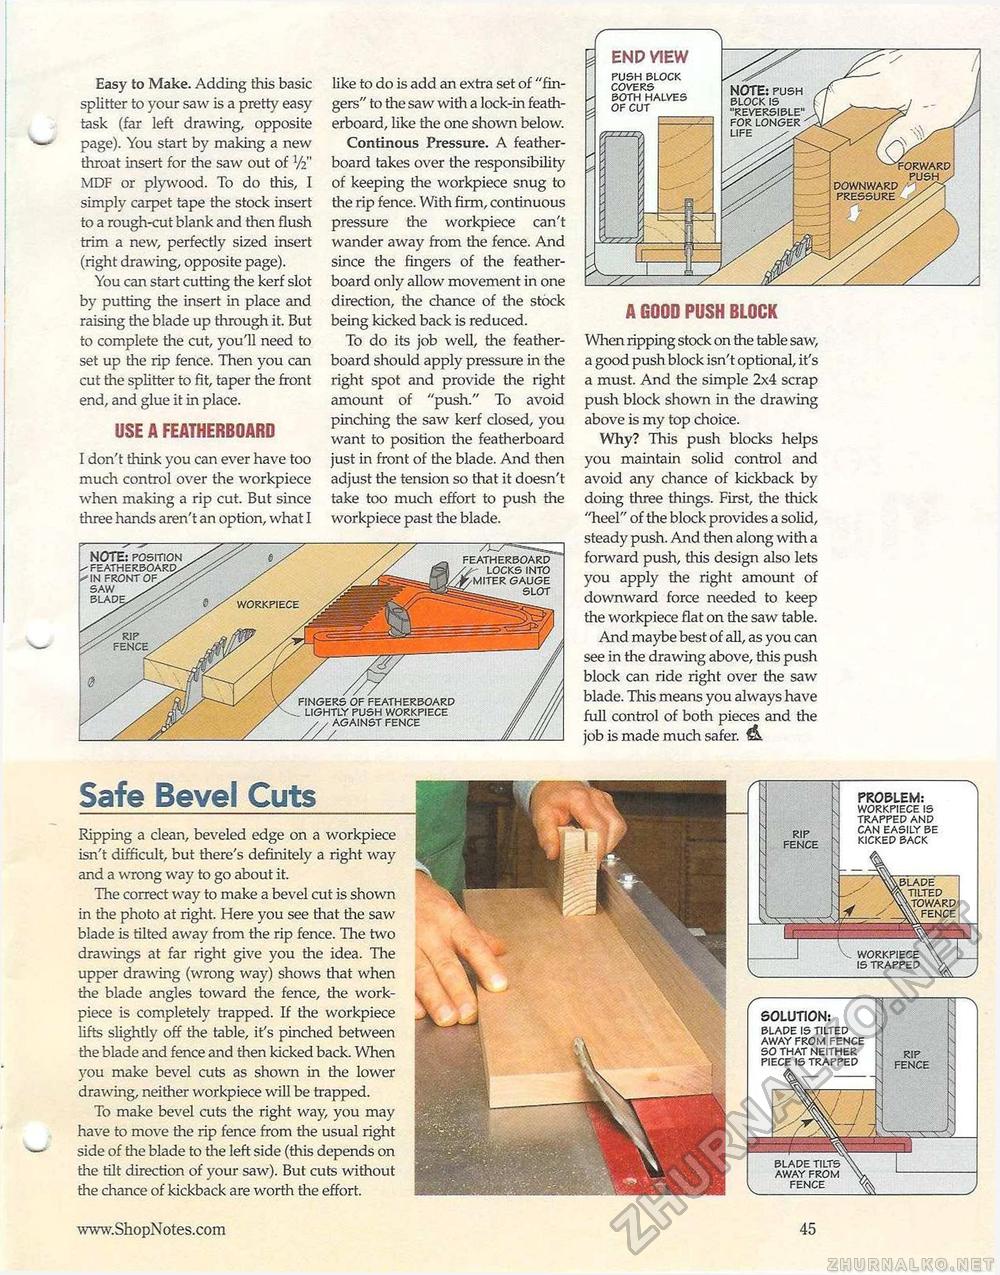
Easy to Make. Adding this basic splitter to your saw is a pretty easy task (far left drawing, opposite page). You start by making a new throat insert for the saw out of V2" MDF or plywood. To do this, I simply carpet tape the stock insert to a rough-cut blank and then flush trim a new, perfectly sized insert (right drawing, opposite page). You can start cutting the kerf slot by putting the insert in place and raising the blade up through it. But to complete the cut, you'll need to set up the rip fence. Then you can cut the splitter to fit, taper the front end, and glue it in place. USE A FEATHERBOARD I don't think you can ever have too much control over the workpiece when making a rip cut. But since three hands aren't an option, what I like to do is add an extra set of "fingers" to the saw with a lock-in featherboard, like the one shown below. Continous Pressure. A featherboard takes over the responsibility of keeping the workpiece snug to the rip fence. With firm, continuous pressure the workpiece can't wander away from the fence. And since the fingers of the featherboard only allow movement in one direction, the chance of the stock being kicked back is reduced. To do its job well, the featherboard should apply pressure in the right spot and provide the right amount of "push." To avoid pinching the saw kerf closed, you want to position the featherboard just in front of the blade. And then adjust the tension so that it doesn't take too much effort to push the workpiece past the blade. A GOOD PUSH BLOCK When ripping stock on the table saw, a good push block isn't optional, it's a must. And the simple 2x4 scrap push block shown in the drawing above is my top choice. Why? This push blocks helps you maintain solid control and avoid any chance of kickback by doing three things. First, the thick "heel" of the block provides a solid, steady push. And then along with a forward push, this design also lets you apply the right amount of downward force needed to keep the workpiece flat on the saw table. And maybe best of all, as you can see in the drawing above, this push block can ride right over the saw blade. This means you always have full control of both pieces and the job is made much safer. Safe Bevel Cuts Ripping a clean, beveled edge on a workpiece isn't difficult, but there's definitely a right way and a wrong way to go about it. The correct way to make a bevel cut is shown in the photo at right. Here you see that the saw blade is tilted away from the rip fence. The two drawings at far right give you the idea. The upper drawing (wrong way) shows that when the blade angles toward the fence, the work-piece is completely trapped. If the workpiece lifts slightly off the table, it's pinched between the blade and fence and then kicked back. When you make bevel cuts as shown in the lower drawing, neither workpiece will be trapped. To make bevel cuts the right way, you may have to move the rip fence from the usual right side of the blade to the left side (this depends on the tilt direction of your saw). But cuts without the chance of kickback are worth the effort. featherboard locks into ►/miter gauge c...... slot NOTE: position /featherboard/ ✓ in front of/'. saw / /y BLADE/ // workpiece fingers of featherboard lightly push workpiece / / against fence END VIEW push block covers both halves of cut rip fence \ PROBLEM: workpiece is trapped and can easily be kicked back c- SOLUTION: blade blade tilts away from fence |


