85 - Router Table, страница 50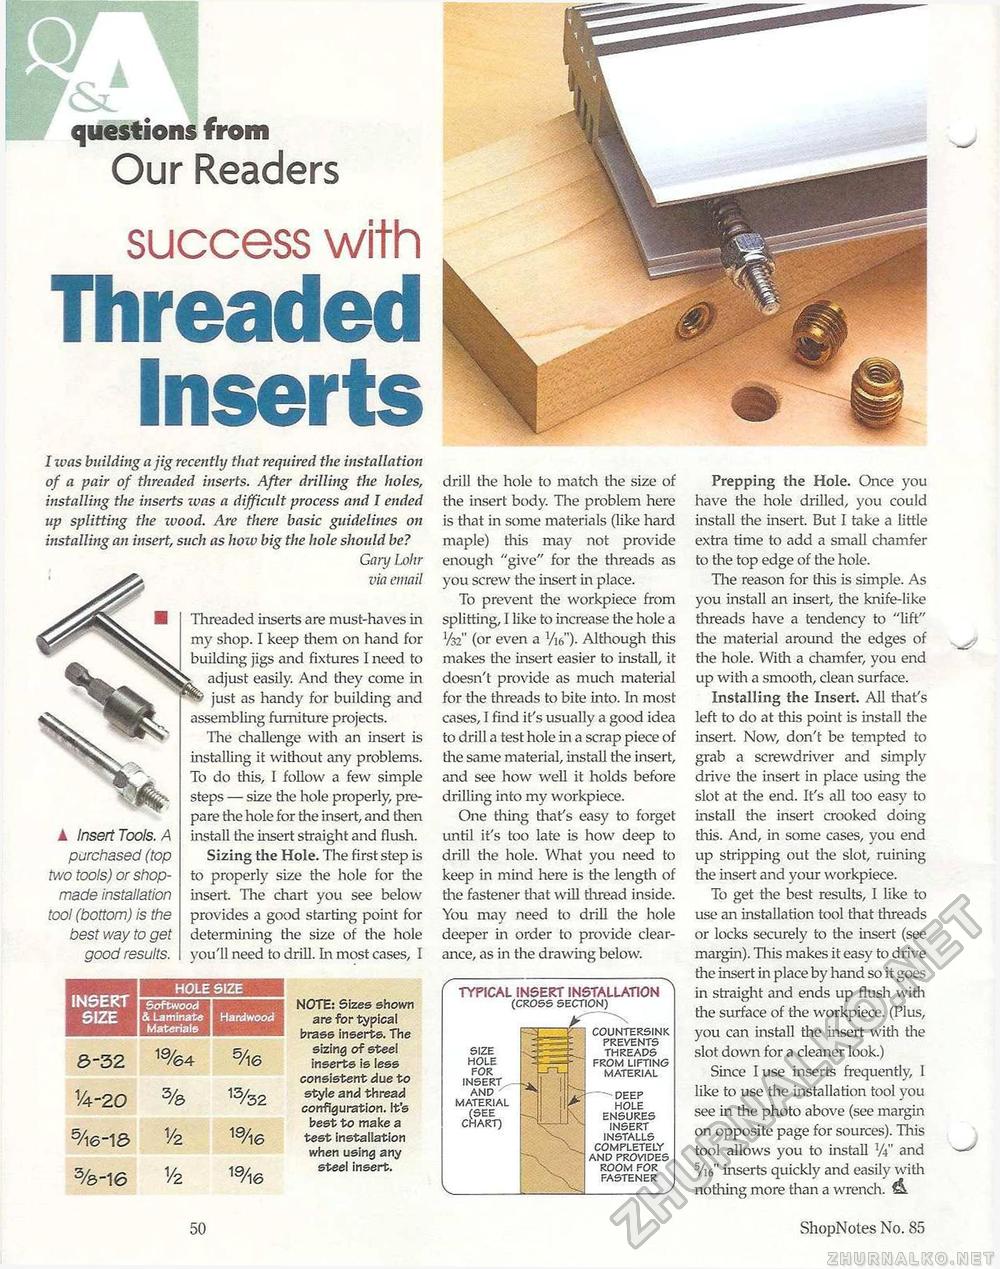
questions from Our Readers success withThreaded Inserts I ivas building a jig recently that required the installation of a pair of threaded inserts. After drilling the holes, installing the inserts was a difficult process and I ended up splitting the wood. Are there basic guidelines on installing an insert, such as how big the hole should be? Gary Lohr via email Threaded inserts are must-haves in my shop. I keep them on hand for building jigs and fixtures I need to adjust easily. And they come in just as handy for building and assembling furniture projects. The challenge with an insert is installing it without any problems. To do this, I follow a few simple steps — size tire hole properly, prepare the hole for the insert, and then install the insert straight and flush. Sizing the Hole. The first step is to properly size the hole for the insert. The chart you see below provides a good starting point for determining the size of the hole you'll need to drill. In most cases, I NOTE: Sizes shown are for typical brass inserts. The sizing of steel inserts is less consistent due to style and thread configuration. It's best to make a test installation when using any steel insert. ▲ Insert Tools. A purchased (top two tools) or shop-made installation tool (bottom) is the best way to get good results.
drill the hole to match the size of the insert body. The problem here is that in some materials (like hard maple) this may not provide enough "give" for the threads as you screw the insert in place. To prevent tire workpiece from splitting, I like to increase the hole a V32" (or even a VW'). Although this makes tire insert easier to install, it doesn't provide as much material for the threads to bite into. In most cases, I find it's usually a good idea to drill a test hole in a scrap piece of tire same material, install the insert, and see how well it holds before drilling into my workpiece. One thing tlrafs easy to forget until it's too late is how deep to drill the hole. What you need to keep in mind here is tire length of tire fastener that will thread inside. You may need to drill tire hole deeper in order to provide clearance, as in the drawing below. TYPICAL INSERT INSTALLATION (CROSS SECTION) COUNTERSINK PREVENTS THREADS FROM LIFTING MATERIAL ---DEEP HOLE ENSURES INSERT INSTALLS COMPLETELY AND PROVIDES ROOM FOR FASTENER Prepping the Hole. Once you have the hole drilled, you could install the insert. But I take a little extra time to add a small chamfer to the top edge of tire hole. The reason for this is simple. As you install an insert, the knife-like threads have a tendency to "lift" the material around tire edges of the hole. With a chamfer, you end up with a smooth, clean surface. Installing the Insert. All that's left to do at this point is install the insert. Now, don't be tempted to grab a screwdriver and simply drive tire insert in place using the slot at the end. It's all too easy to install the insert crooked doing this. And, in some cases, you end up stripping out tire slot, ruining tire insert and your workpiece. To get the best results, 1 like to use an installation tool that threads or locks securely to tire insert (see margin). This makes it easy to drive the insert in place by hand so it goes in straight and ends up flush with the surface of the workpiece. (PIlls, you can install the insert with the slot down for a cleaner look.) Since I use inserts frequently, 1 like to use the installation tool you see in tire photo above (see margin on opposite page for sources). This tool allows you to install Vi" and s/i6" inserts quickly and easily with nothing more than a wrench. & 50 ShopNotes No. 85 |
|||||||||||||||||


