91 - Planer Stand, страница 50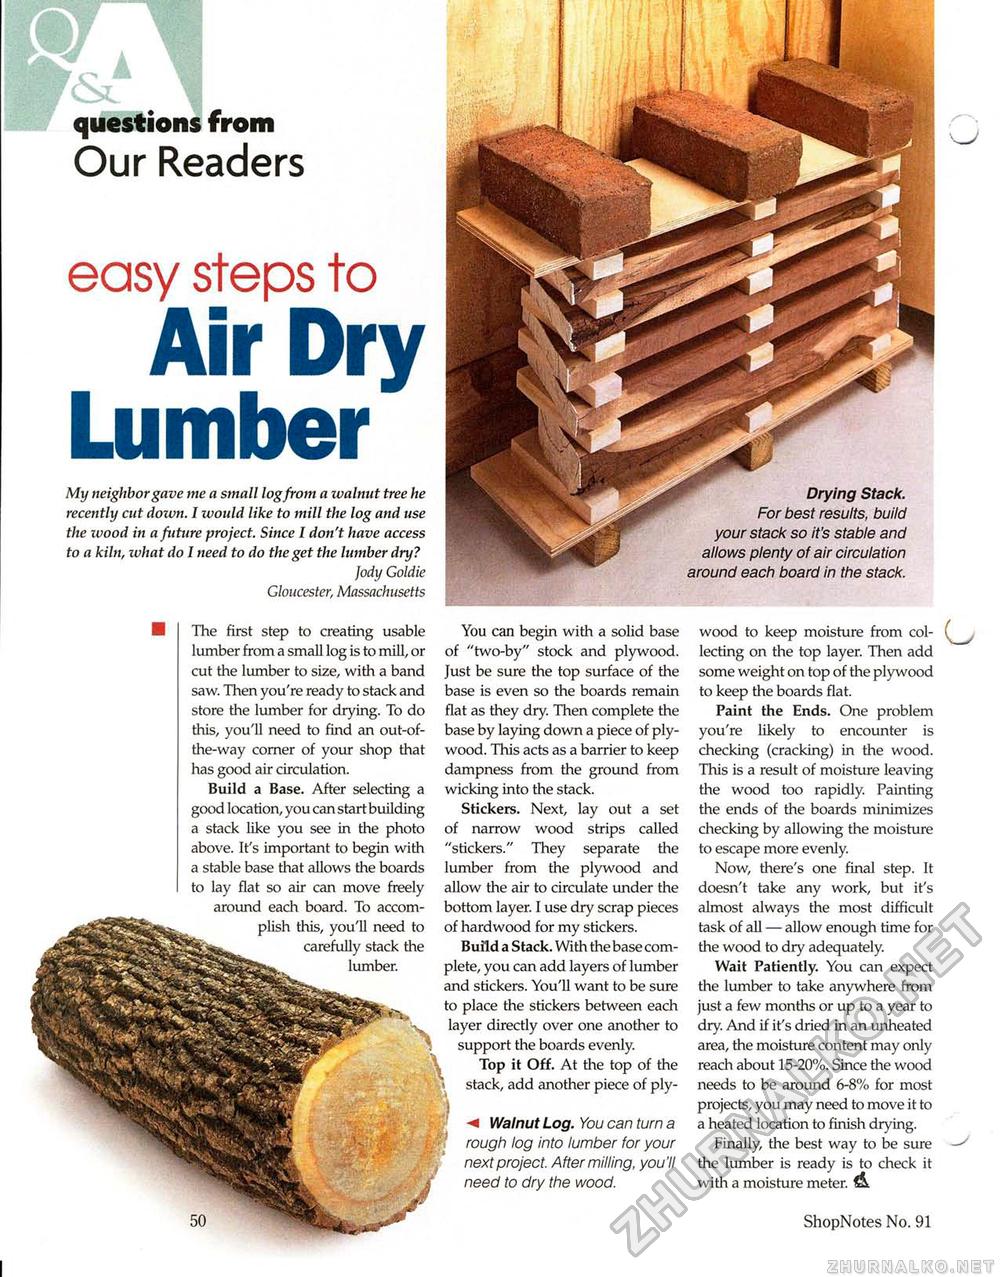
questions from Our Readerseasy steps toAir Dry LumberMy neighbor gave me a small log from a zvalmtt tree he recently cut down. I would like to mill the log and use the wood in a future project. Since I don't have access to a kiln, what do I need to do the get the lumber dry? Jody Goldie Gloucester, Massachusetts Drying Stack. For best results, build your stack so it's stable and allows plenty of air circulation around each board in the stack. wood to keep moisture from collecting on the top layer. Then add some weight on top of the plywood to keep the boards flat. Paint the Ends. One problem you're likely to encounter is checking (cracking) in the wood. This is a result of moisture leaving the wood too rapidly. Painting the ends of the boards minimizes checking by allowing the moisture to escape more evenly. Now, there's one final step. It doesn't take any work, but it's almost always the most difficult task of all — allow enough time for the wood to dry adequately. Wait Patiently. You can expect the lumber to take anywhere from just a few months or up to a year to dry. And if it's dried in an unheated area, the moisture content may only reach about 15-20%. Since the wood needs to be around 6-8% for most projects, you may need to move it to a heated location to finish drying. Finally, the best way to be sure the lumber is ready is to check it with a moisture meter. & 50 ShopNotes No. 91 The first step to creating usable lumber from a small log is to mill, or cut the lumber to size, with a band saw. Then you're ready to stack and store the lumber for drying. To do this, you'll need to find an out-of-the-way corner of your shop that has good air circulation. Build a Base. After selecting a good location, you can start building a stack like you see in the photo above. It's important to begin with a stable base that allows the boards to lay flat so air can move freely around each board. To accomplish this, you'll need to carefully stack the lumber. You can begin with a solid base of "two-by" stock and plywood. Just be sure the top surface of the base is even so the boards remain flat as they dry. Then complete the base by laying down a piece of plywood. This acts as a barrier to keep dampness from the ground from wicking into the stack. Stickers. Next, lay out a set of narrow wood strips called "stickers." They separate the lumber from the plywood and allow the air to circulate under the bottom layer. I use dry scrap pieces of hardwood for my stickers. Build a Stack. With the base complete, you can add layers of lumber and stickers. You'll want to be sure to place the stickers between each layer directly over one another to support the boards evenly. Top it Off. At the top of the stack, add another piece of ply- Walnut Log. You can turn a rough log into lumber for your next project. After milling, you'll need to dry the wood. |


