95, страница 4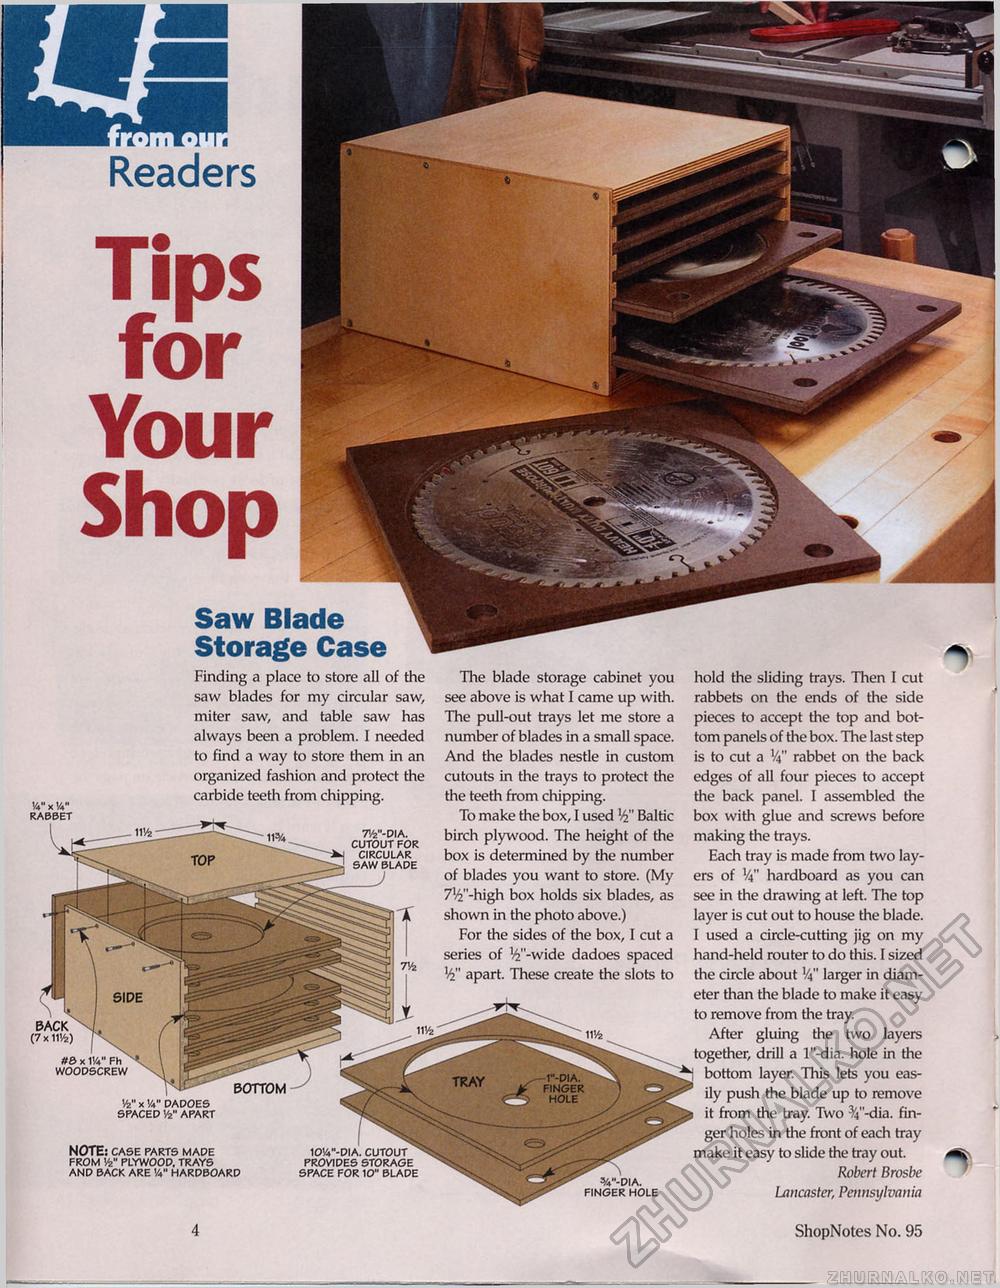
Readers Tips for Your Shop Saw Blade Storage Case hold the sliding trays. Then I cut rabbets on the ends of the side pieces to accept the top and bottom panels of the box. The last step is to cut a V4" rabbet on the back edges of all four pieces to accept the back panel. I assembled the box with glue and screws before making the trays. Each tray is made from two layers of Va hardboard as you can see in the drawing at left. The top layer is cut out to house the blade. I used a circle-cutting jig on my hand-held router to do this. I sized the circle about '4" larger in diameter than the blade to make it easy to remove from the tray. After gluing the two layers together, drill a l"-dia. hole in the bottom layer. This lets you easily push the blade up to remove it from the tray. Two -V'-dia. finger holes in the front of each tray make it easy to slide the tray out. Robert Brosbe Lancaster, Pennsylvania VS." x '/<" dadoes spaced y2" apart The blade storage cabinet you see above is what I came up with. The pull-out trays let me store a number of blades in a small space. And the blades nestle in custom cutouts in the trays to protect the the teeth from chipping. To make the box, I used ty' Baltic birch plywood. The height of the box is determined by the number of blades you want to store. (My 71£"-high box holds six blades, as shown in the photo above.) For the sides of the box, I cut a series of ^"-wide dadoes spaced apart. These create the slots to BACK (7* 11V4) #0 x W Fh woodscrew v-dia. finger hole x'/«" rabbet NOTE: case parts made from w plywood, trays and back are vi" hardboard lo'/v'-dia. cutout provides storage space for 10" blade Finding a place to store all of the saw blades for my circular saw, miter saw, and table saw has always been a problem. I needed to find a way to store them in an organized fashion and protect the carbide teeth from chipping. w-dia. cutout for circular saw blade 4 ShopNotes No. 95 |


