Woodworker's Journal 1984-8-6, страница 46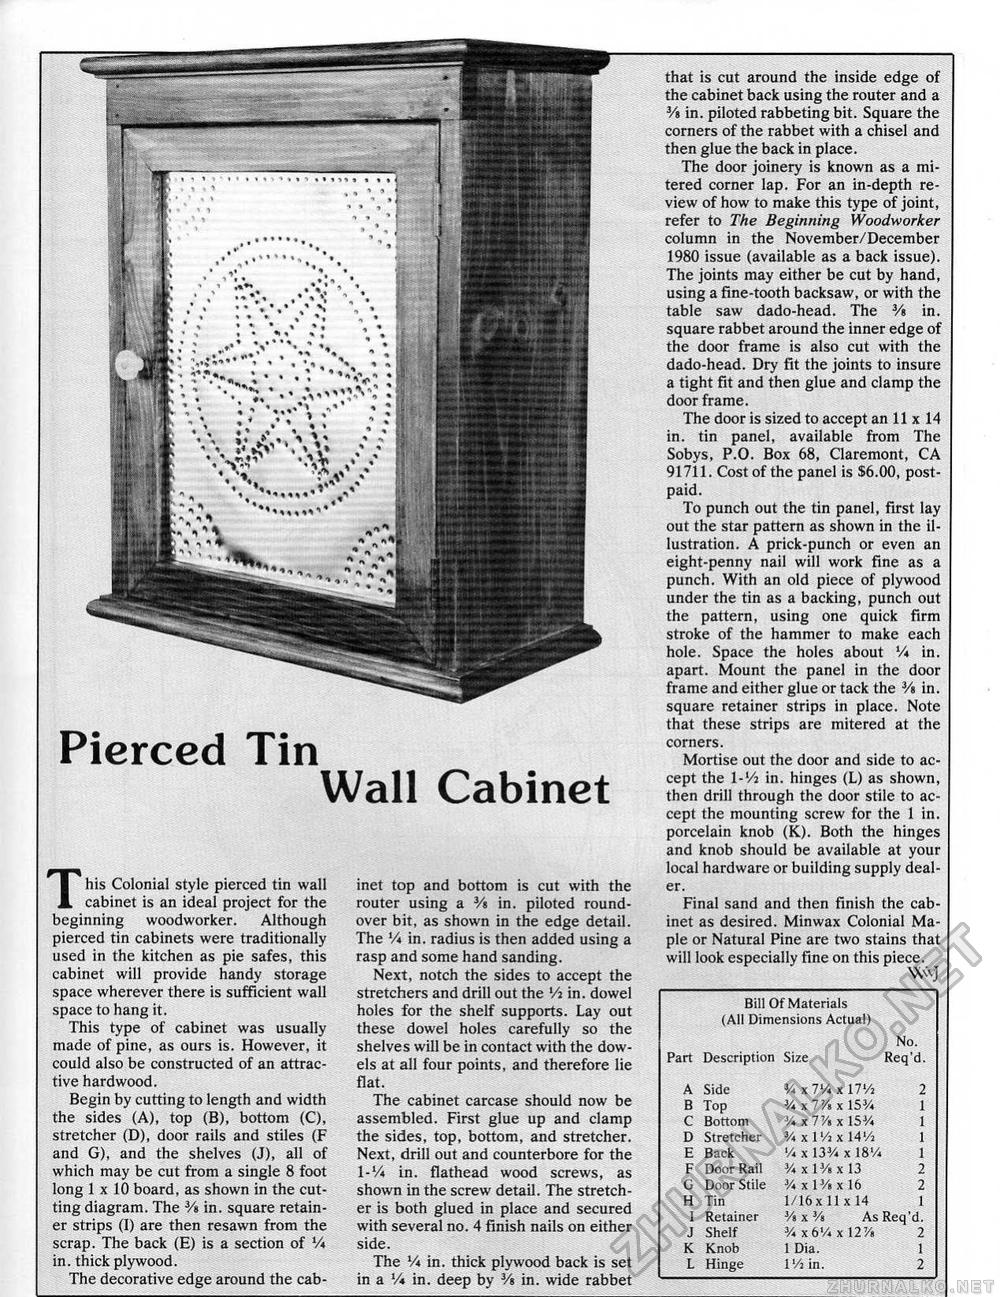
Bill Of Materials (All Dimensions Actual} No. Bill Of Materials (All Dimensions Actual} No.
that is cut around the inside edge of the cabinet back using the router and a Vi in. piloted rabbeting bit. Square the corners of the rabbet with a chisel and then glue the back in place. The door joinery is known as a mi-tered corner lap. For an in-depth review of how to make this type of joint, refer to The Beginning Woodworker column in the November/December 1980 issue (available as a back issue). The joints may either be cut by hand, using a fine-tooth backsaw, or with the table saw dado-head. The V% in. square rabbet around the inner edge of the door frame is also cut with the dado-head. Dry fit the joints to insure a tight fit and then glue and clamp the doorframe. The door is sized to accept an 11 x 14 in. tin panel, available from The Sobys, P.O. Box 68, Claremont, CA 91711. Cost of the panel is $6.00, postpaid. To punch out the tin panel, first lay out the star pattern as shown in the illustration. A prick-punch or even an eight-penny nail will work fine as a punch. With an old piece of plywood under the tin as a backing, punch out the pattern, using one quick firm stroke of the hammer to make each hole. Space the holes about Vi in. apart. Mount the panel in the door frame and either glue or tack the 3/a in. square retainer strips in place. Note that these strips are mitered at the corners. Mortise out the door and side to accept the l-'/j in, hinges (L) as shown, then drill through the door stile to accept the mounting screw for the 1 in. porcelain knob (K.). Both the hinges and knob should be available at your local hardware or building supply dealer. Final sand and then finish the cabinet as desired. Minwax Colonial Maple or Natural Pine are two stains that will look especially fine on this piece. \\<vj Pierced Tin Wall Cabinet This Colonial style pierced tin wall cabinet is an ideal project for the beginning woodworker. Although pierced tin cabinets were traditionally used in the kitchen as pie safes, this cabinet will provide handy storage space wherever there is sufficient wall space to hang it. This type of cabinet was usually made of pine, as ours is. However, it could also be constructed of an attractive hardwood. Begin by cutting to length and width the sides (A), top (B), bottom (C), stretcher (D), door rails and stiles (F and G), and the shelves (J), all of which may be cut from a single 8 foot long 1 x 10 board, as shown in the cutting diagram. The Va in. square retainer strips (I) are then resawn from the scrap. The back (E) is a section of V* in. thick plywood. The decorative edge around the cab inet top and bottom is cut with the router using a 3/« in, piloted round-over bit, as shown in the edge detail. The V* in. radius is then added using a rasp and some hand sanding. Next, notch the sides to accept the stretchers and drill out the Vi in. dowel holes for the shelf supports. Lay out these dowel holes carefully so the shelves will be in contact with the dowels at all four points, and therefore lie flat. The cabinet carcase should now be assembled. First glue up and clamp the sides, top, bottom, and stretcher. Next, drill out and counterbore for the l-V* in. flathead wood screws, as shown in the screw detail. The stretcher is both glued in place and secured with several no. 4 finish nails on either side. The V* in. thick plywood back is set in a V* in. deep by 3/s in. wide rabbet |
||||||||||||||||||||||||||||||||||||||||||||||||||||


