Woodworker's Journal 1985-9-5, страница 51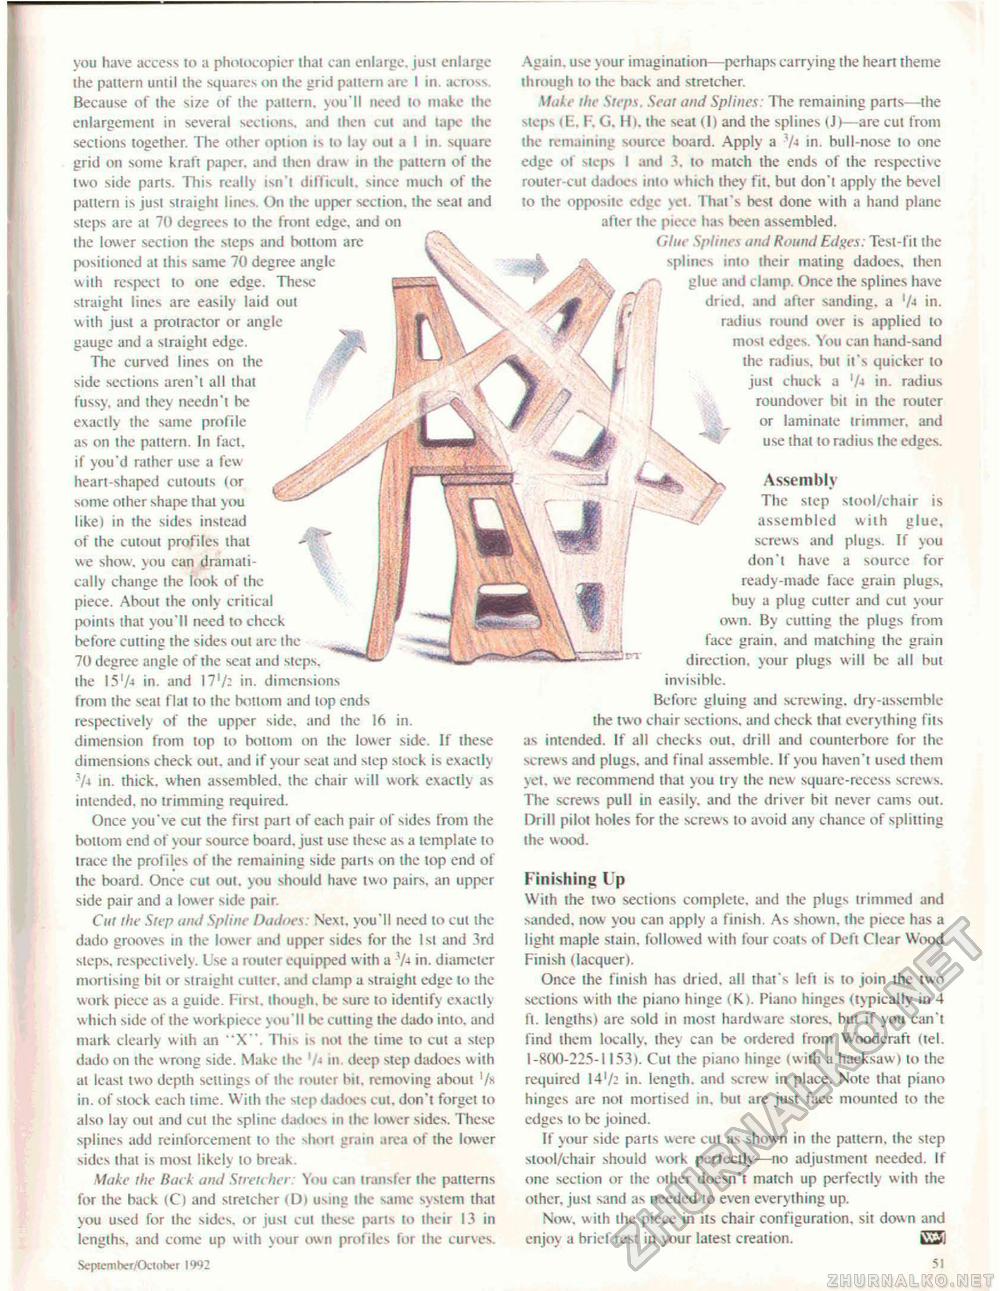
you have access to a photocopier that can enlarge, just enlarge the pattern until the squares on the grid pattern are I in. across. Because of the size of the pattern, you'll need to make the enlargement in several sections, and then cut and tape the sections together. The other opium is to lay out a I in. square grid on some kraft paper, and then draw in the pattern of the two side parts. This really isn't difficult, since much of the pattern is just straight lines. On the upper section, the seat and steps are at 70 degrees to the front edge, and on the lower section the steps and bottom are positioned at this same 70 degree angle with respect to one edge. These straight lines are easily laid out with just a protractor or angle gauge and a straight edge. The curved lines on the side sections aren't all that fussy, and they needn't be exactly the same profile as on the pattern. In fact, if you'd rather use a few heart-shaped cutouts (or some other shape lhat you like) in the sides instead of the cutout profiles that we show, you can dramatically change the look of the piece. About the only critical points lhat you'll need to chcck before cutting the sides out are the 70 degree angle of the scat and steps, the 151/4 in. and 17'/^ in. dimensions from the seat flat to the bottom and lop ends respectively of the upper side, and the 16 in. dimension from top to bottom on the lower side. If these dimensions check out. and if your seat and step stock is exactly in. thick, when assembled, the chair will work exactly as intended, no trimming required. Once you've cut the first part of cach pair of sides from the bottom end of your source board, just use these as a template to trace the profiles of the remaining side parts on ihe lop end of the board. Once cut out. you should have two pairs, an upper side pair and a lower side pair. Cut the Step and Spline Dadoes: Next. you'll need lo cut the dado grooves in ihe lower and upper sides for the 1st and 3rd steps, respectively. L'se a router equipped with a tyi in. diameter mortising bil or straight culler, and clamp a straight edge lo the work piece as a guide. First, though, be sure to identify cxaclly w hich side of the workpiece you'll be cutting the dado inlo. and mark clearly with an "X". This is not the time to cut a step dado on the wrong side. Make the '/-» in. deep step dadoes with at least two depth sellings of the router bit, removing about '/x in. of slock each lime. With ihe step dadoes cut. don't forget to also lay out and cut the spline dadoes in ihe lower sides. These splines add reinforcement lo the short grain area of the lower sides that is most likely to break. Make the Back and Stretcher: You can transfer the patterns for the back (C) and stretcher <D) using the same system that you used for ihe sides, or jusi cut these parts to their 13 in lengths, and come up with your own profiles for the curves. September/October 1992 Again, use your imagination—perhaps carrying the heart theme through lo ihe back and stretcher. Make the Steps. Seat and Splines: The remaining parts—the steps (E, E G. II). the scat (1) and the splines (J)— are eul from the remaining source board. Apply a ty-i in. bull-nose to one edge of steps I and 3, to match the ends of the respective router-cut dadoes into which they fit. but don't apply the bevel to the opposite edge yet. That's best done with a hand plane after the piece has been assembled. Glue Splines and Round Edges: Test-fit ihe splines into iheir mating dadoes, then glue and clamp. Once the splines have dried, and after sanding, a '/j in. radius round over is applied lo most edges. You can hand-sand the radius, hut it's quicker to just chuck a 'A in. radius roundover bil in the router or laminate trimmer, and use that to radius the edges. Assembly The siep stool/chair is assembled wiih glue, screws and plugs. If you don'l have a source for ready-made face grain plugs, buy a plug culler and cut your own. By cutting the plugs from face grain, and matching the grain direction, your plugs will be all but invisible. Before gluing and screwing, dry-assemble the two chair sections, and check lhat everything fits as intended. If all checks out, drill and counterbore for the screws and plugs, and final assemble. If you haven't used them yet. we recommend thai you try the new square-recess screws. The screw-s pull in easily, and the driver bit never cams out. Drill pilot holes for the screws to avoid any chance of splitting the wood. Finishing Up With the two sections complete, and the plugs trimmed and sanded, now you can apply a finish. As shown, ihe piece has a light maple stain, followed w ith four coats of Deft Clear Wood Finish (lacquer). Once the finish has dried, all that's left is to join the two sections with the piano hinge (K). Piano hinges (typically in 4 ft. lengths) are sold in most hardware stores, but if you can't find them locally, ihey can be ordered from Woodcraft (tel. 1-800-225-1153). Cut the piano hinge (with a hacksaw) to the required 14in. length, and screw in place. Note lhat piano hinges are not mortised in, but are just face mounted to the edges to be joined. If your side parts were cut as shown in the pattern, the step stool/chair should work perfectly—no adjustment needed. If one section or the other doesn't match up perfectly with the other, just sand as needed lo even everything up. Now. with ihe piece in its chair configuration, sit down and enjoy a brief rest in your latest creation. Si 51 |


