Woodworker's Journal 1986-10-4, страница 44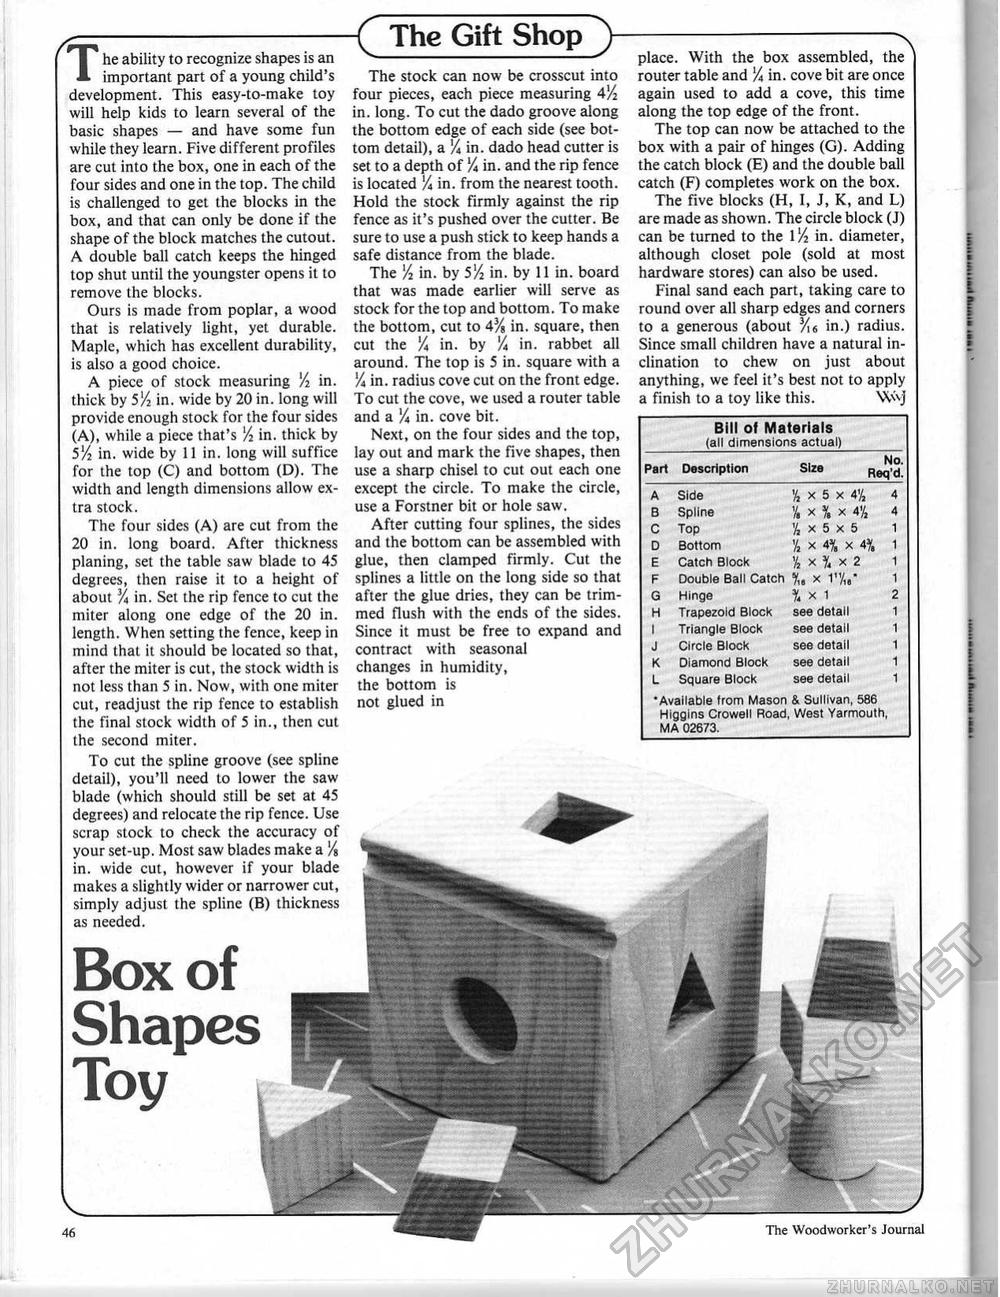
{ The Gift Shop ) Bill of Materials (all dimensions actual) Part Description Size Part Description Size
Higgins Crowell Road, West Yarmouth, MA 02673. Higgins Crowell Road, West Yarmouth, MA 02673. The stock can now be crosscut into four pieces, each piece measuring 4'A in. long. To cut the dado groove along the bottom edge of each side (see bottom detail), a '/i in. dado head cutter is set to a depth of % in. and the rip fence is located % in. from the nearest tooth. Hold the stock firmly against the rip fence as it's pushed over the cutter. Be sure to use a push stick to keep hands a safe distance from the blade. The Vi in. by 5XA in. by 11 in. board that was made earlier will serve as stock for the top and bottom. To make the bottom, cut to 4% in. square, then cut the Va in. by % in. rabbet all around. The top is 5 in. square with a lA in. radius cove cut on the front edge. To cut the cove, we used a router table and a ]A in. cove bit. Next, on the four sides and the top, lay out and mark the five shapes, then use a sharp chisel to cut out each one except the circle. To make the circle, use a Forstner bit or hole saw. After cutting four splines, the sides and the bottom can be assembled with glue, then clamped firmly. Cut the splines a little on the long side so that after the glue dries, they can be trimmed flush with the ends of the sides. Since it must be free to expand and contract with seasonal changes in humidity, the bottom is not glued in place. With the box assembled, the router table and VA in. cove bit are once again used to add a cove, this time along the top edge of the front. The top can now be attached to the box with a pair of hinges (G). Adding the catch block (E) and the double ball catch (F) completes work on the box. The five blocks (H, I, J, K, and L) are made as shown. The circle block (J) can be turned to the lA in. diameter, although closet pole (sold at most hardware stores) can also be used. Final sand each part, taking care to round over all sharp edges and corners to a generous (about Vi6 in.) radius. Since small children have a natural inclination to chew on just about anything, we feel it's best not to apply a finish to a toy like this. W\j 44 The Woodworker's Journal The ability to recognize shapes is an important part of a young child's development. This easy-to-make toy will help kids to learn several of the basic shapes — and have some fun while they learn. Five different profiles are cut into the box, one in each of the four sides and one in the top. The child is challenged to get the blocks in the box, and that can only be done if the shape of the block matches the cutout. A double ball catch keeps the hinged top shut until the youngster opens it to remove the blocks. Ours is made from poplar, a wood that is relatively light, yet durable. Maple, which has excellent durability, is also a good choice. A piece of stock measuring 'A in. thick by 5XA in. wide by 20 in. long will provide enough stock for the four sides (A), while a piece that's lA in. thick by 5lA in. wide by 11 in. long will suffice for the top (C) and bottom (D). The width and length dimensions allow extra stock. The four sides (A) are cut from the 20 in. long board. After thickness planing, set the table saw blade to 45 degrees, then raise it to a height of about % in. Set the rip fence to cut the miter along one edge of the 20 in. length. When setting the fence, keep in mind that it should be located so that, after the miter is cut, the stock width is not less than 5 in. Now, with one miter cut, readjust the rip fence to establish the final stock width of 5 in., then cut the second miter. To cut the spline groove (see spline detail), you'll need to lower the saw blade (which should still be set at 45 degrees) and relocate the rip fence. Use scrap stock to check the accuracy of your set-up. Most saw blades make a V% in, wide cut, however if your blade makes a slightly wider or narrower cut, simply adjust the spline (B) thickness as needed. Box ofShapes Toy |
|||||||||||||||||||||||||||||||||||||||


