Woodworker's Journal 2004 Spring, страница 11
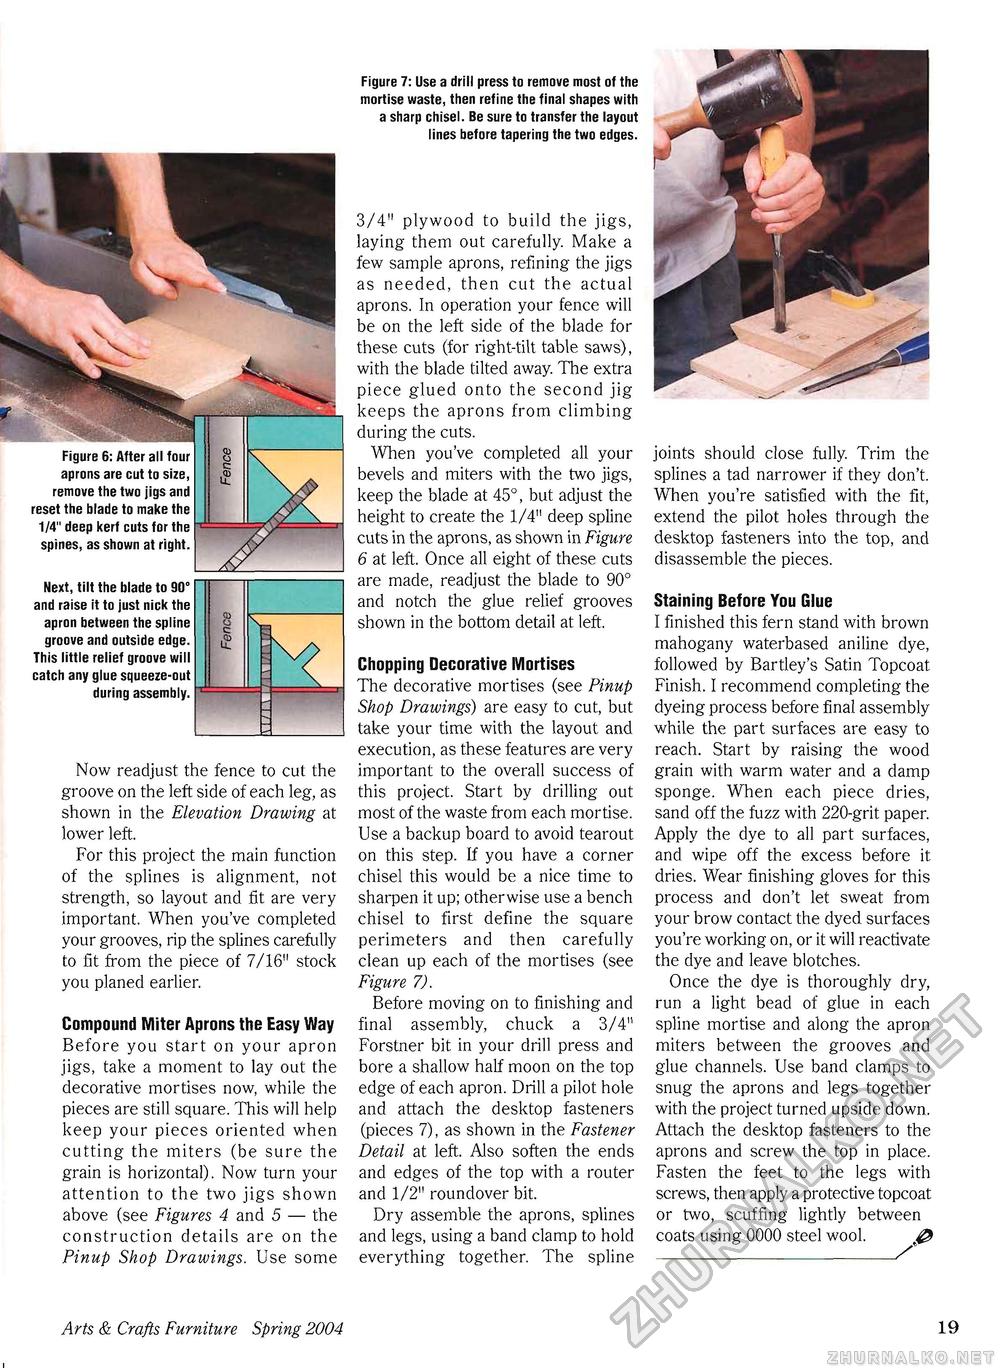
Figure 6: After all four aprons are cut to size, remove the two jigs and reset the blade to make the 1/4" deep kerf cuts for the spines, as shown at right. Next, tilt the blade to 90° and raise it to just nick the apron between the spline groove and outside edge. This little relief groove will catch any glue squeeze-out during assembly. Now readjust the fence to cut the groove on the left side of each leg, as shown in the Elevation Drawing at lower left. For this project the main function of the splines is alignment, not strength, so layout and fit are very important. When you've completed your grooves, rip the splines carefully to fit from the piece of 7/16" stock you planed earlier. Compound Miter Aprons the Easy Way Before you start on your apron jigs, take a moment to lay out the decorative mortises now, while the pieces are still square. This will help keep your pieces oriented when cutting the miters (be sure the grain is horizontal). Now turn your attention to the two jigs shown above (see Figures 4 and 5 — the construction details are on the Pinup Shop Drawings. Use some Figure 7: Use a drill press to remove most of the mortise waste, then refine the final shapes with a sharp chisel. Be sure to transfer the layout lines before tapering the two edges. 3/4" plywood to build the jigs, laying them out carefully. Make a few sample aprons, refining the jigs as needed, then cut the actual aprons. In operation your fence will be on the left side of the blade for these cuts (for right-tilt table saws), with the blade tilted away. The extra piece glued onto the second jig keeps the aprons from climbing during the cuts. When you've completed all your bevels and miters with the two jigs, keep the blade at 45°, but adjust the height to create the 1/4" deep spline cuts in the aprons, as shown in Figure 6 at left. Once all eight of these cuts are made, readjust the blade to 90° and notch the glue relief grooves shown in the bottom detail at left. Chopping Decorative Mortises The decorative mortises (see Pinup Shop Drawings) are easy to cut, but take your time with the layout and execution, as these features are very important to the overall success of this project. Start by drilling out most of the waste from each mortise. Use a backup board to avoid tearout on this step. If you have a corner chisel this would be a nice time to sharpen it up; otherwise use a bench chisel to first define the square perimeters and then carefully clean up each of the mortises (see Figure 7). Before moving on to finishing and final assembly, chuck a 3/4" Forstner bit in your drill press and bore a shallow half moon on the top edge of each apron. Drill a pilot hole and attach the desktop fasteners (pieces 7), as shown in the Fastener Detail at left. Also soften the ends and edges of the top with a router and 1/2" roundover bit. Dry assemble the aprons, splines and legs, using a band clamp to hold everything together. The spline joints should close fully. Trim the splines a tad narrower if they don't. When you're satisfied with the fit, extend the pilot holes through the desktop fasteners into the top, and disassemble the pieces. Staining Before You Glue I finished this fern stand with brown mahogany waterbased aniline dye, followed by Bartley's Satin Topcoat Finish. I recommend completing the dyeing process before final assembly while the part surfaces are easy to reach. Start by raising the wood grain with warm water and a damp sponge. When each piece dries, sand off the fuzz with 220-grit paper. Apply the dye to all part surfaces, and wipe off the excess before it dries. Wear finishing gloves for this process and don't let sweat from your brow contact the dyed surfaces you're working on, or it will reactivate the dye and leave blotches. Once the dye is thoroughly dry, run a light bead of glue in each spline mortise and along the apron miters between the grooves and glue channels. Use band clamps to snug the aprons and legs together with the project turned upside down. Attach the desktop fasteners to the aprons and screw the top in place. Fasten the feet to the legs with screws, then apply a protective topcoat or two, scuffing lightly between coats using 0000 steel wool. @ Arts & Crafts Furniture Spring 2004 17 |


