Woodworker's Journal 2004 Spring, страница 17
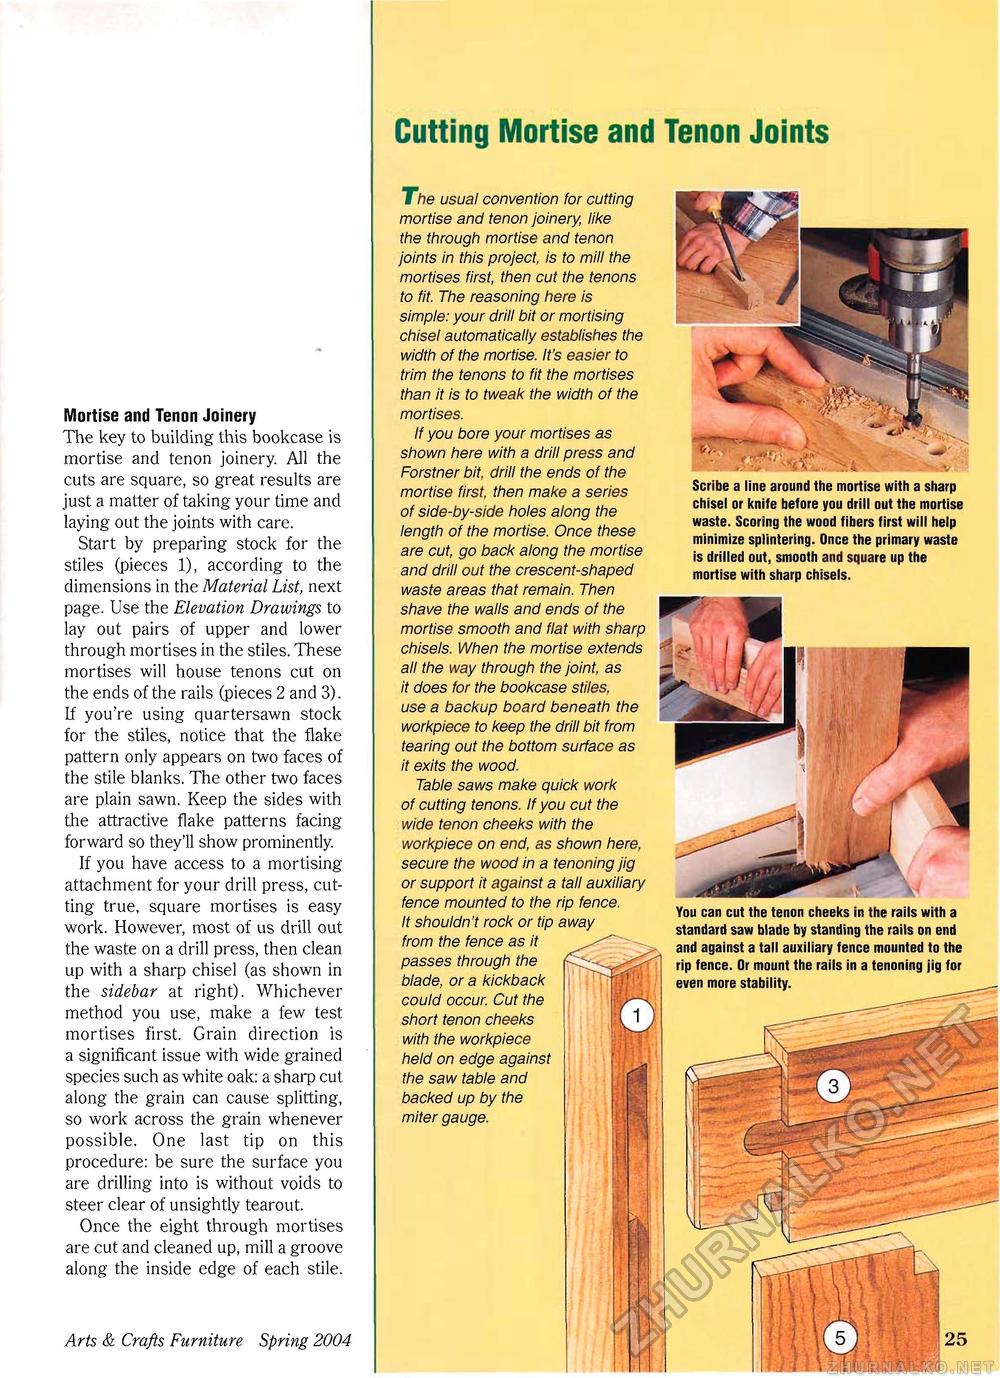
Cutting Mortise and Tenon JointsMortise and Tenon Joinery The key to building this bookcase is mortise and tenon joinery. All the cuts are square, so great results are just a matter of taking your time and laying out the joints with care. Start by preparing stock for the stiles (pieces 1), according to the dimensions in the Material List, next page. Use the Elevation Drawings to lay out pairs of upper and lower through mortises in the stiles. These mortises will house tenons cut on the ends of the rails (pieces 2 and 3). If you're using quartersawn stock for the stiles, notice that the flake pattern only appears on two faces of the stile blanks. The other two faces are plain sawn. Keep the sides with the attractive flake patterns facing-forward so they'll show prominently. If you have access to a mortising attachment for your drill press, cutting true, square mortises is easy work. However, most of us drill out the waste on a drill press, then clean up with a sharp chisel (as shown in the sidebar at right). Whichever method you use, make a few test mortises first. Grain direction is a significant issue with wide grained species such as white oak: a sharp cut along the grain can cause splitting, so work across the grain whenever possible. One last tip on this procedure: be sure the surface you are drilling into is without voids to steer clear of unsightly tearout. Once the eight through mortises are cut and cleaned up, mill a groove along the inside edge of each stile. Arts & Crafts Furniture Spring 2004 17 The usual convention for cutting mortise and tenon joinery, like the through mortise and tenon joints in this project, is to mill the mortises first, then cut the tenons to fit. The reasoning here is simple: your drill bit or mortising chisel automatically establishes the width of the mortise. It's easier to trim the tenons to fit the mortises than it is to tweak the width of the mortises. If you bore your mortises as shown here with a drill press and Forstner bit. drill the ends of the mortise first, then make a series of side-by-side holes along the length of the mortise. Once these are cut, go back along the mortise and drill out the crescent-shaped waste areas that remain. Then shave the walls and ends of the mortise smooth and flat with sharp chisels. When the mortise extends all the way through the joint, as it does for the bookcase stiles, use a backup board beneath the workpiece to keep the drill bit from tearing out the bottom surface as it exits the wood. Table saws make quick work of cutting tenons. If you cut the wide tenon cheeks with the workpiece on end, as shown here, secure the wood in a tenoning jig or support it against a tall auxiliary fence mounted to the rip fence. It shouldn't rock or tip away from the fence as it passes through the blade, or a kickback could occur. Cut the short tenon cheeks with the workpiece held on edge against the saw table and backed up by the miter gauge. Scribe a line around the mortise with a sharp chisel or knife before you drill out the mortise waste. Scoring the wood fibers first will help minimize splintering. Once the primary waste is drilled out, smooth and square up the mortise with sharp chisels. You can cut the tenon cheeks in the rails with a standard saw blade by standing the rails on end and against a tall auxiliary fence mounted to the rip fence. Or mount the rails in a tenoning jig for even more stability. |


