Woodworker's Journal 2004 Spring, страница 43
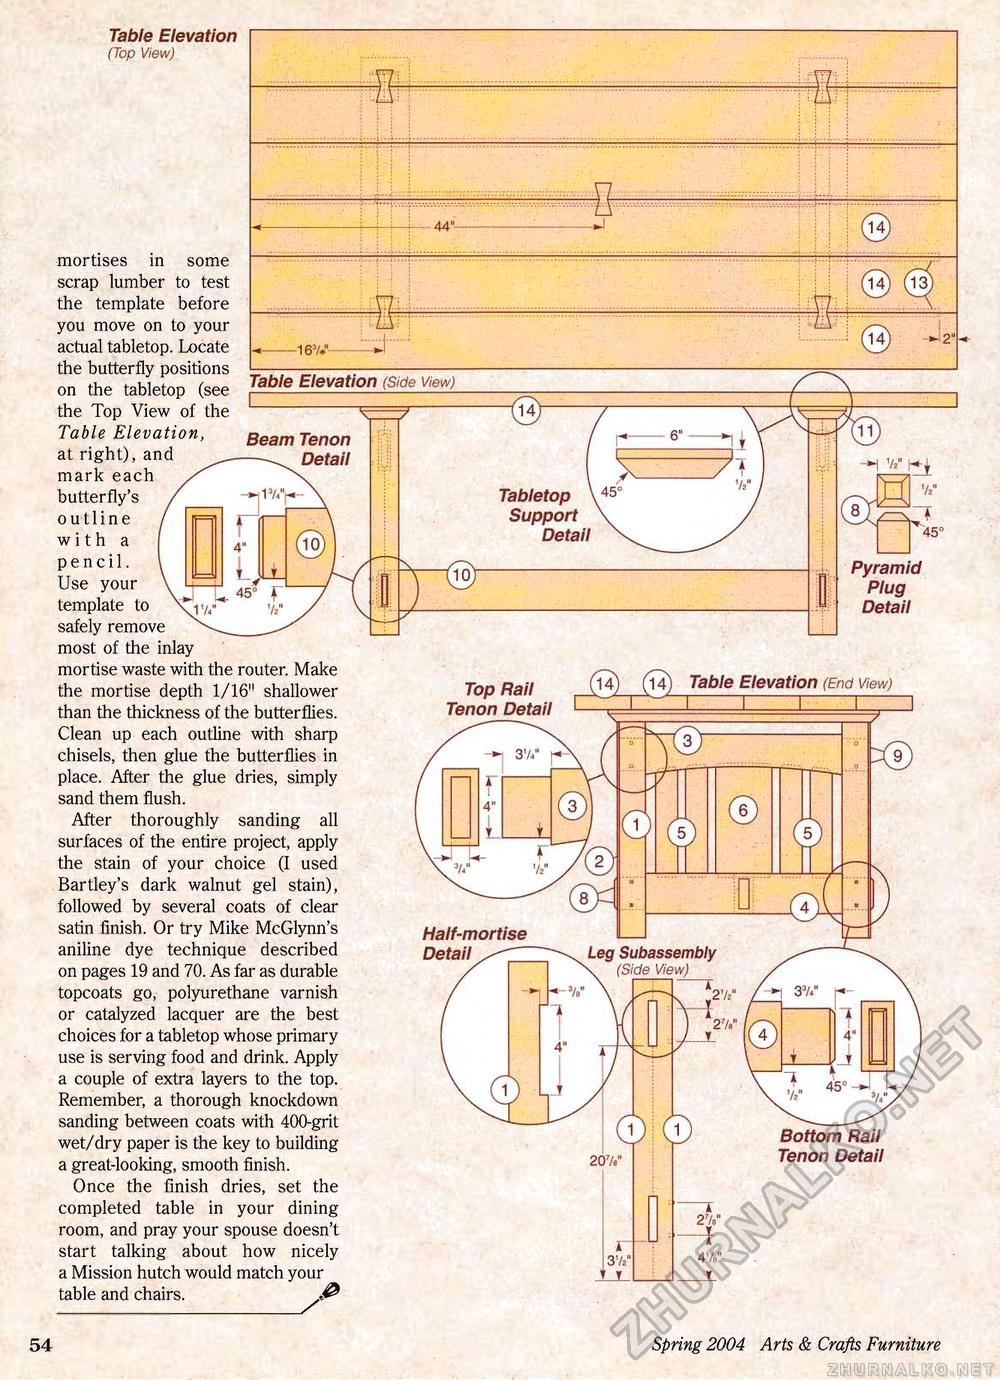
10 Spring 2004 Arts & Crafts Furniture Table Elevation (Top View) mortises in some ......................... scrap lumber to test the template before ........................................ you move on to your actual tabletop. Locate ---■ the butterfly positions —-—-- on the tabletop (see Table Elevation (Side vie*) the Top View of the ~~ _^ Table Elevation, at right), and mark each butterfly's / outline ( 8 with a I pencil. \ Use your \ - template to <J safely remove \ most of the inlay mortise waste with the router. Make the mortise depth 1/16" shallower Top Rail than the thickness of the butterflies. Tenon Detail Clean up each outline with sharp chisels, then glue the butterflies in / 3V"" ' place. After the glue dries, simply / — r- sand them flush. f 4„ After thoroughly sanding all 1 . surfaces of the entire project, apply V L—J y the stain of your choice (I used vt" Bartley's dark walnut gel stain), __^ followed by several coats of clear satin finish. Or try Mike McGlynn's Half-mortise aniline dye technique described Detail - on pages 19 and 70. As far as durable / topcoats go, polyurethane varnish / " - or catalyzed lacquer are the best / choices for a tabletop whose primary use is serving food and drink. Apply \ a couple of extra layers to the top. \ /y\ Remember, a thorough knockdown ''w 1 sanding between coats with 400-grit ^-^ wet/dry paper is the key to building a great-looking, smooth finish. Beam Tenon —Detail Tabletop Support Detail Pyramid Plug Detail (14) (14) Table Elevation (End View) Leg Subassembly \ (Side View) Bottom Rail Tenon Detail Once the finish dries, set the completed table in your dining room, and pray your spouse doesn't start talking about how nicely a Mission hutch would match your table and chairs. r 37*° f 27s" _I a 47s" T |


