Woodworker's Journal 2004 Spring, страница 60
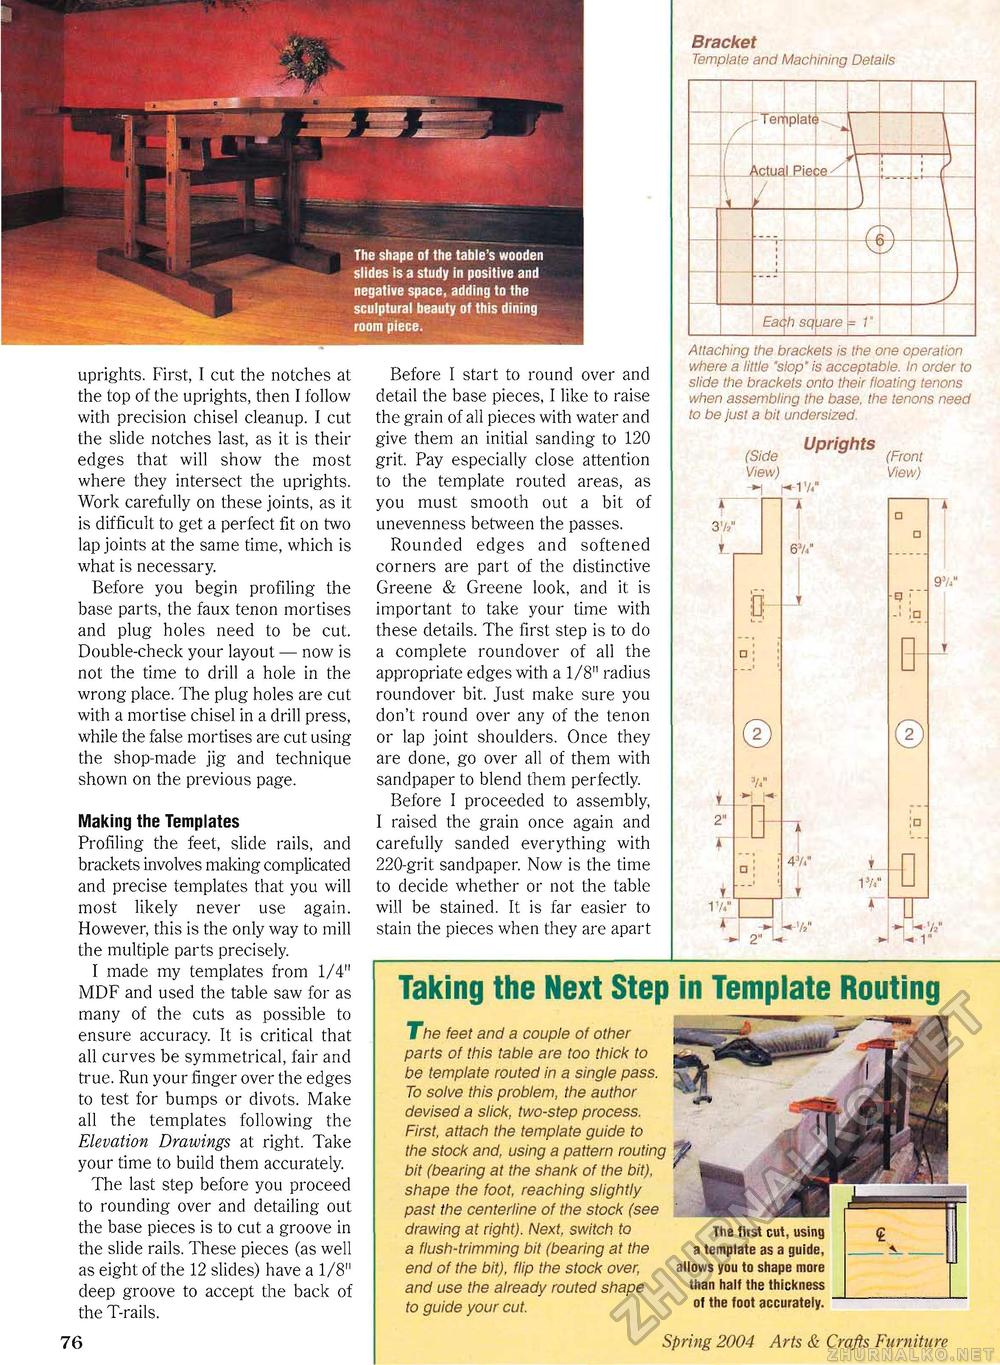
uprights. First, I cut the notches at the top of the uprights, then I follow with precision chisel cleanup. I cut the slide notches last, as it is their edges that will show the most where they intersect the uprights. Work carefully on these joints, as it is difficult to get a perfect fit on two lap joints at the same time, which is what is necessary. Before you begin profiling the base parts, the faux tenon mortises and plug holes need to be cut. Double-check your layout — now is not the time to drill a hole in the wrong place. The plug holes are cut with a mortise chisel in a drill press, while the false mortises are cut using the shop-made jig and technique shown on the previous page. Making the Templates Profiling the feet, slide rails, and brackets involves making complicated and precise templates that you will most likely never use again. However, this is the only way to mill the multiple parts precisely. I made my templates from 1/4" MDF and used the table saw for as many of the cuts as possible to ensure accuracy. It is critical that all curves be symmetrical, fair and true. Run your finger over the edges to test for bumps or divots. Make all the templates following the Elevation Drawings at right. Take your time to build them accurately. The last step before you proceed to rounding over and detailing out the base pieces is to cut a groove in the slide rails. These pieces (as well as eight of the 12 slides) have a 1/8" deep groove to accept the back of the T-rails. Before I start to round over and detail the base pieces, I like to raise the grain of all pieces with water and give them an initial sanding to 120 grit. Pay especially close attention to the template routed areas, as you must smooth out a bit of unevenness between the passes. Rounded edges and softened corners are part of the distinctive Greene & Greene look, and it is important to take your time with these details. The first step is to do a complete roundover of all the appropriate edges with a 1/8" radius roundover bit. Just make sure you don't round over any of the tenon or lap joint shoulders. Once they are done, go over all of them with sandpaper to blend them perfectly. Before I proceeded to assembly, I raised the grain once again and carefully sanded everything with 220-grit sandpaper. Now is the time to decide whether or not the table will be stained. It is far easier to stain the pieces when they are apart Bracket Template and Machining Details Bracket Template and Machining Details
Attaching the brackets is the one operation where a little 'slop' is acceptable. In order to slide the brackets onto their floating tenons when assembling the base, the tenons need to be just a bit undersized. Attaching the brackets is the one operation where a little 'slop' is acceptable. In order to slide the brackets onto their floating tenons when assembling the base, the tenons need to be just a bit undersized. k 37/ 1_ 2" r i 17/ (Side Upri9MS View) -*1 V I 6V (Front View) d © r
B- © 0 TT 97/ Taking the Next Step in Template Routing The feet and a couple of other parts of this table are too thick to be template routed in a single pass. To solve this problem, the author devised a slick, two-step process. First, attach the template guide to the stock and, using a pattern routing bit (bearing at the shank of the bit), shape the foot, reaching slightly past the centerline of the stock (see drawing at right). Next, switch to a flush-trimming bit (bearing at the end of the bit), flip the stock over, and use the already routed shape to guide your cut. The first cut, using a template as a guide, allows you to shape more than half ths thickness of the foot accurately. 10 Spring 2004 Arts & Crafts Furniture |
|||||||||||||||||||||||||||||||||||||||||||||||||||||||||||||||||||||||||||||||||||


