Woodworker's Journal 2004 Spring, страница 65
MATERIAL LIST TOP
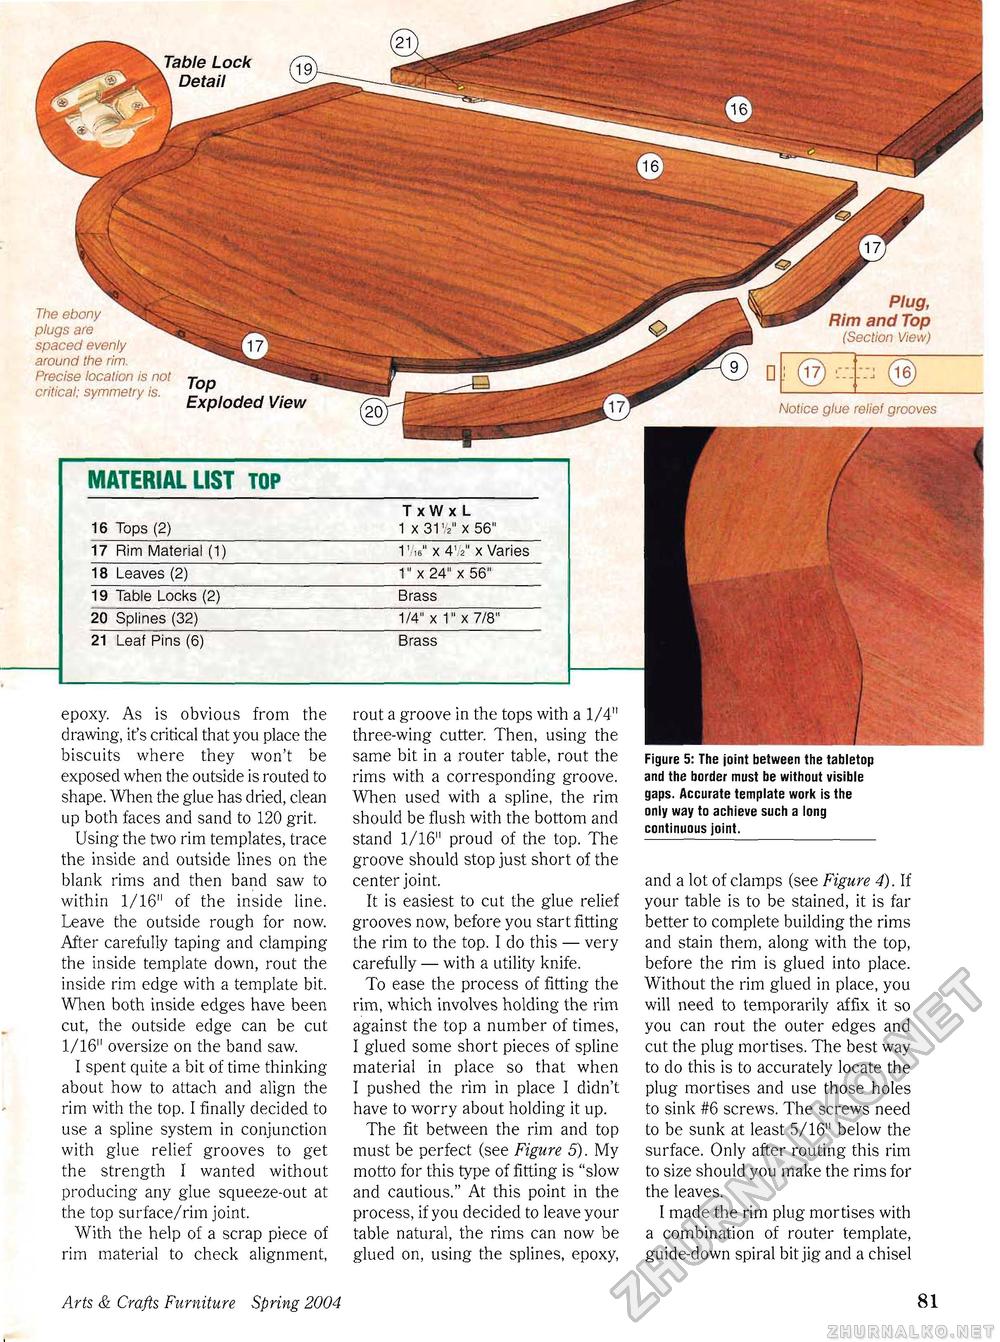
rout a groove in the tops with a 1/4" three-wing cutter. Then, using the same bit in a router table, rout the rims with a corresponding groove. When used with a spline, the rim should be flush with the bottom and stand 1/16" proud of the top. The groove should stop just short of the center joint. It is easiest to cut the glue relief grooves now, before you start fitting the rim to the top. I do this — very carefully — with a utility knife. To ease the process of fitting the rim, which involves holding the rim against the top a number of times, I glued some short pieces of spline material in place so that when I pushed the rim in place I didn't have to worry about holding it up. The fit between the rim and top must be perfect (see Figure 5). My motto for this type of fitting is "slow and cautious." At this point in the process, if you decided to leave your table natural, the rims can now be glued on, using the splines, epoxy, epoxy. As is obvious from the drawing, it's critical that you place the biscuits where they won't be exposed when the outside is routed to shape. When the glue has dried, clean up both faces and sand to 120 grit. Using the two rim templates, trace the inside and outside lines on the blank rims and then band saw to within 1/16" of the inside line. Leave the outside rough for now. After carefully taping and clamping the inside template down, rout the inside rim edge with a template bit. When both inside edges have been cut, the outside edge can be cut 1/16" oversize on the band saw. I spent quite a bit of time thinking about how to attach and align the rim with the top. I finally decided to use a spline system in conjunction with glue relief grooves to get the strength I wanted without producing any glue squeeze-out at the top surface/rim joint. With the help of a scrap piece of rim material to check alignment, Notice glue reliei grooves
Figure 5: The joint between the tabletop and the border must be without visible gaps. Accurate template work is the only way to achieve such a long continuous joint. Figure 5: The joint between the tabletop and the border must be without visible gaps. Accurate template work is the only way to achieve such a long continuous joint. and a lot of clamps (see Figure 4). If your table is to be stained, it is far better to complete building the rims and stain them, along with the top, before the rim is glued into place. Without the rim glued in place, you will need to temporarily affix it so you can rout the outer edges and cut the plug mortises. The best way to do this is to accurately locate the plug mortises and use those holes to sink #6 screws. The screws need to be sunk at least 5/16" below the surface. Only after routing this rim to size should you make the rims for the leaves. I made the rim plug mortises with a combination of router template, guide-down spiral bit jig and a chisel Top Exploded View The ebony plugs are spaced evenly around the rim. Precise location is not critical; symmetry is. Plug, Rim and Top (Section View) Arts & Crafts Furniture Spring 2004 17 |
||||||||||||||||||||||||||||||||||


