Woodworker's Journal 2004 Spring, страница 9
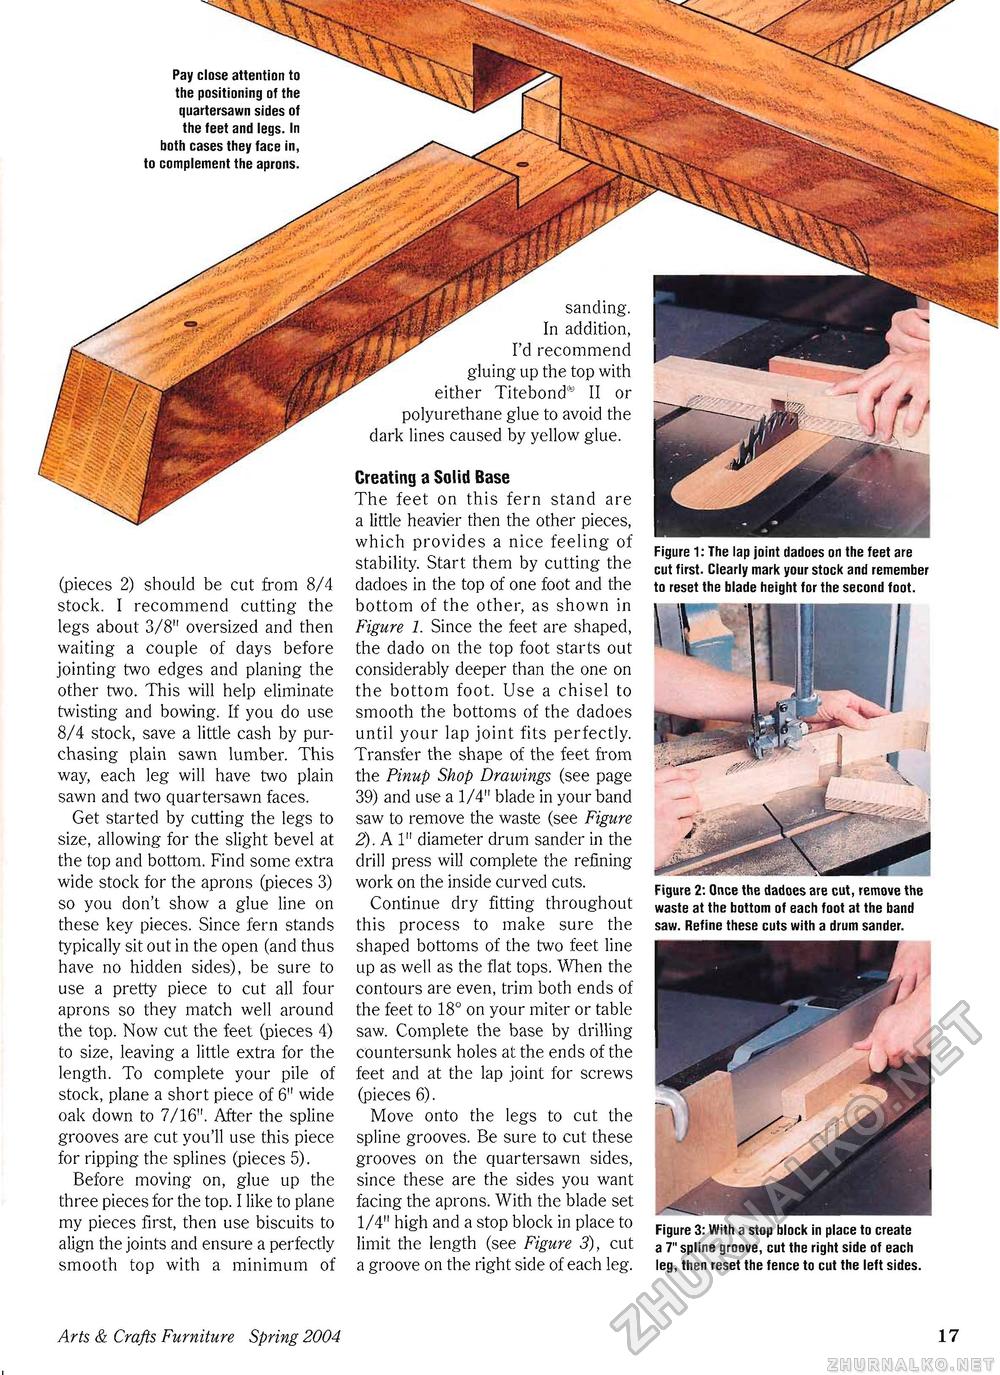
Pay close attention to the positioning of the quartersawn sides of the feet and legs. In both cases they face in, to complement the aprons. (pieces 2) should be cut from 8/4 stock. I recommend cutting the legs about 3/8" oversized and then waiting a couple of days before jointing two edges and planing the other two. This will help eliminate twisting and bowing. If you do use 8/4 stock, save a little cash by purchasing plain sawn lumber. This way, each leg will have two plain sawn and two quartersawn faces. Get started by cutting the legs to size, allowing for the slight bevel at the top and bottom. Find some extra wide stock for the aprons (pieces 3) so you don't show a glue line on these key pieces. Since fern stands typically sit out in the open (and thus have no hidden sides), be sure to use a pretty piece to cut all four aprons so they match well around the top. Now cut the feet (pieces 4) to size, leaving a little extra for the length. To complete your pile of stock, plane a short piece of 6" wide oak down to 7/16". After the spline grooves are cut you'll use this piece for ripping the splines (pieces 5). Before moving on, glue up the three pieces for the top. I like to plane my pieces first, then use biscuits to align the joints and ensure a perfectly smooth top with a minimum of sanding. In addition, I'd recommend gluing up the top with either Titebond® II or polyurethane glue to avoid the dark lines caused by yellow glue. Creating a Solid Base The feet on this fern stand are a little heavier then the other pieces, which provides a nice feeling of stability. Start them by cutting the dadoes in the top of one foot and the bottom of the other, as shown in Figure 1. Since the feet are shaped, the dado on the top foot starts out considerably deeper than the one on the bottom foot. Use a chisel to smooth the bottoms of the dadoes until your lap joint fits perfectly. Transfer the shape of the feet from the Pinup Shop Drawings (see page 39) and use a 1/4" blade in your band saw to remove the waste (see Figure 2). A 1" diameter drum sander in the drill press will complete the refining work on the inside curved cuts. Continue dry fitting throughout this process to make sure the shaped bottoms of the two feet line up as well as the flat tops. When the contours are even, trim both ends of the feet to 18° on your miter or table saw. Complete the base by drilling countersunk holes at the ends of the feet and at the lap joint for screws (pieces 6). Move onto the legs to cut the spline grooves. Be sure to cut these grooves on the quartersawn sides, since these are the sides you want facing the aprons. With the blade set 1/4" high and a stop block in place to limit the length (see Figure 3), cut a groove on the right side of each leg. Figure 1: The lap joint dadoes on the feet are cut first. Clearly mark your stock and remember to reset the blade height for the second foot. Figure 2: Once the dadoes are cut, remove the waste at the bottom of each foot at the band saw. Refine these cuts with a drum sander. Figure 3: With a stop block in place to create a 7" spline groove, cut the right side of each leg, then reset the fence to cut the left sides. Arts & Crafts Furniture Spring 2004 17 |


