Woodworker's Journal 2006-30-Winter, страница 73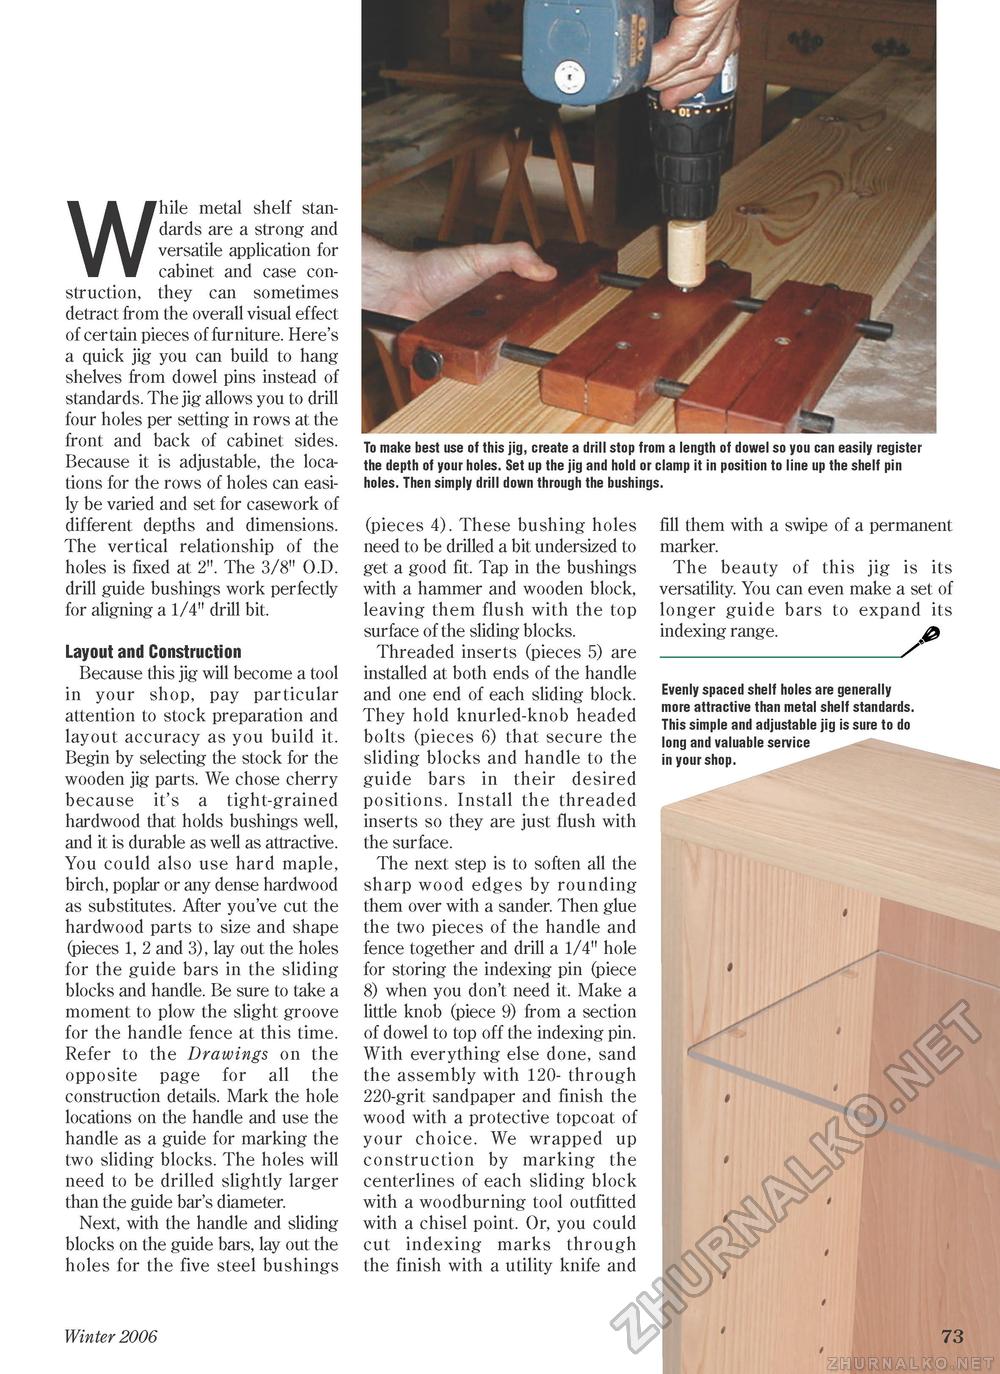
While metal shelf standards are a strong and versatile application for cabinet and case construction, they can sometimes detract from the overall visual effect of certain pieces of furniture. Here's a quick jig you can build to hang shelves from dowel pins instead of standards. The jig allows you to drill four holes per setting in rows at the front and back of cabinet sides. Because it is adjustable, the locations for the rows of holes can easily be varied and set for casework of different depths and dimensions. The vertical relationship of the holes is fixed at 2". The 3/8" O.D. drill guide bushings work perfectly for aligning a 1/4" drill bit. Layout and Construction Because this jig will become a tool in your shop, pay particular attention to stock preparation and layout accuracy as you build it. Begin by selecting the stock for the wooden jig parts. We chose cherry because it's a tight-grained hardwood that holds bushings well, and it is durable as well as attractive. You could also use hard maple, birch, poplar or any dense hardwood as substitutes. After you've cut the hardwood parts to size and shape (pieces 1, 2 and 3), lay out the holes for the guide bars in the sliding blocks and handle. Be sure to take a moment to plow the slight groove for the handle fence at this time. Refer to the Drawings on the opposite page for all the construction details. Mark the hole locations on the handle and use the handle as a guide for marking the two sliding blocks. The holes will need to be drilled slightly larger than the guide bar's diameter. Next, with the handle and sliding blocks on the guide bars, lay out the holes for the five steel bushings Winter 2006 To make best use of this jig, create a drill stop from a length of dowel so you can easily register the depth of your holes. Set up the jig and hold or clamp it in position to line up the shelf pin holes. Then simply drill down through the bushings. (pieces 4). These bushing holes need to be drilled a bit undersized to get a good fit. Tap in the bushings with a hammer and wooden block, leaving them flush with the top surface of the sliding blocks. Threaded inserts (pieces 5) are installed at both ends of the handle and one end of each sliding block. They hold knurled-knob headed bolts (pieces 6) that secure the sliding blocks and handle to the guide bars in their desired positions. Install the threaded inserts so they are just flush with the surface. The next step is to soften all the sharp wood edges by rounding them over with a sander. Then glue the two pieces of the handle and fence together and drill a 1/4" hole for storing the indexing pin (piece 8) when you don't need it. Make a little knob (piece 9) from a section of dowel to top off the indexing pin. With everything else done, sand the assembly with 120- through 220-grit sandpaper and finish the wood with a protective topcoat of your choice. We wrapped up construction by marking the centerlines of each sliding block with a woodburning tool outfitted with a chisel point. Or, you could cut indexing marks through the finish with a utility knife and fill them with a swipe of a permanent marker. The beauty of this jig is its versatility. You can even make a set of longer guide bars to expand its indexing range. & _/ Evenly spaced shelf holes are generally more attractive than metal shelf standards. This simple and adjustable jig is sure to do long and valuable service in your shop. 73 |


