Woodworker's Journal 2008-32-1, страница 39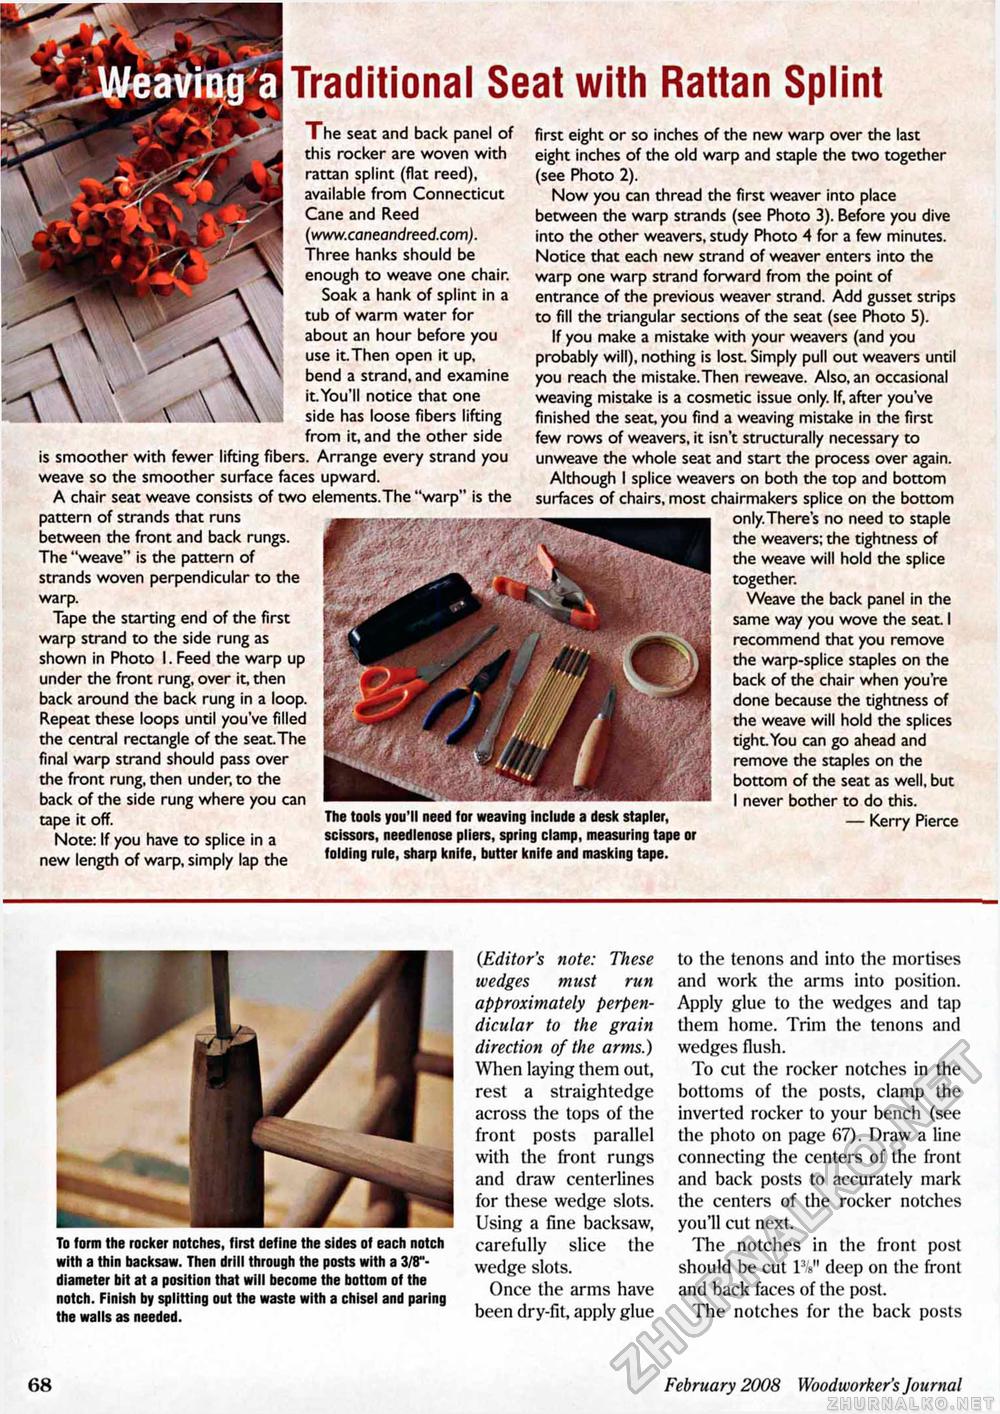
Traditional Seat with Rattan Splint The seat and back panel of this rocker are woven with rattan splint (flat reed), available from Connecticut Cane and Reed (www.caneandreed.com). Three hanks should be enough to weave one chair. Soak a hank of splint in a tub of warm water for about an hour before you use it.Then open it up, bend a strand, and examine it. You'll notice that one side has loose fibers lifting from it, and the other side is smoother with fewer lifting fibers. Arrange every strand you weave so the smoother surface faces upward. A chair seat weave consists of two elements.The "warp" is the pattern of strands that runs between the front and back rungs. The "weave" is the pattern of strands woven perpendicular to the warp. Tape the starting end of the first warp strand to the side rung as shown in Photo I. Feed the warp up under the front rung, over it, then back around the back rung in a loop. Repeat these loops until you've filled the central rectangle of the seat The final warp strand should pass over the front rung, then under, to the back of the side rung where you can tape it off. Note: If you have to splice in a new length of warp, simply lap the The tools you'll need for weaving include a desk stapler, scissors, needlenose pliers, spring clamp, measuring tape or folding rule, sharp knife, butter knife and masking tape. first eight or so inches of the new warp over the last eight inches of the old warp and staple the two together (see Photo 2). Now you can thread the first weaver into place between the warp strands (see Photo 3). Before you dive into the other weavers, study Photo 4 for a few minutes. Notice that each new strand of weaver enters into the warp one warp strand forward from the point of entrance of the previous weaver strand. Add gusset strips to fill the triangular sections of the seat (see Photo 5). If you make a mistake with your weavers (and you probably will), nothing is lost. Simply pull out weavers until you reach the mistake.Then reweave. Also, an occasional weaving mistake is a cosmetic issue only. If, after you've finished the seat, you find a weaving mistake in the first few rows of weavers, it isn't structurally necessary to unweave the whole seat and start the process over again. Although I splice weavers on both the top and bottom surfaces of chairs, most chairmakers splice on the bottom only.There's no need to staple the weavers; the tightness of the weave will hold the splice together. Weave the back panel in the same way you wove the seat I recommend that you remove the warp-splice staples on the back of the chair when you're done because the tightness of the weave will hold the splices tight.You can go ahead and remove the staples on the bottom of the seat as well, but I never bother to do this. — Kerry Pierce To form the rocker notches, first define the sides of each notch with a thin hacksaw. Then drill through the posts with a 3/8"-diameter bit at a position that will become the bottom of the notch. Finish by splitting out the waste with a chisel and paring the walls as needed. (Editor's note: These wedges must run approximately perpendicular to the grain direction of the arms.) When laying them out, rest a straightedge across the tops of the front posts parallel with the front rungs and draw centerlines for these wedge slots. Using a fine backsaw, carefully slice the wedge slots. Once the arms have been dry-fit, apply glue to the tenons and into the mortises and work the arms into position. Apply glue to the wedges and tap them home. Trim the tenons and wedges flush. To cut the rocker notches in the bottoms of the posts, clamp the inverted rocker to your bench (see the photo on page 67). Draw a line connecting the centers of the front and back posts to accurately mark the centers of the rocker notches you'll cut next. The notches in the front post should be cut IV deep on the front and back faces of the post. The notches for the back posts 68 February 2008 Woodworker's Journal |


