Woodworker's Journal 2008-32-3, страница 71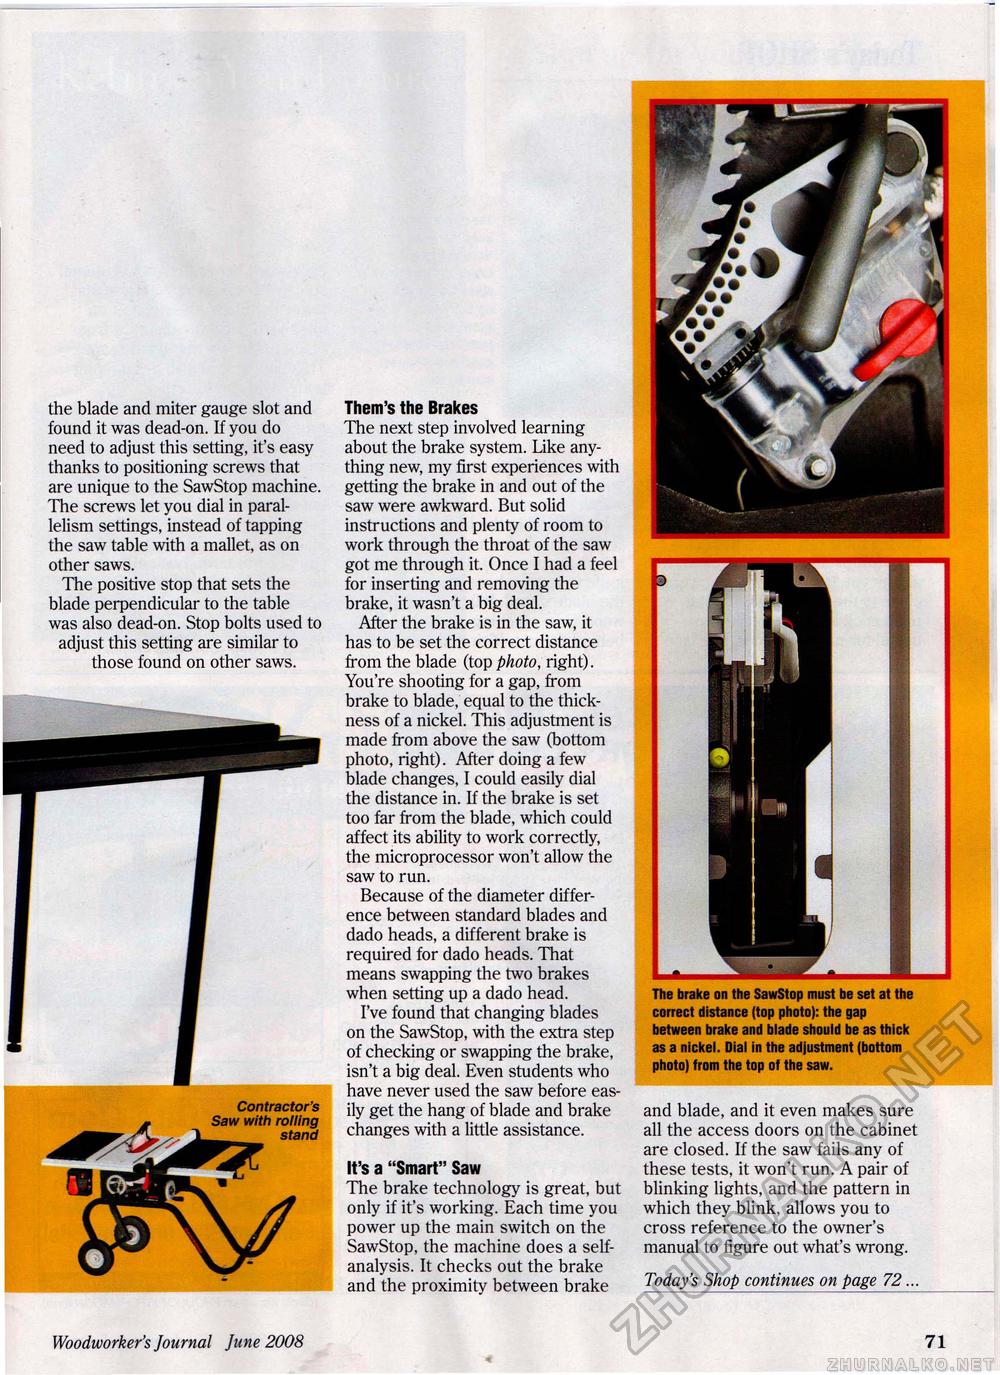
the blade and miter gauge slot and found it was dead-on. If you do need to adjust this setting, it's easy thanks to positioning screws that are unique to the SawStop machine. The screws let you dial in parallelism settings, instead of tapping the saw table with a mallet, as on other saws. The positive stop that sets the blade perpendicular to the table was also dead-on. Stop bolts used to adjust this setting are similar to those found on other saws. Contractor's Saw with rolling stand Them's the Brakes The next step involved learning about the brake system. Like anything new, my first experiences with getting the brake in and out of the saw were awkward. But solid instructions and plenty of room to work through the throat of the saw got me through it. Once I had a feel for inserting and removing the brake, it wasn't a big deal. After the brake is in the saw, it has to be set the correct distance from the blade (top photo, right). You're shooting for a gap, from brake to blade, equal to the thickness of a nickel. This adjustment is made from above the saw (bottom photo, right). After doing a few blade changes, I could easily dial the distance in. If the brake is set too far from the blade, which could affect its ability to work correctly, the microprocessor won't allow the saw to run. Because of the diameter difference between standard blades and dado heads, a different brake is required for dado heads. That means swapping the two brakes when setting up a dado head. I've found that changing blades on the SawStop, with the extra step of checking or swapping the brake, isn't a big deal. Even students who have never used the saw before easily get the hang of blade and brake changes with a little assistance. It's a "Smart" Saw The brake technology is great, but only if it's working. Each time you power up the main switch on the SawStop, the machine does a self-analysis. It checks out the brake and the proximity between brake The brake on the SawStop must be set at the correct distance (top photo): the gap between brake and blade should be as thick as a nickel. Dial in the adjustment (bottom photo) from the top of the saw. and blade, and it even makes sure all the access doors on the cabinet are closed. If the saw fails any of these tests, it won't run. A pair of blinking lights, and the pattern in which they blink, allows you to cross reference to the owner's manual to figure out what's wrong. Today's Shop continues on page 72... Woodworker's Journal June 2008 71 |


