Woodworker's Journal 2008-32-5, страница 82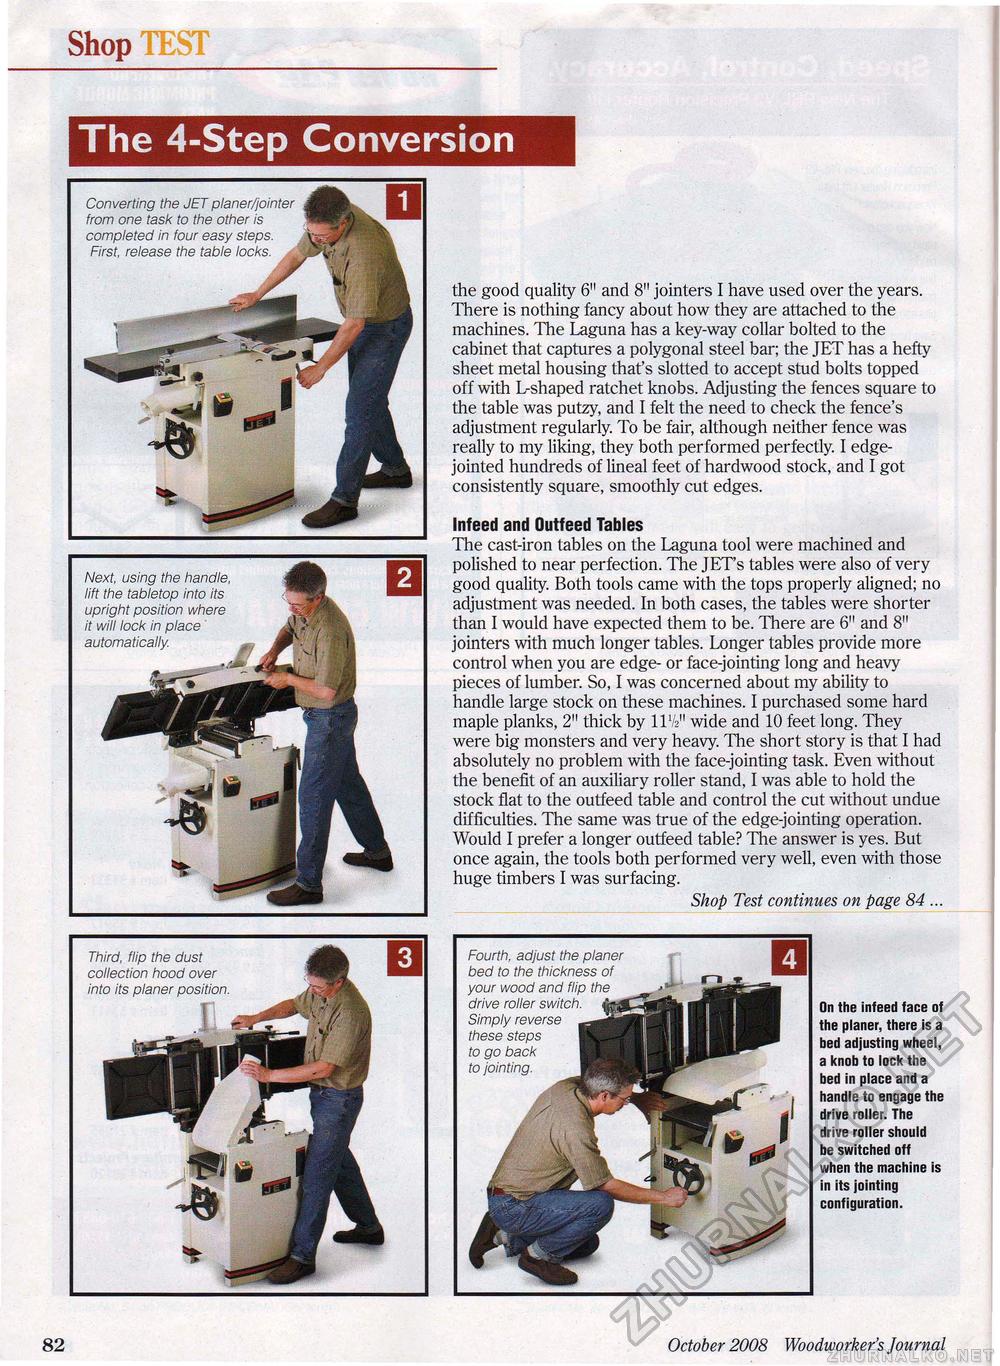
Shop IE The 4-Step Conversion 82 October 2008 Woodworker's Journal the good quality 6" and 8" jointers I have used over the years. There is nothing fancy about how they are attached to the machines. The Laguna has a key-way collar bolted to the cabinet that captures a polygonal steel bar; the JET has a hefty sheet metal housing that's slotted to accept stud bolts topped off with L-shaped ratchet knobs. Adjusting the fences square to the table was putzy, and I felt the need to check the fence's adjustment regularly. To be fair, although neither fence was really to my liking, they both performed perfectly. I edge-jointed hundreds of lineal feet of hardwood stock, and I got consistently square, smoothly cut edges. Infeed and Outfeed Tables The cast-iron tables on the Laguna tool were machined and polished to near perfection. The JET's tables were also of very good quality. Both tools came with the tops properly aligned; no adjustment was needed. In both cases, the tables were shorter than I would have expected them to be. There are 6" and 8" jointers with much longer tables. Longer tables provide more control when you are edge- or face-jointing long and heavy pieces of lumber. So, I was concerned about my ability to handle large stock on these machines. I purchased some hard maple planks, 2" thick by ll1// wide and 10 feet long. They were big monsters and very heavy. The short story is that I had absolutely no problem with the face-jointing task. Even without the benefit of an auxiliary roller stand, I was able to hold the stock flat to the outfeed table and control the cut without undue difficulties. The same was true of the edge-jointing operation. Would I prefer a longer outfeed table? The answer is yes. But once again, the tools both performed very well, even with those huge timbers I was surfacing. Shop Test continues on page 84 ... Third, flip the dust collection hood over into its planer position. Next, using the handle, lift the tabletop into its upright position where it will lock in place automatically. Fourth, adjust the planer bed to the thickness of your wood and flip the drive roller switch. Simply reverse these steps to go back to jointing. On the infeed face of the planer, there is a bed adjusting wheel, a knob to lock the bed in place and a handle to engage the drive roller. The drive roller should be switched off when the machine is in its jointing configuration. Converting the JET planer/jointer from one task to the other is completed in four easy steps. First, release the table locks. |


