Woodworker's Journal 2008-32-6, страница 97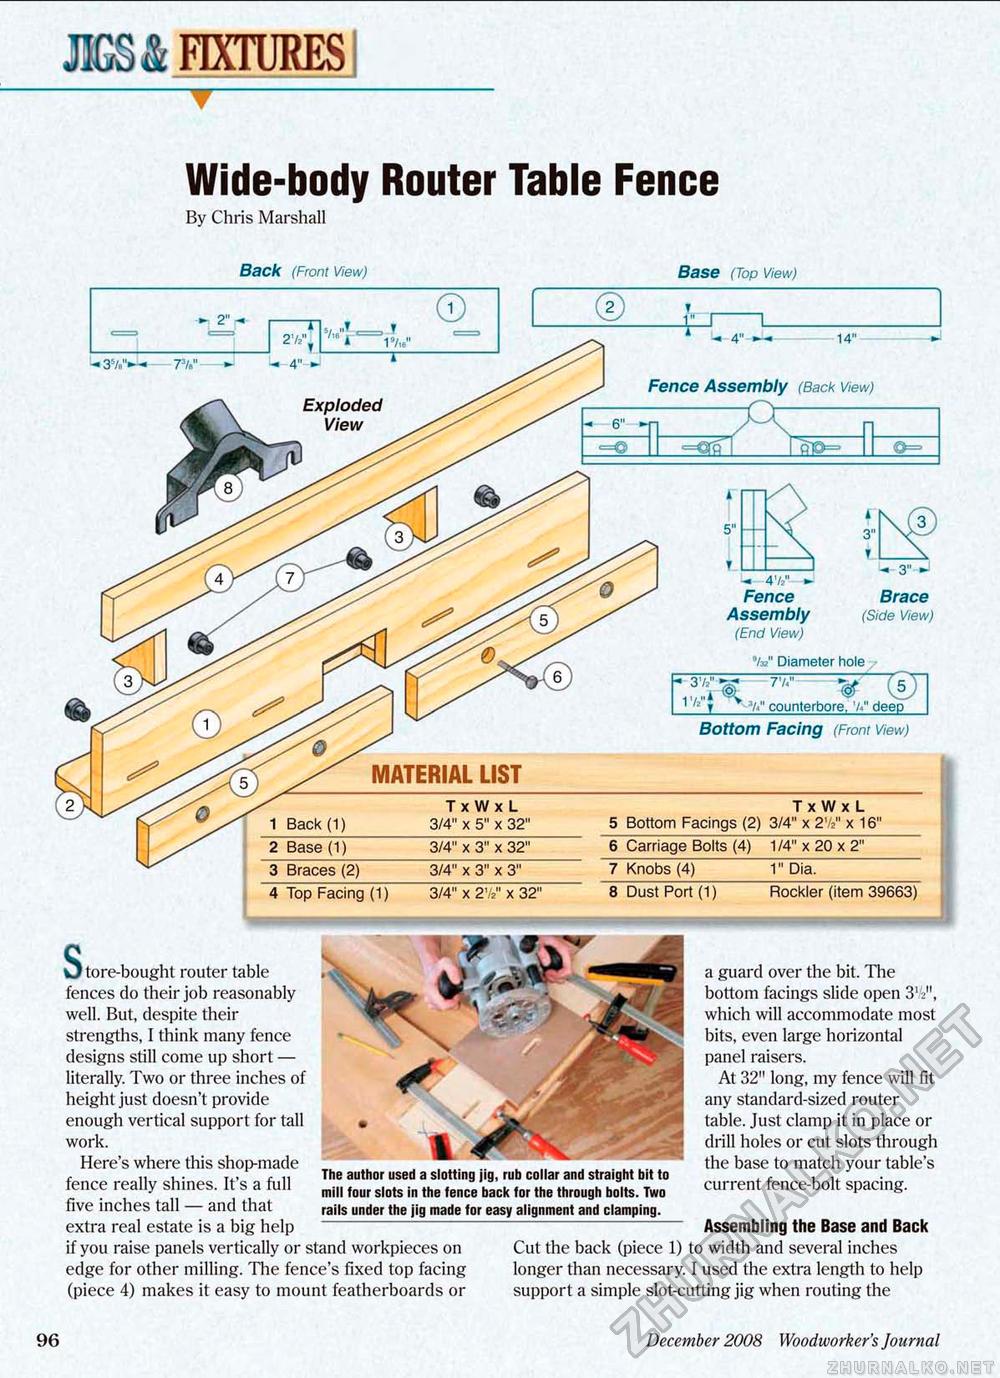
JBS& FIXTURES | -▼- Wide-body Router Table Fence By Chris Marshall Back (Front View) Base (Top View) 3" U-3"' «J Fence Brace Assembly (Side View) (End View) ®/3z" Diameter hole t counterbore. 'a." deep J-L_ Fence Assembly (Back View) 2 Base (1) 3/4" x 3" x 32" 6 Carriage Bolts (4) 1/4" x 20 x 2" 3 Braces (2) 3/4" x 3" x 3" 7 Knobs (4) " 1" Dia, 4 Top Facing (1) 3/4" x 27s" x 32" 8 Dust Port (1) Rockier (item 39663) O tore-bought router table fences do their job reasonably well. But, despite their strengths, I think many fence designs still come up short — literally. Two or three inches of height just doesn't provide enough vertical support for tall work. Here's where this shop-made fence really shines. It's a full five inches tall — and that extra real estate is a big help if you raise panels vertically or stand workpieces on edge for other milling. The fence's fixed top facing (piece 4} makes it easy to mount featherboards or The author used a slotting jig, rub collar and straight hit to mill four slots in the fence back for the through bolts. Two rails under the jig made for easy alignment and clamping. a guard over the bit. The bottom facings slide open 31 l.-", which will accommodate most bits, even large horizontal panel raisers. At 32" long, my fence will fit any standard-sized router table. Just clamp it in place or drill holes or cut slots through the base to match your table's current fence-bolt spacing. Assembling the Base and Back Cut the back (piece 1) to width and several inches longer than necessary. I used the extra length to help support a simple slot-cutting jig when routing the ► 2V- 35V'»— 73/a"---«» 1 4" - 1 Back (1) Tx Wx L 3/4" x 5" x 32" Tx W x L 5 Bottom Facings (2) 3/4" x 27^ x 16" Exploded View MATERIAL LIST Bottom Facing (Front View) 96 December 2008 Woodworker's Journal |


