Woodworker's Journal 2011-35-1, страница 70
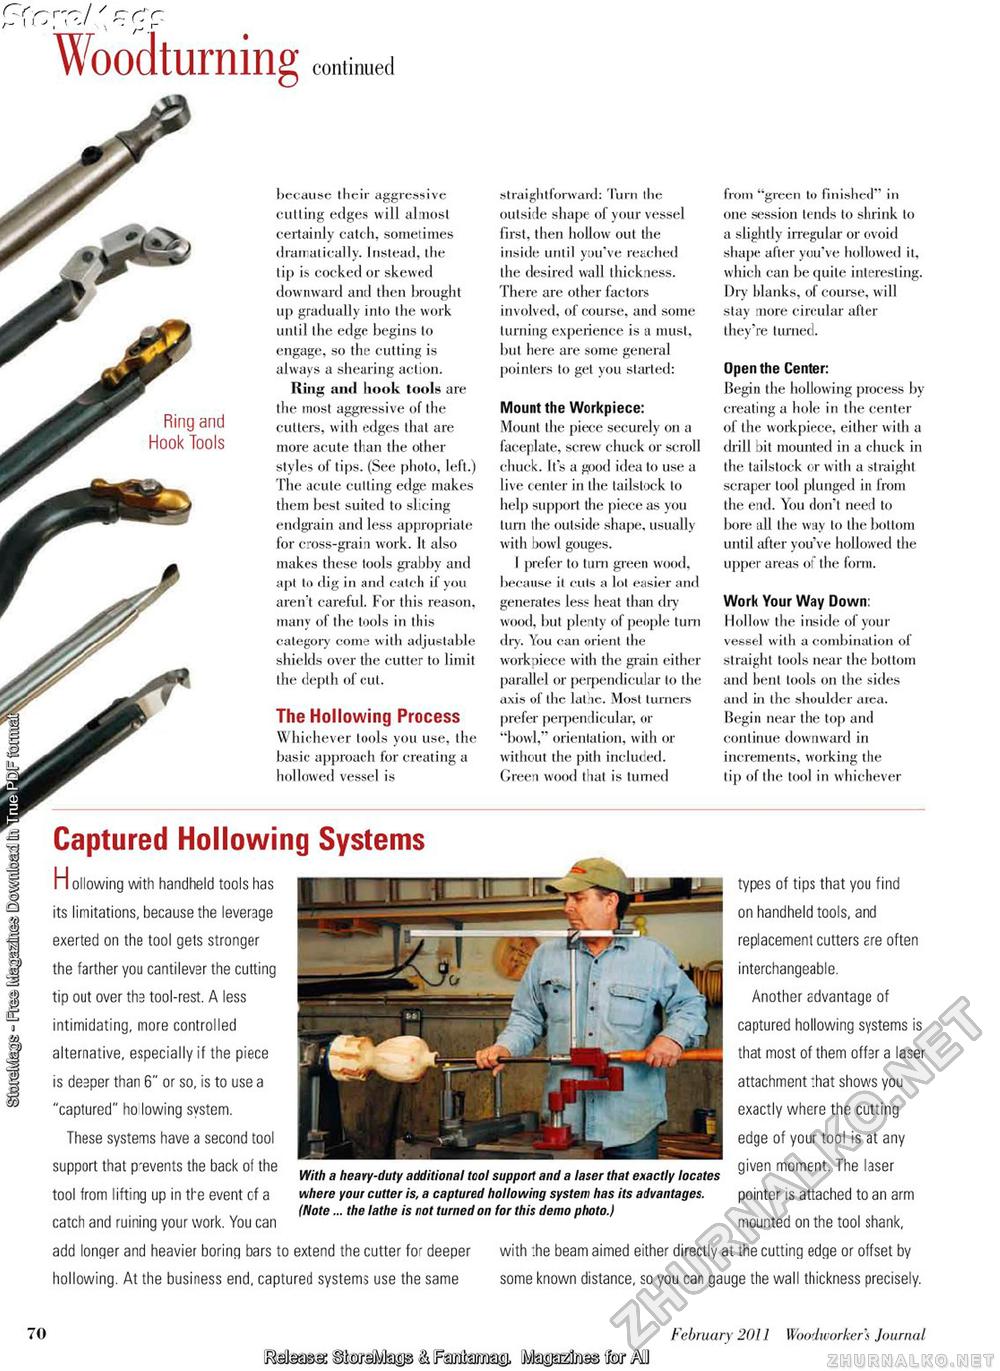
r77/ 7 zrrt r. ' \ ' r> r Woodturning continued because their aggressive cutting edges will almost certainly catch, sometimes dramatically. Instead, the tip is cocked or skewed downward anil then brought up gradually into the work until the edge begins to engage, so the cutting is always a shearing action. Ring and hook tools are the most aggressive of the cutters, with edges that are more acute than the other styles of tips. (See photo, left.) The acute cutting edge makes them best suited to slicing endgrain and less appropriate for cross-grain work. It also makes these tools grabby and apt to dig in and catch if you aren't careful. For this reason, many of the tools in this category come with adjustable shields over the cutter to limit the depth of cut. The Hollowing Process Whichever tools you use, the basic approach for creating a hollowed vessel is straightforward: Turn the outside shape of your vessel first, then hollow out the inside until you've reached the desired wall thickness. There are other factors involved, of course, and some turning experience is a must, but here are some general pointers to get you started: Mount the Workpiece: Mount the piece securely on a faceplate, screw chuck or scroll chuck. It's a good idea to use a live center in the tailstock to help support the piece as you turn the outside shape, usually with bowl gouges. I prefer to turn green wood, because it cuts a lot easier and generates less heat than dry wood, but plenty of people turn dry . You can orient the workpiece with the grain either parallel or perpendicular to the axis of the lathe. Most turners prefer perpendicular, or "bowl," orientation, with or without the pith included. Green wood that is turned from "green to finished" in one session tends to shrink to a slightly irregular or ovoid shape after you've hollowed it, which can be quite interesting. Dry blanks, of course, will stay more circular after they're turned. Open the Center: Begin the hollowing process by creating a hole in the center of the workpiece, either with a drill bit mounted in a chuck in the tailstock or with a straight scraper tool plunged in from the end. You don't need to lx>re all the way to the bottom until after you've hollowed the upper areas of the form. Work Your Way Down: Hollow the inside of your vessel with a combination ol straight tools near the bottom and bent tools on the sides and in the shoulder area. Begin near the top and continue downward in increments, working the tip of the tool in whichever types of tips that you find on handheld tools, and replacement cutters are often interchangeable. Another advantage of captured hollowing systems is that most of them offer a laser attachment that shows you exactly where the cutting edge of your tool is at any given moment. The laser pointer is attached to an arm mounted on the tool shank, Captured Hollowing Systems H ollowing with handheld tools has its limitations, because the leverage exerted on the tool gets stronger the farther you cantilever the cutting tip out over the tool-rest. A less intimidating, more controlled alternative, especially if the piece is deeper than 6" or so, is to use a "captured" ho lowing system. These systems have a second tool support that p-events the back of the tool from lifting up in the event of a catch and ruining your work. You can With a heavy-duty additional tool support and a laser that exactly locates where your cutter is, a captured hollowing system has its advantages. (Note... the lathe is not turned on for this demo photo.) add longer and heavier boring bars to extend the cutter for deeper with :he beam aimed either directly at the cutting edge or offset by hollowing. At the business end, captured systems use the same some known distance, so you can gauge the wall thickness precisely. 70 February 2011 Woodworkers Journal JMaasa: ii^aVkus & IFsmtas© Map^tetorMI |


