Woodworker's Journal fall-2008, страница 38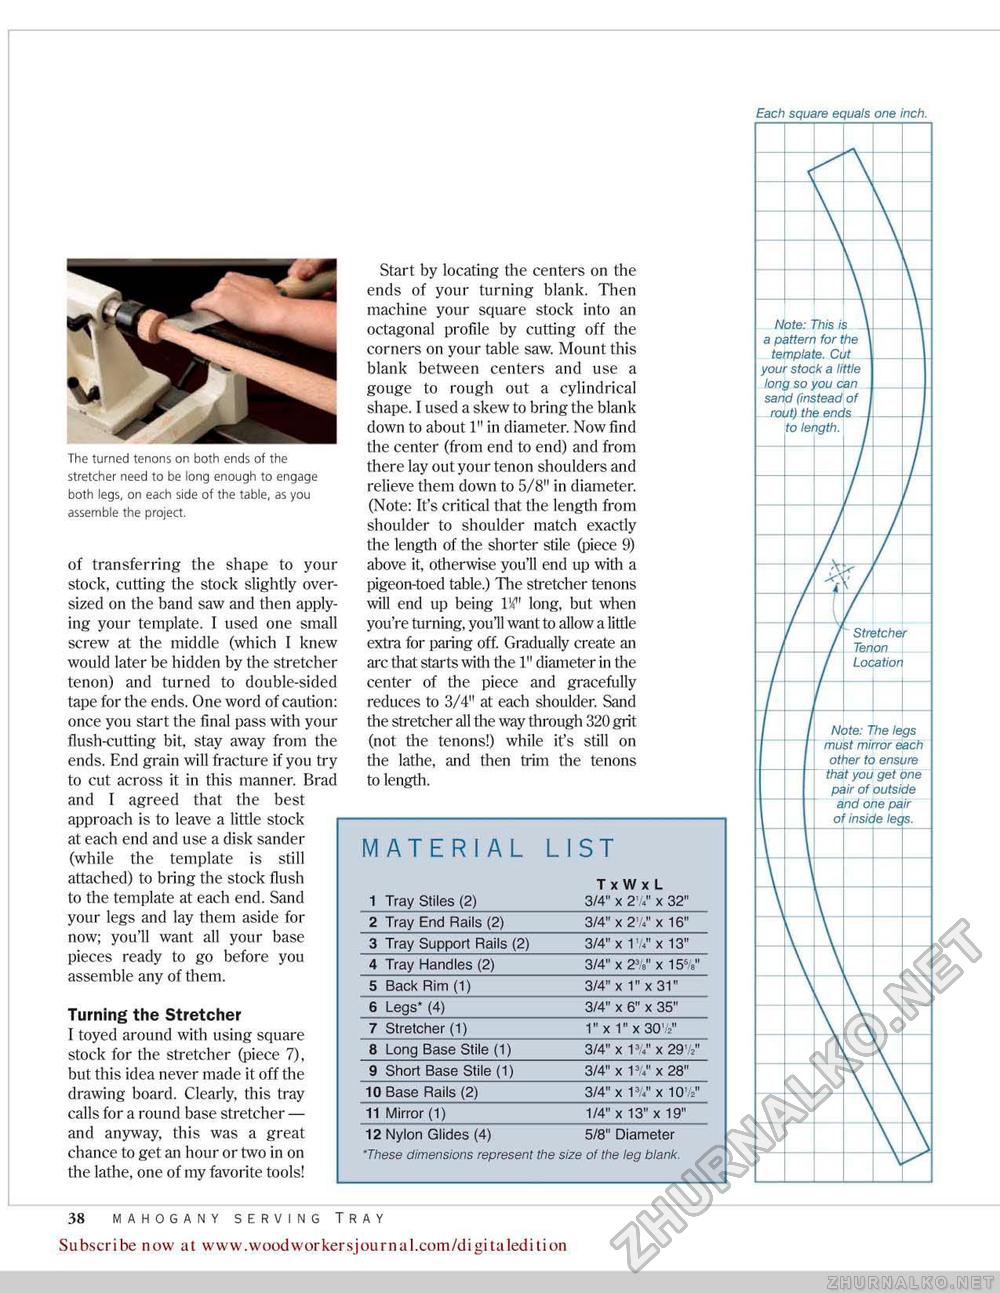
Each square equals one inch. The turned tenons on both ends of the stretcher need to be long enough to engage both legs, on each side of the Table, as you assemble the project. of transferring the shape to your stock, cutting the stock slightly oversized on the band saw and then applying your template. I used one small screw at the middle (which I knew would later be hidden by the stretcher tenon) and turned to double-sided tape for the ends. One word of caution: once you start the final pass with your flush-cutting hit, stay away from the ends. End grain will fracture if you try to cut across it in this manner. Brad and T agreed that the best approach is to leave a little stock at each end and use a disk sander (while the template is still attached) to bring the stock flush to the template at each end. Sand your legs and lay them aside for now; you'll want all your base pieces ready to go before you assemble any of them. Turning the Stretcher I toyed around with using square stock for the stretcher (piece 7), but this idea never made it off the drawing board. Clearly, this tray calls for a round base stretcher — and anyway, this was a great chance to get an hour or two in on the lathe, one of my favorite tools! Start by locating the centers on the ends of your turning blank. Then machine your square stock into an octagonal profile by cutting off the corners on your table saw. Mount this blank between centers and use a gouge to rough out a cylindrical shape. I used a skew to bring the blank down to about 1" in diameter. Now find the center (from end to end) and from there lay out your tenon shoulders and relieve them down to 5/8" in diameter. (Note: It's critical that the length from shoulder to shoulder match exactly the length of the shorter stile (piece 9) above it, otherwise you'll end up with a pigeon-toed table.) The stretcher tenons will end up being IV long, but when you're turning, you'll want to allow a little extra for paring off. Gradually create an arc that starts with the 111 diameter in the center of the piece and gracefully reduces to 3/4" at each shoulder. Sand the stretcher all the way through 320 grit (not the tenons!) while it's still on the lathe, and then trim the tenons to length.
38 MAHOGANY SERVING TRAY Subscribe now at www.wpodworkersjournal.com/digitaledition |
||||||||||||||||||||||||||||||||||||||||||||||||||||||||||||||||||||||||||||||||||||||||||||||||||||||||||||||||||||||||||||||||||||||||||||||||||||||||||||||||||||||||||||||||||||||||||||||||||||||||||||||||||||||||||||||||||||||


