Woodworker's Journal Wall-Shelf-with-Pegs, страница 4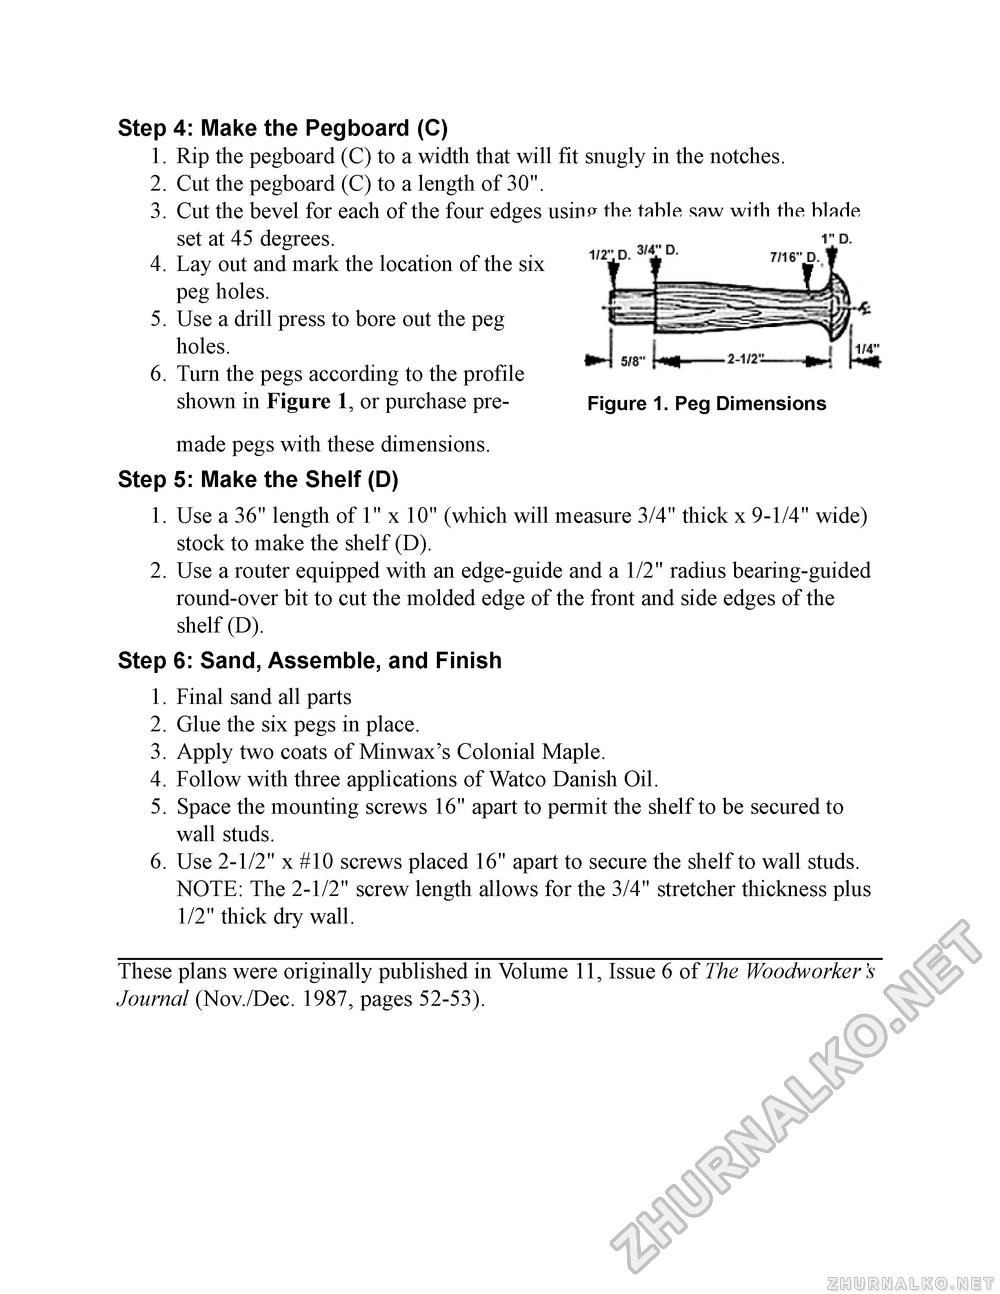
Step 4: Make the Pegboard (C)1. Rip the pegboard (C) to a width that will fit snugly in the notches. 2. Cut the pegboard (c) to a length of 30". 3. Cut the bevel for each of the four edges usin^ the table saw with the blade set at 45 degrees. 4. Lay out and mark the location of the six peg holes. 5. Use a drill press to bore out the peg holes. 6. Turn the pegs according to the profile shown in Figure 1, or purchase pre- Figure 1. Peg Dimensions made pegs with these dimensions. Step 5: Make the Shelf (D) 1. Use a 36" length of 1" x 10" (which will measure 3/4" thick x 9-1/4" wide) stock to make the shelf (D). 2. Use a router equipped with an edge-guide and a 1/2" radius bearing-guided round-over bit to cut the molded edge of the front and side edges of the shelf (D). Step 6: Sand, Assemble, and Finish1. Final sand all parts 2. Glue the six pegs in place. 3. Apply two coats of Minwax's Colonial Maple. 4. Follow with three applications of Watco Danish Oil. 5. Space the mounting screws 16" apart to permit the shelf to be secured to wall studs. 6. Use 2-1/2" x #10 screws placed 16" apart to secure the shelf to wall studs. NOTE: The 2-1/2" screw length allows for the 3/4" stretcher thickness plus 1/2" thick dry wall. These plans were originally published in Volume 11, Issue 6 of The Woodworker S Journal (Nov./Dec. 1987, pages 52-53). |


