Woodworker's Journal winter-2009, страница 35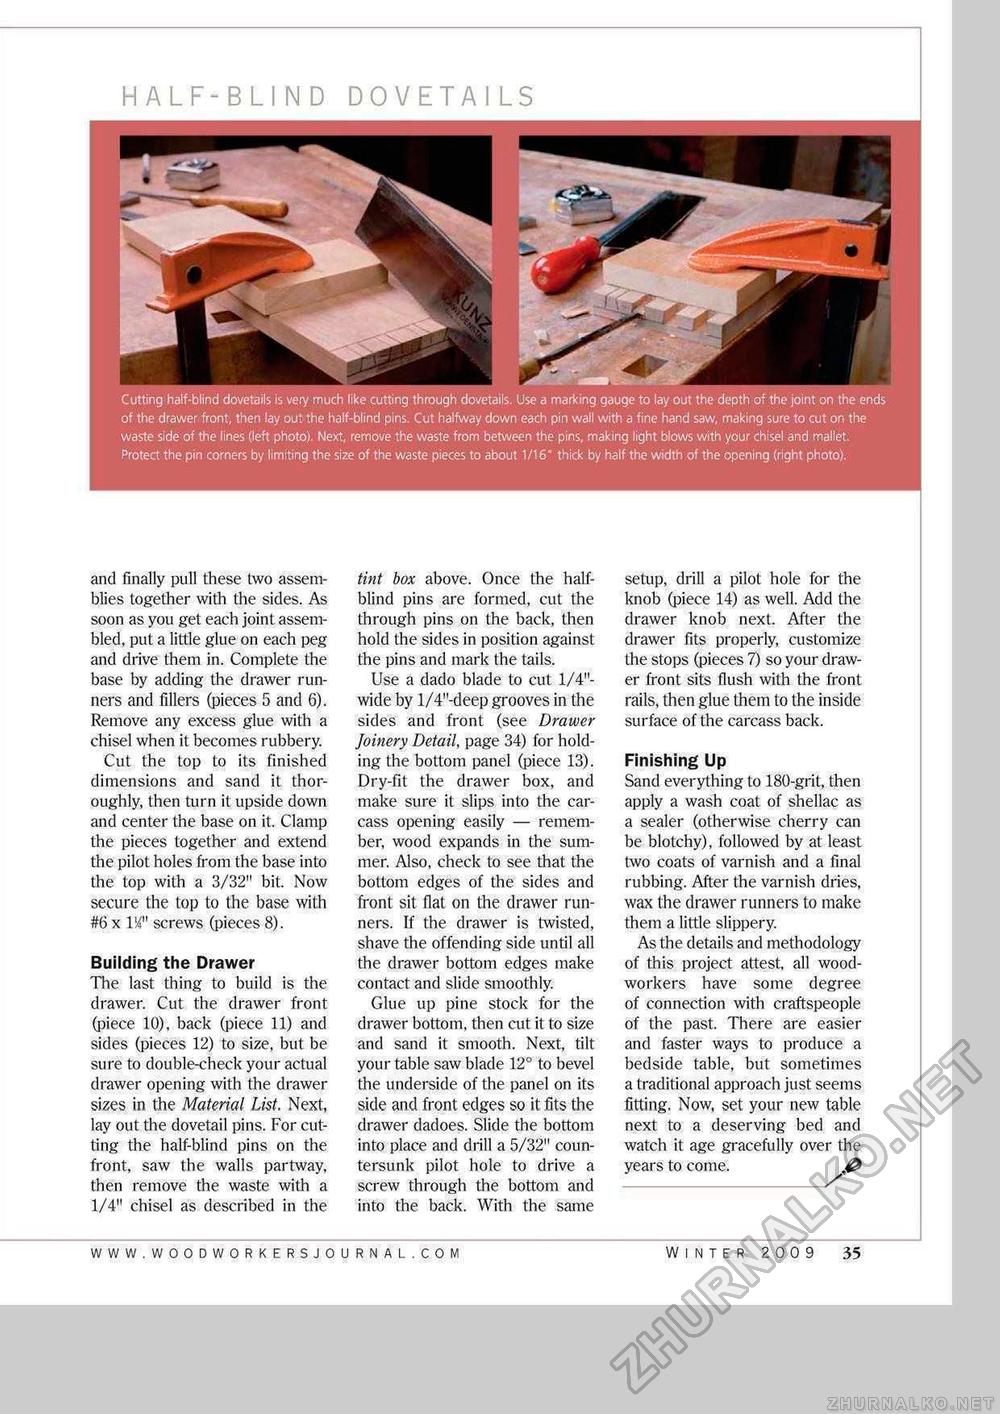
half-blind dovetails Cutting half-blind dovetails is very much like cutting through dovetails. Use a marking gauge to lay out the depth of the joint on the ends of the drawer front, then lay out the half-blind pins. Cut halfway down each pin wall with a fine hand saw, making sure to cut on the waste side of the lines (left photo). Next, remove the waste from between the pins, making light blows with your chisel and mallet. Protect the pin corners by limiting the size of the waste pieces to about 1/16" thick by half the width of the opening (right photo). and finally pull these two assemblies together with the sides. As soon as you get each joint assembled, put a little glue on each peg and drive them in. Complete the base by adding the drawer runners and fillers (pieces 5 and 6). Remove any excess glue with a chisel when it becomes rubbery. Cut the top to its finished dimensions and sand it thoroughly, then turn it upside down and center the base on it. Clamp the pieces together and extend the pilot holes from the base into the top with a 3/32" bit. Now secure the top to the base with #6 x IK" screws (pieces 8). Building the Drawer The last thing to build is the drawer. Cut the drawer front (piece 10), back (piece 11) and sides (pieces 12) to size, but be sure to double-check your actual drawer opening with the drawer sizes in the Material List. Next, lay out the dovetail pins. For cutting the half-blind pins on the front, saw the walls partway, then remove the waste with a 1/4" chisel as described in the tint box above. Once the half-blind pins are formed, cut the through pins on the back, then hold the sides in position against the pins and mark the tails. Use a dado blade to cut 1/4"-wide by l/4"-deep grooves in the sides and front (see Drawer Joinery Detail, page 34) for holding the bottom panel (piece 13). Dry-fit the drawer box, and make sure it slips into the carcass opening easily — remember, wood expands in the summer. Also, check to see that the bottom edges of the sides and front sit fiat on the drawer runners. If the drawer is twisted, shave the offending side until all the drawer bottom edges make contact and slide smoothly. Glue up pine stock for the drawer bottom, then cut it to size and sand it smooth. Next, tilt your table saw blade 12° to bevel the underside of the panel on its side and front edges so it fits the drawer dadoes. Slide the bottom into place and drill a 5/32" countersunk pilot hole to drive a screw through the bottom and into the back. With the same setup, drill a pilot hole for the knob (piece 14) as well. Add the drawer knob next. After the drawer fits properly, customize the stops (pieces 7) so your drawer front sits flush with the front rails, then glue them to the inside surface of the carcass back. Finishing Up Sand everything to 180-grit, then apply a wash coat of shellac as a sealer (otherwise cherry can be blotchy), followed by at least two coats of varnish and a final rubbing. After the varnish dries, wax the drawer runners to make them a little slippery. As the details and methodology of this project attest, all woodworkers have some degree of connection with craftspeople of the past. There are easier and faster ways to produce a bedside table, but sometimes a traditional approach just seems fitting. Now, set your new table next to a deserving bed and watch it age gracefully over the years to come. WINTER 2009 35 |


