Creative Woodworks & crafts 1997-08, страница 23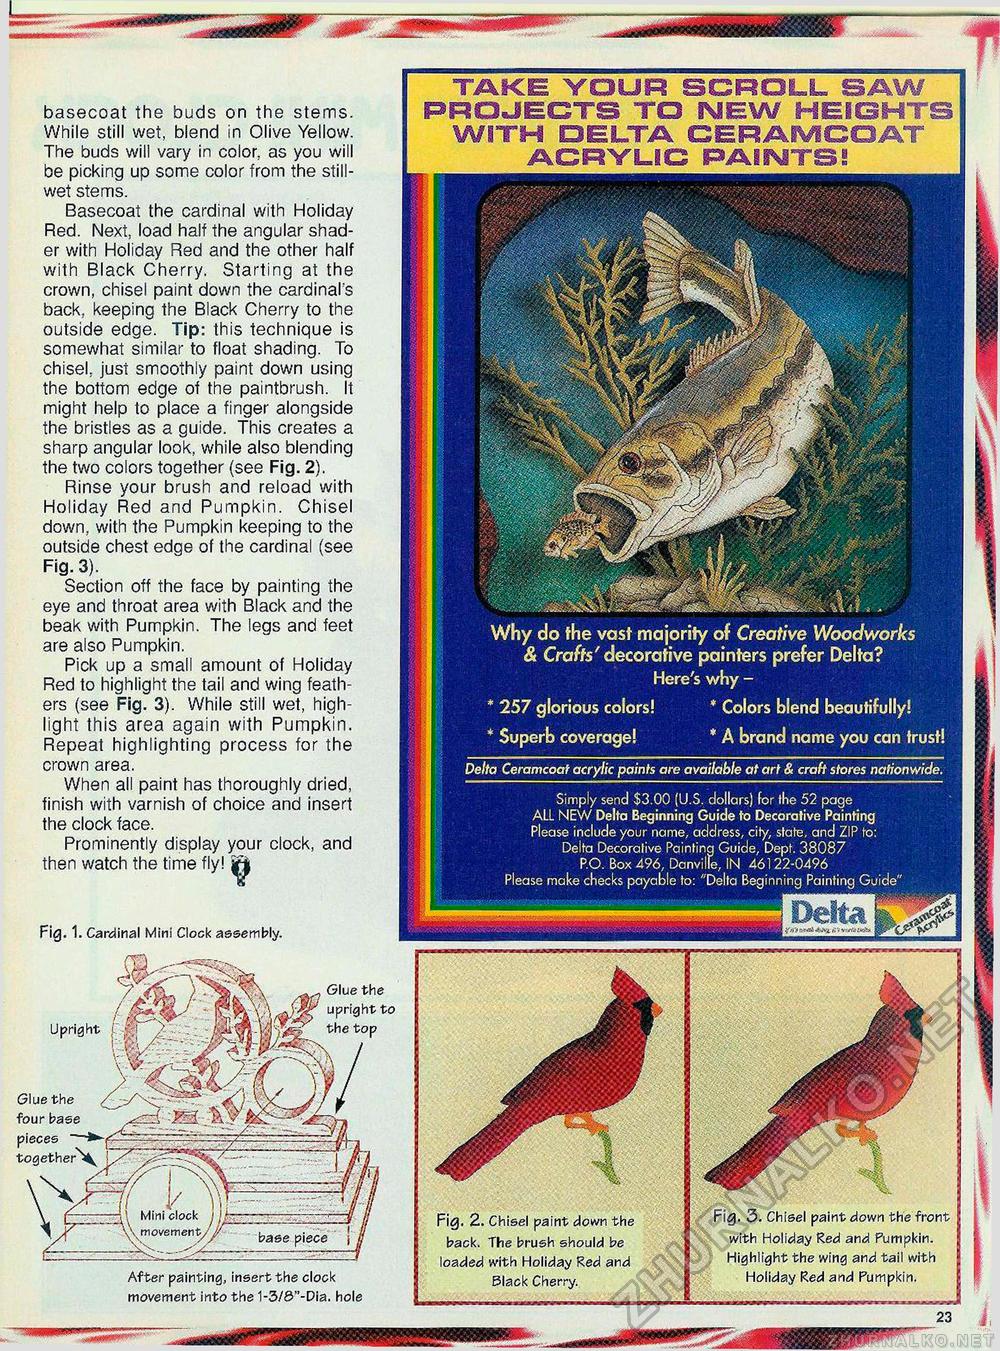
Why do the vast majority of Creative Woodworks & Crafts' decorative painters prefer Delta? Here's why - * 257 glorious colors! * Colors blend beautifully! * Superb coverage! * A brand name you can trust! Delta Ceramcoat acrylic paints are available at art & craft stores nationwide. Simply send $3.00 (U.S. dollars) for the 52 page ALL NEW Delta Beginning Guide to Decorative Painting Please include your name, address, city, state, and ZIP to: Delta Decorative Painting Guide, Dept. 38087 P.O. Box 496, Danville, IN 46122-0496 Please make checks payable to: "Delta Beginning Painting Guide" 8 SfA't ntsii itxvz X V v mo TAKE YOUR SCROLL SAW PROJECTS TO ISSfEW HEIGHTS WITH OEELTA CERAMCOAT ACRYLIC PAIWTS! basecoat the buds on the stems. While still wet, blend in Olive Yellow. The buds will vary in color, as you will be picking up some color from the still-wet stems. Basecoat the cardinal with Holiday Red. Next, load half the angular shad-er with Holiday Red and the other half with Black Cherry. Starting at the crown, chisel paint down the cardinal s back, keeping the Black Cherry to the outside edge. Tip: this technique is somewhat similar to float shading. To chisel, just smoothly paint down using the bottom edge of the paintbrush. It might help to place a finger alongside the bristles as a guide. This creates a sharp angular look, while also blending the two colors together (see Fig. 2). Rinse your brush and reload with Holiday Red and Pumpkin. Chisel down, with the Pumpkin keeping to the outside chest edge of the cardinal (see Fig. 3). Section off the face by painting the eye and throat area with Black and the beak with Pumpkin. The legs and feet are also Pumpkin. Pick up a small amount of Holiday Red to highlight the tail and wing feathers (see Fig. 3). While still wet, highlight this area again with Pumpkin. Repeat highlighting process for the crown area. When all paint has thoroughly dried, finish with varnish of choice and insert the clock face. Prominently display your clock, and then watch the time fly! jf| Fig. 1. Cardinal Mini Clock assembly. Upright Glue the upright to the top Glue the four base pieces together^ After painting, insert the clock movement into the 1-3/0"-Dia. hole Fig. 2. Chisel paint down back. The brush should be loaded with Holiday Red and Black Cherry. |


