Creative Woodworks & crafts 1997-08, страница 20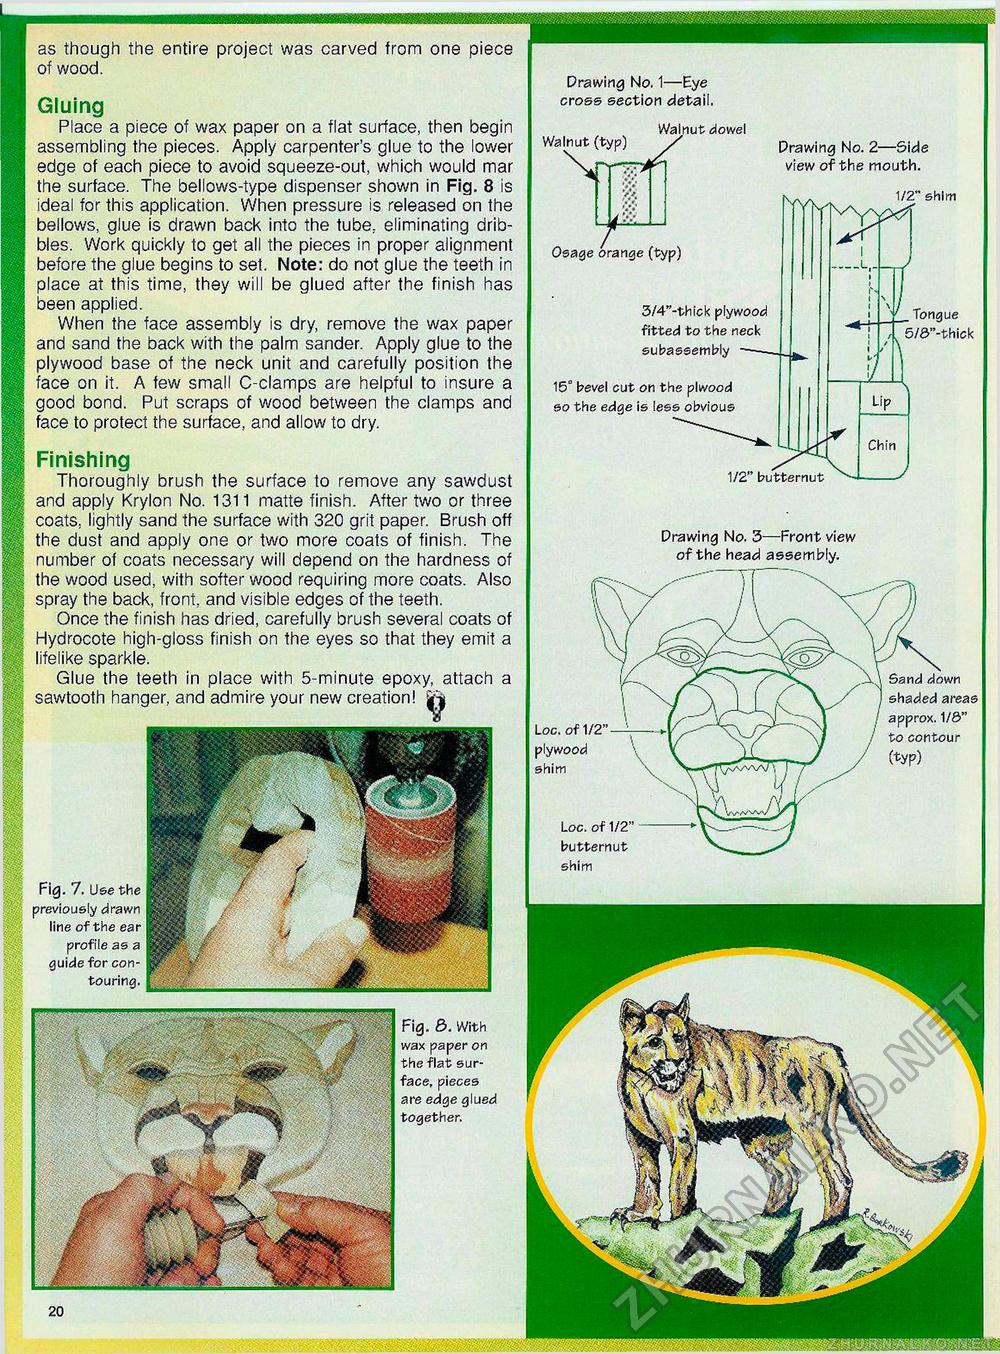
IMMiMRM as though the entire project was carved from one piece of wood. Gluing Place a piece of wax paper on a flat surface, then begin assembling the pieces. Apply carpenter's glue to the lower edge of each piece to avoid squeeze-out, which would mar the surface. The bellows-type dispenser shown in Fig. 8 is ideal for this application. When pressure is released on the bellows, glue is drawn back into the tube, eliminating dribbles. Work quickly to get all the pieces in proper alignment before the glue begins to set. Note: do not glue the teeth in place at this time, they will be glued after the finish has been applied. When the face assembly is dry, remove the wax paper and sand the back with the palm sander. Apply glue to the plywood base of the neck unit and carefully position the face on it. A few small C-clamps are helpful to insure a good bond. Put scraps of wood between the clamps and face to protect the surface, and allow to dry. Drawing No. 1—Eye cross section detail. Walnut (typ) Walnut dowel r~ Drawing No. 2—Side view of the mouth. Osage orange (typ) 3/4"-thick plywood fitted to the neck subassembly 15° bevel cut on the plwood so the edge is less obvious 1shim Tongue Fig. b. With wax paper on the flat surface, pieces are edge glued together. shaded areas approx. 1/S" to contour (typ) Fig. 7. Use the previously drawn line of the ear profile as a guide for contouring. Finishing Thoroughly brush the surface to remove any sawdust and apply Krylon No. 1311 matte finish. After two or three coats, lightly sand the surface with 320 grit paper. Brush off the dust and apply one or two more coats of finish. The number of coats necessary will depend on the hardness of the wood used, with softer wood requiring more coats. Also spray the back, front, and visible edges of the teeth. Once the finish has dried, carefully brush several coats of Hydrocote high-gloss finish on the eyes so that they emit a lifelike sparkle. Glue the teeth in place with 5-minute epoxy, attach a sawtooth hanger, and admire your new creation! Loc. of 1/2" plywood shim Loc. of 1/2" butternut shim Drawing No. 3—Front view of the head assembly. |


