Creative Woodworks & crafts 1997-08, страница 33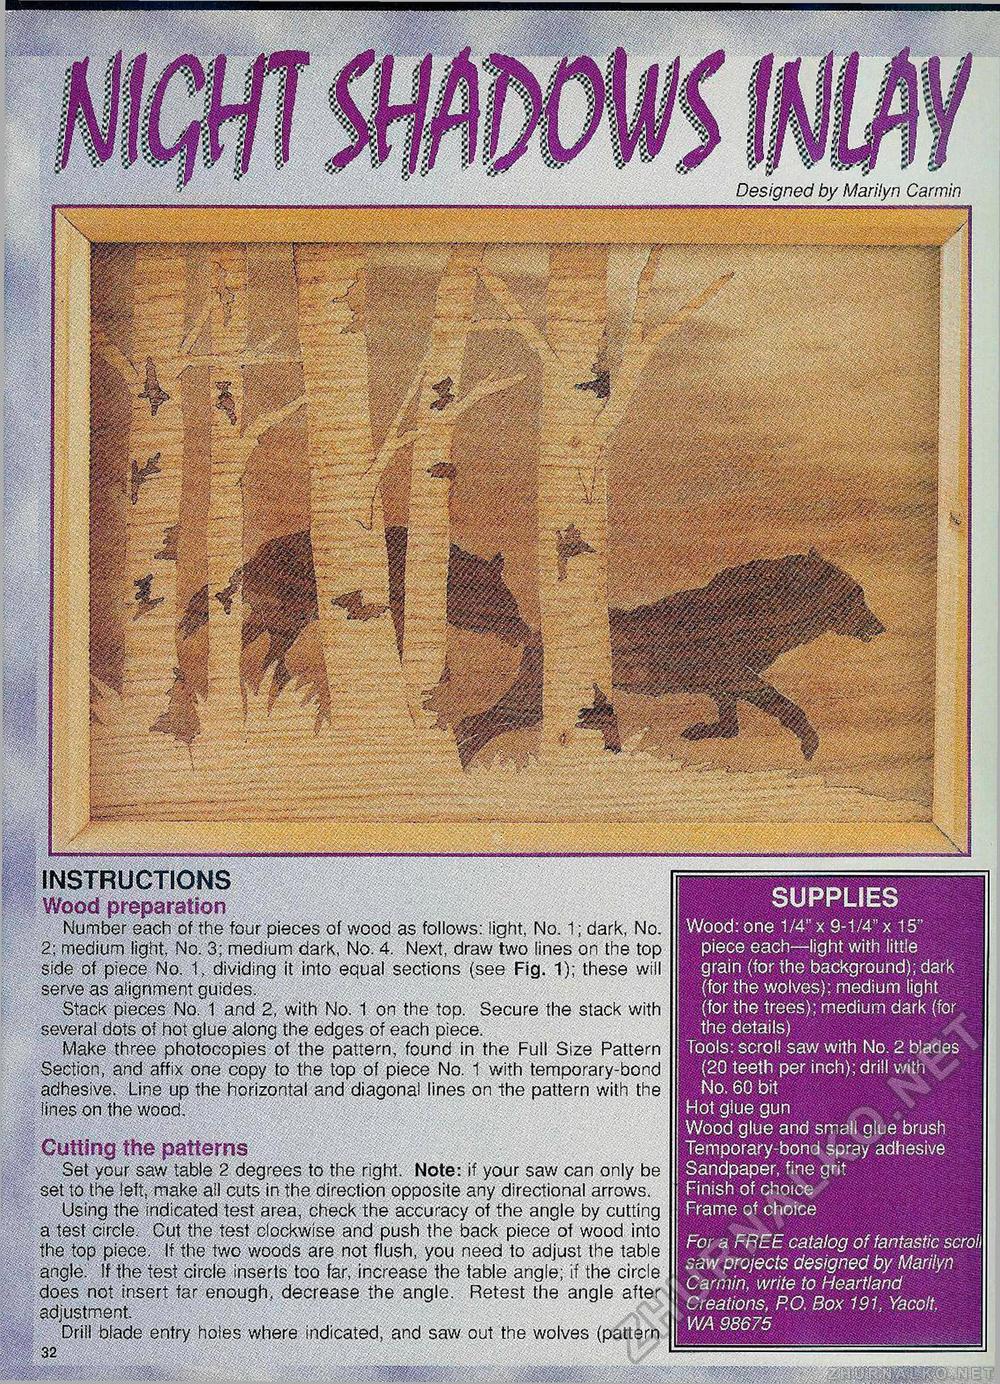
SUPPLIES Wood: one 1/4" x 9-1/4" x 15" piece each—light with little grain (for the background); dark (for the wolves); medium light (for the trees); medium dark (for the details) Tools: scroll saw with No. 2 blades (20 teeth per inch); drill with No. 60 bit Hot glue gun Wood glue and small glue brush Temporary-bond spray adhesive Sandpaper, fine grit Finish of choice Frame of choice For a FREE catalog of fantastic scrolt saw projects designed by Marilyn Carmin, write to Heartland Creations, P.O. Box 191. Yacolt. WA 98675 Designed by Marilyn Carmin ifiiill INSTRUCTIONS Wood preparation Number each of the four pieces of wood as follows: light, No. 1; dark, No. 2; medium light, No. 3; medium dark, No. 4. Next, draw two lines on the top Side of piece No. 1, dividing it into equal sections (see Fig. 1); these will serve as alignment guides. Stack pieces No. 1 and 2, with No. 1 on the top. Secure the stack with several dots of hot glue along the edges of each piece. Make three photocopies of the pattern, found in the Full Size Pattern Section, and affix one copy to the top of piece No. 1 with temporary-bond adhesive. Line up the horizontal and diagonal lines on the pattern with the lines on the wood. Cutting the patterns Set your saw table 2 degrees to the right. Note: if your saw can only be set to the left, make all cuts in the direction opposite any directional arrows. Using the indicated test area, check the accuracy of the angle by cutting a test circle. Cut the test clockwise and push the back piece of wood into the top piece. If the two woods are not flush, you need to adjust the table angle. !f the test circle inserts too far, increase the table angle; if the circle does not insert far enough, decrease the angle. Retest the angle after adjustment. Drill blade entry holes where indicated, and saw out the wolves (pattern 32 |


