Creative Woodworks & crafts 1997-08, страница 39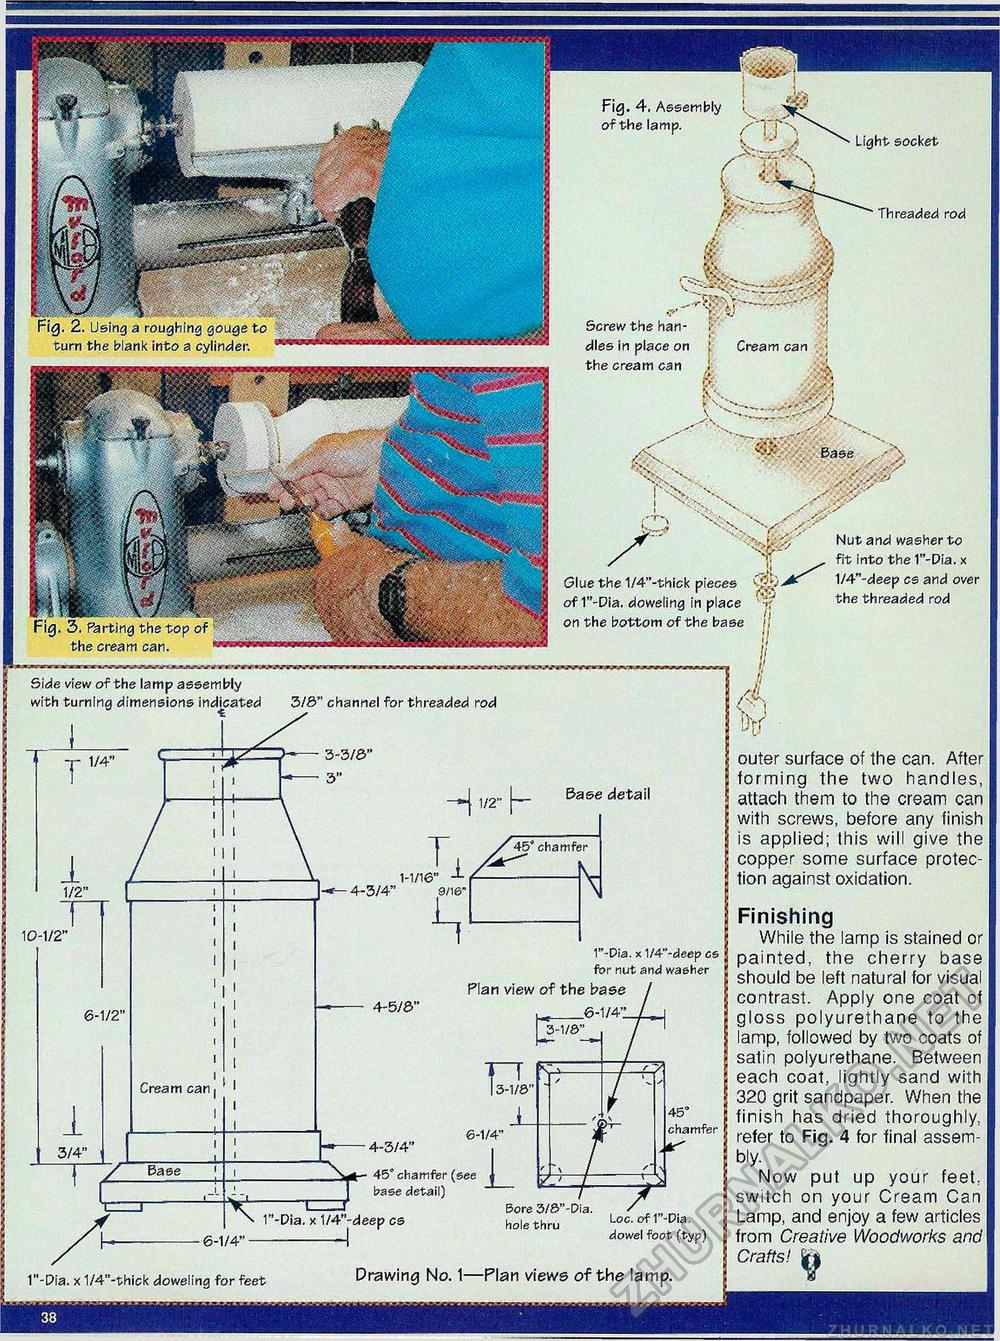
h Fig. 4. Assembly of the lamp. Fig. 2. Using a roughing gouge to turn the blank into a cylinder. Light socket Threaded rod Screw the handles in place on the cream can . 3. Parting the top of the cream can. Glue the 1/4"-thick pieces of 1"-Dia. doweling in place on the bottom of the base Nut and washer to fit into the 1"-Dia. x 1/4"-deep cs and over the threaded rod outer surface of the can. After forming the two handles, attach them to the cream can with screws, before any finish is applied; this will give the copper some surface protection against oxidation. Finishing While the lamp is stained or painted, the cherry base should be left natural for visual contrast. Apply one coat of gloss polyurethane to the lamp, followed by two coats of satin polyurethane. Between each coat, lightly sand with 320 grit sandpaper. When the finish has dried thoroughly, refer to Fig. 4 for final assembly. Now put up your feet, switch on your Cream Can Lamp, and enjoy a few articles from Creative Woodworks and Crafts! 1"-Dia. x 1/4"-thick doweling for feet Drawing No. 1—Plan views of the lamp. 38 |


