Creative Woodworks & crafts 1997-08, страница 42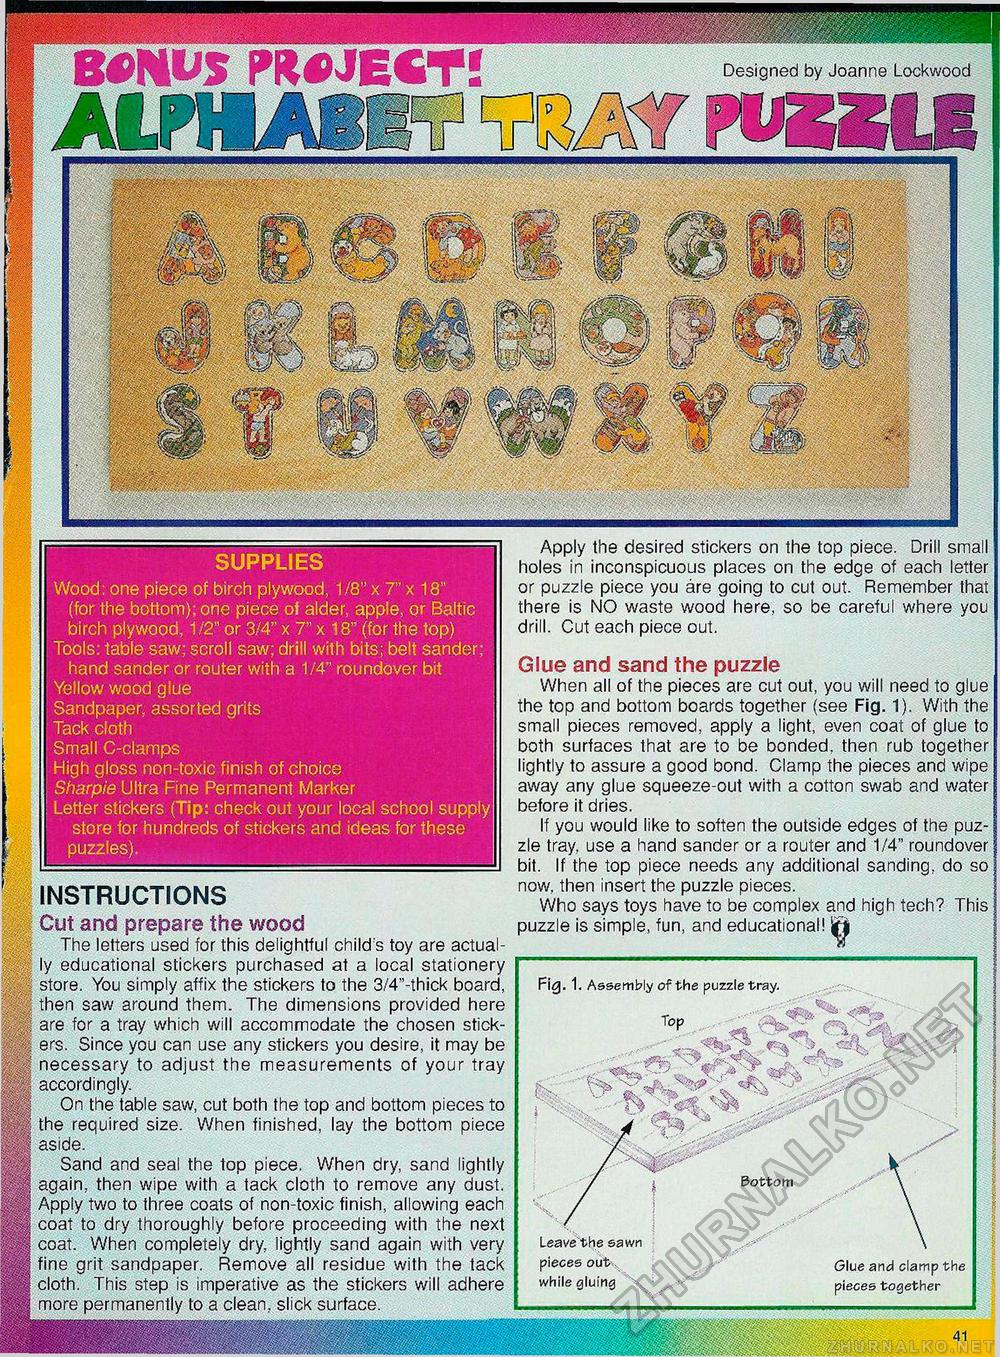
SUPPLIES Wood: one piece of birch plywood, 1/8" x 7"x 18" (for the bottom); one piece of alder, apple, or Baltic birch plywood, 1/2" or 3/4" x 7" x 18" (for the top) Tools: table saw; scroll saw; drill with bits; belt sander; hand sander or router with a 1/4" roundover bit Yellow wood glue Sandpaper, assorted grits Tack cloth Small C-clamps High gloss non-toxic finish of choice Sharpie Ultra Fine Permanent Marker Letter stickers (Tip: check out your local school supply store for hundreds of stickers and ideas for these puzzles). Bottom B»HVS PROJECT! ALPHUDesigned by Joanne Lockwood VZZLE Fig. 1. Assembly of the puzzle tray. pieces while gluing Glue and clamp the pieces together Apply the desired stickers on the top piece. Drill small holes in inconspicuous places on the edge of each letter or puzzle piece you are going to cut out. Remember that there is NO waste wood here, so be careful where you drill. Cut each piece out. Glue and sand the puzzle When all of the pieces are cut out, you will need to glue the top and bottom boards together (see Fig. 1). With the small pieces removed, apply a light, even coat of glue to both surfaces that are to be bonded, then rub together lightly to assure a good bond. Clamp the pieces and wipe away any glue squeeze-out with a cotton swab and water before it dries. If you would like to soften the outside edges of the puzzle tray, use a hand sander or a router and 1/4" roundover bit. If the top piece needs any additional sanding, do so now, then insert the puzzle pieces. Who says toys have to be complex and high tech? This puzzle is simple, fun, and educational! Iff INSTRUCTIONS Cut and prepare the wood The letters used for this delightful child's toy are actually educational stickers purchased at a local stationery ; store. You simply affix the stickers to the 3/4"-thick board, then saw around them. The dimensions provided here are for a tray which will accommodate the chosen stickers. Since you can use any stickers you desire, it may be necessary to adjust the measurements of your tray accordingly. On the table saw, cut both the top and bottom pieces to the required size. When finished, lay the bottom piece aside. Sand and seal the top piece. When dry, sand lightly again, then wipe with a tack cloth to remove any dust. Apply two to three coats of non-toxic finish, allowing each coat to dry thoroughly before proceeding with the next coat. When completely dry, lightly sand again with very fine grit sandpaper. Remove all residue with the tack cloth. This step is imperative as the stickers will adhere more permanently to a clean, slick surface. |


