Creative Woodworks & crafts 1997-08, страница 48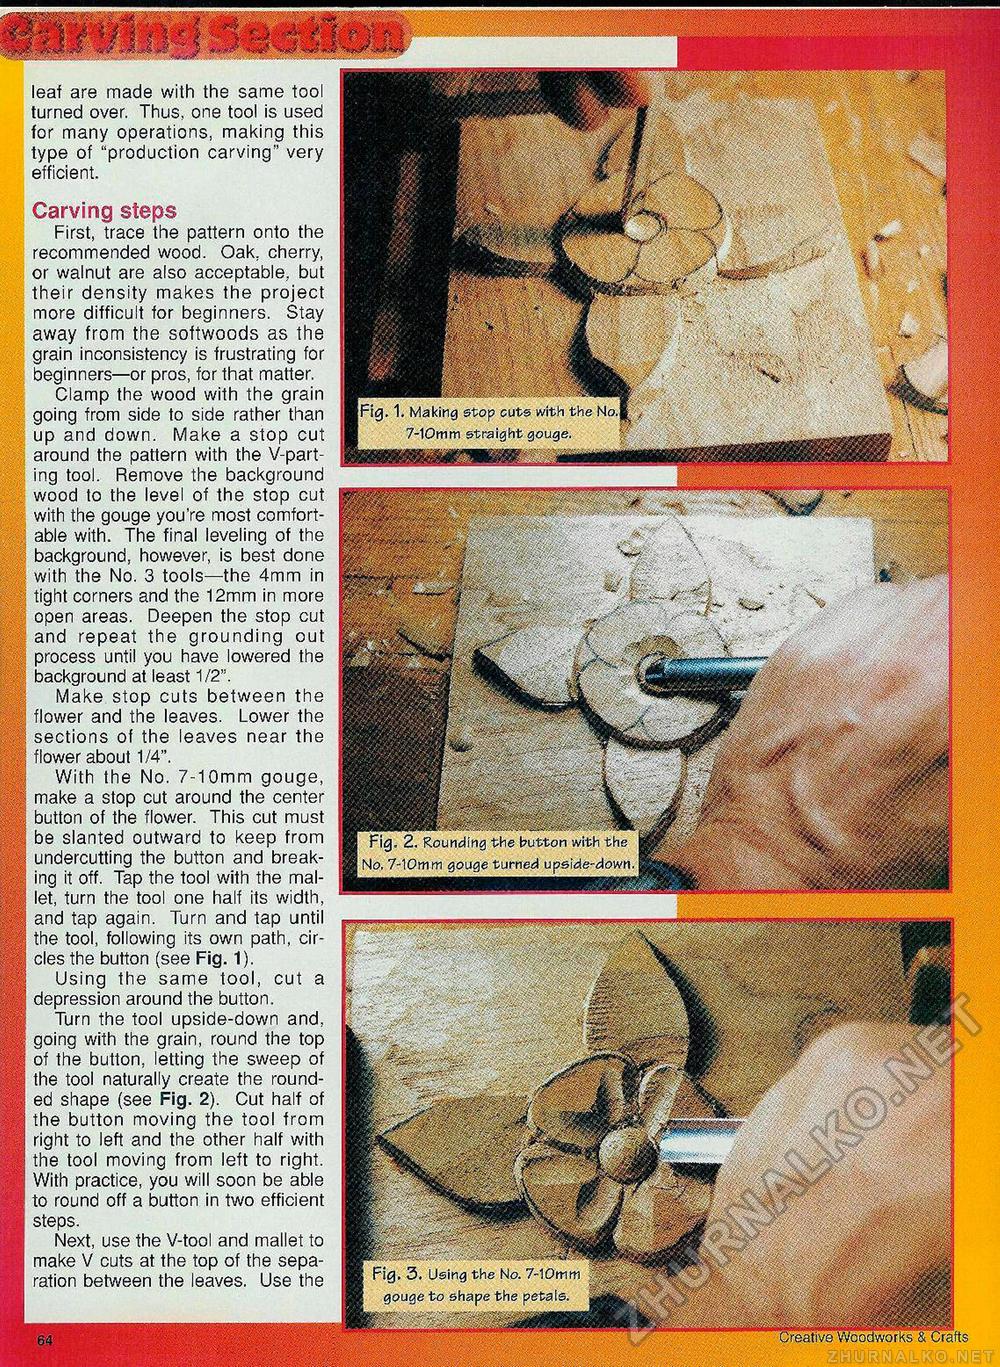
[Fig. 1. Making stop cuts with the Ho. 7-1 Omm straight gouge. Fig. 2. Rounding the button with the No. 7-10mm gouge turned upside-down. W • ssSipS^x v - 1 ' % Fig. 3. Using the No. 7-IOmm gouge to shape the petals. Creative Woodworks & Crafts leaf are made with the same tool turned over. Thus, one tool is used for many operations, making this type of "production carving" very efficient. Carving steps First, trace the pattern onto the recommended wood. Oak. cherry, or walnut are also acceptable, but their density makes the project more difficult for beginners. Stay away from the softwoods as the grain inconsistency is frustrating for beginners—or pros, for that matter. Clamp the wood with the grain going from side to side rather than up and down. Make a stop cut around the pattern with the V-part-ing tool. Remove the background wood to the level of the stop cut with the gouge you're most comfortable with. The final leveling of the background, however, is best done with the No. 3 tools—the 4mm in tight corners and the 12mm in more open areas. Deepen the stop cut and repeat the grounding out process until you have lowered the background at least 1/2". Make stop cuts between the flower and the leaves. Lower the sections of the leaves near the ; flower about 1/4". With the No. 7-10mm gouge, make a stop cut around the center I button of the flower. This cut must j be slanted outward to keep from I undercutting the button and breaking it off. Tap the tool with the mal-I let, turn the tool one half its width, and tap again. Turn and tap until the tool, following its own path, circles the button (see Fig. 1). Using the same tool, cut a depression around the button. Turn the tool upside-down and, going with the grain, round the top of the button, letting the sweep of the tool naturally create the rounded shape (see Fig. 2). Cut half of the button moving the tool from right to left and the other half with the tool moving from left to right. With practice, you will soon be able to round off a button in two efficient steps. Next, use the V-tool and mallet to make V cuts at the top of the separation between the leaves. Use the |


