Creative Woodworks & crafts 1997-08, страница 75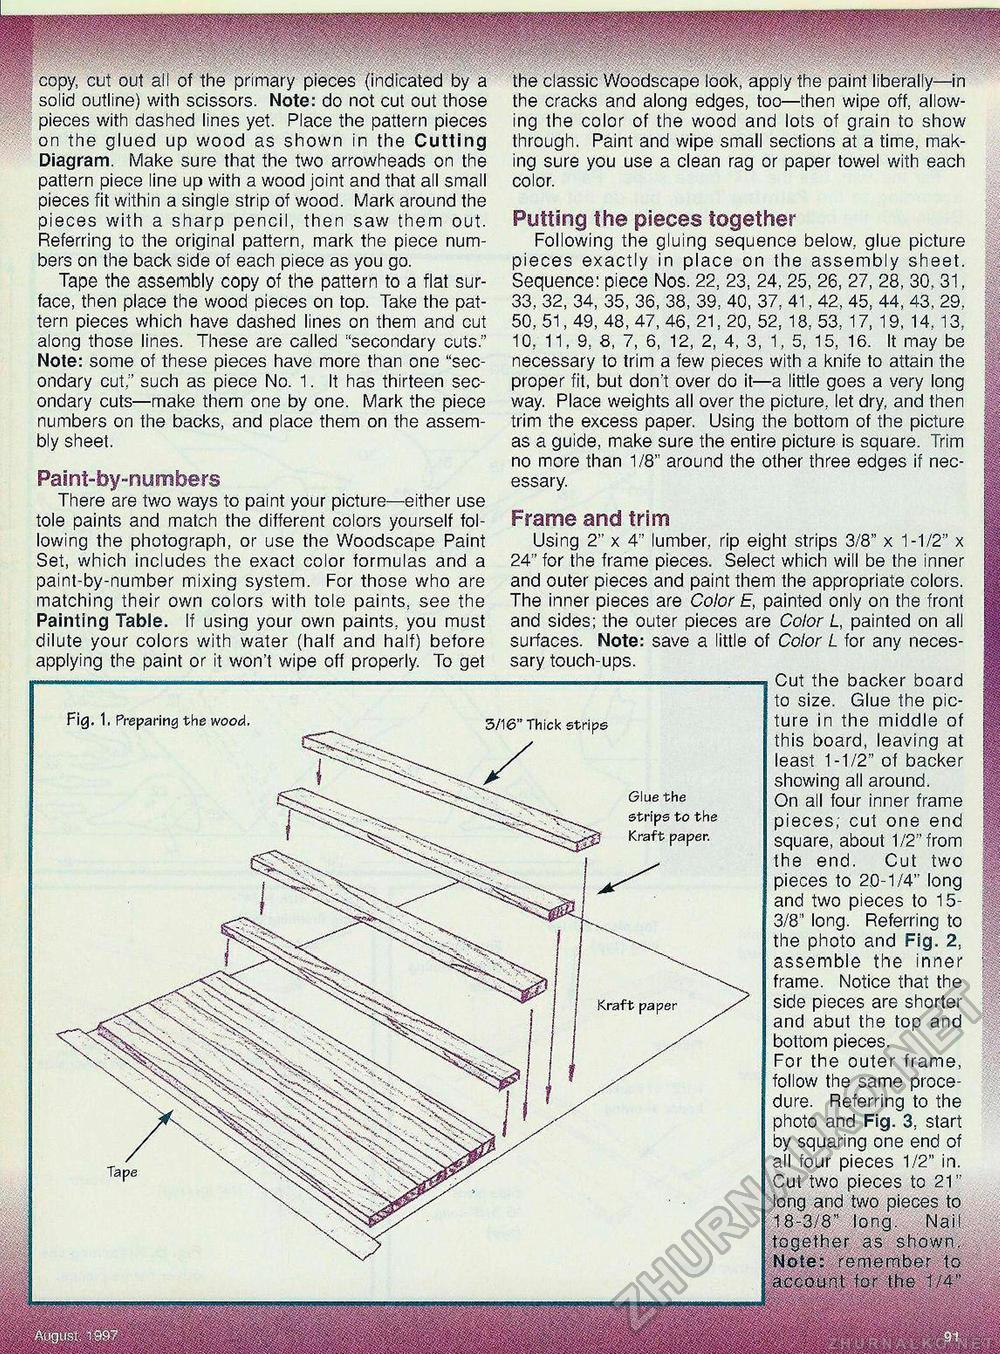
Kraft paper copy, cut out all of the primary pieces (indicated by a solid outline) with scissors. Note: do not cut out those pieces with dashed lines yet. Place the pattern pieces on the glued up wood as shown in the Cutting Diagram. Make sure that the two arrowheads on the pattern piece line up with a wood joint and that all small pieces fit within a single strip of wood. Mark around the pieces with a sharp pencil, then saw them out. Referring to the original pattern, mark the piece numbers on the back side of each piece as you go. Tape the assembly copy of the pattern to a flat surface, then place the wood pieces on top. Take the pattern pieces which have dashed lines on them and cut along those lines. These are called "secondary cuts." Note: some of these pieces have more than one "secondary cut;' such as piece No. 1. It has thirteen secondary cuts—make them one by one. Mark the piece numbers on the backs, and place them on the assembly sheet. Paint-by-numbers There are two ways to paint your picture—either use tole paints and match the different colors yourself following the photograph, or use the Woodscape Paint Set, which includes the exact color formulas and a paint-by-number mixing system. For those who are matching their own colors with tole paints, see the Painting Table. If using your own paints, you must dilute your colors with water (half and half) before applying the paint or it won't wipe off properly. To get Fig. 1, Preparing the wood. Glue the strips to the Kraft paper. the classic Woodscape look, apply the paint liberally—in the cracks and along edges, too—then wipe off, allowing the color of the wood and lots of grain to show through. Paint and wipe small sections at a time, making sure you use a clean rag or paper towel with each color. Putting the pieces together Following the gluing sequence below, glue picture pieces exactly in place on the assembly sheet. Sequence: piece Nos. 22, 23, 24. 25, 26, 27, 28, 30. 31, 33. 32, 34, 35, 36, 38, 39. 40, 37. 41. 42. 45, 44, 43. 29. 50, 51, 49, 48, 47, 46, 21, 20, 52, 18. 53. 17, 19, 14. 13. 10,. 11, 9, 8, 7, 6, 12, 2, 4, 3, 1, 5, 15, 16. It may be necessary to trim a few pieces with a knife to attain the proper fit, but don't over do it—a little goes a very long way. Place weights all over the picture, let dry, and then trim the excess paper. Using the bottom of the picture as a guide, make sure the entire picture is square. Trim no more than 1/8" around the other three edges if necessary. Frame and trim Using 2" x 4f' lumber, rip eight strips 3/8" x 1-1/2" x 24" for the frame pieces. Select which will be the inner and outer pieces and paint them the appropriate colors. The inner pieces are Color E, painted only on the front and sides; the outer pieces are Color L, painted on all surfaces. Note: save a little of Color L for any necessary touch-ups. Cut the backer board to size. Glue the picture in the middle of this board, leaving at least 1-1/2" of backer showing all around. On all four inner frame pieces; cut one end square, about 1/2" from the end. Cut two pieces to 2.0-1/4" long and two pieces to 15-3/8" long. Referring to the photo and Fig. 2, assemble the inner frame. Notice that the side pieces are shorter and abut the top and bottom pieces. For the outer frame, follow the same procedure. Referring to the photo and Fig. 3, start by squaring one end of ail four pieces 1/2" in. Cut two pieces to 21" long and two pieces to 18-3/8" long Nail together as shown. Note: remember to acJimnt fo^, the 1M" 3/16" Thick strips |


