Creative Woodworks & crafts 1997-08, страница 76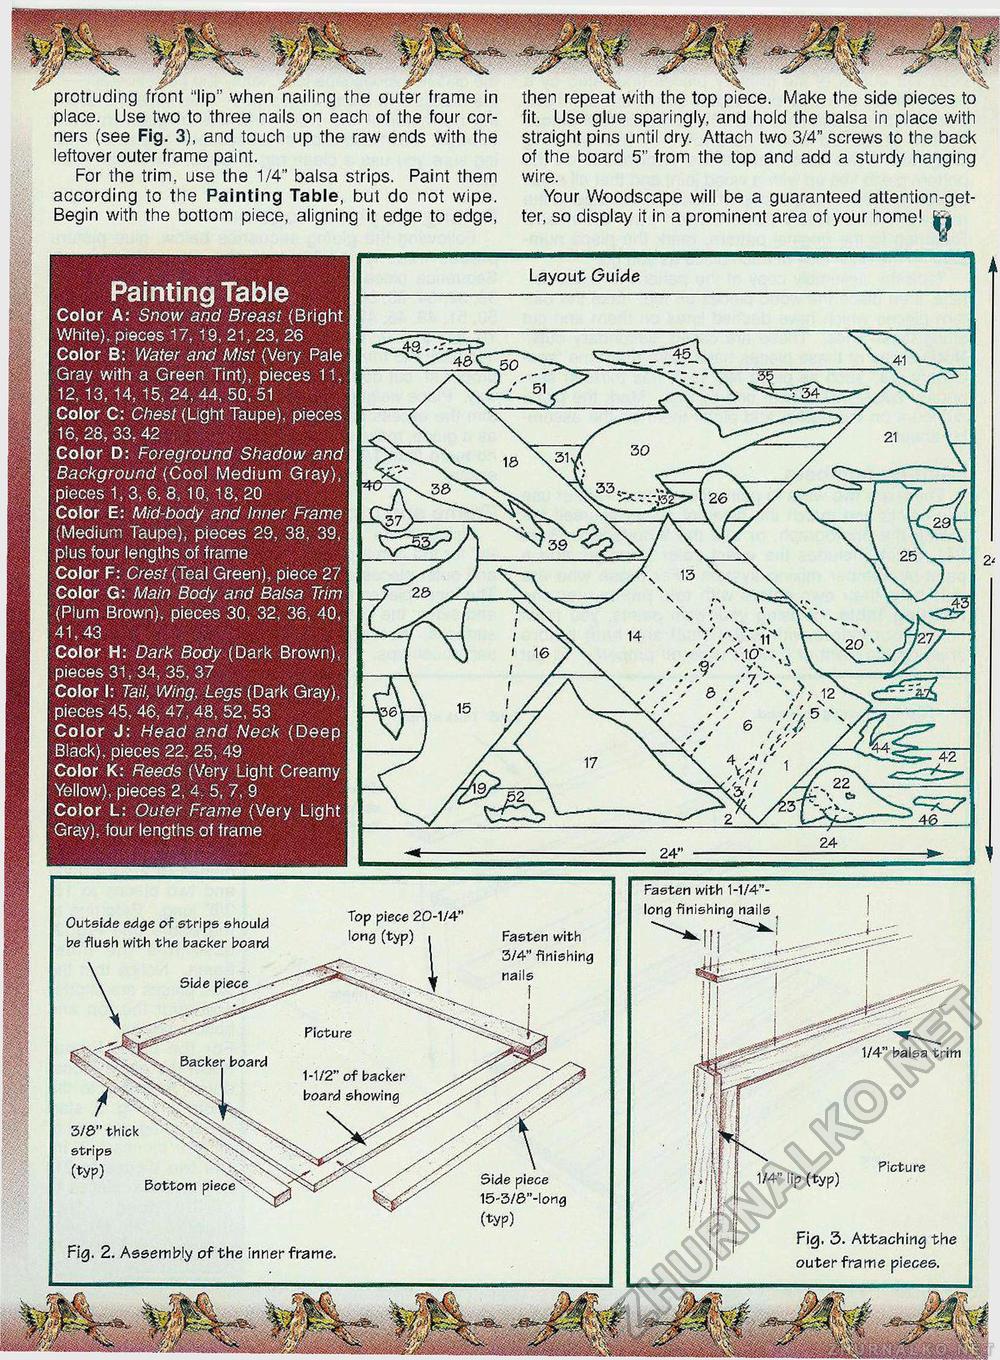
Painting Table Color A: Snow and Breast (Bright White), pieces 17, 19, 21, 23, 26 Color B: Water and Mist (Very Pale Gray with a Green Tint), pieces 11, 12, 13, 14, 15, 24,44, 50, 51 Color C: Chest (Light Taupe), pieces 16, 28, 33, 42 Color D: Foreground Shadow and Background (Cool Medium Gray), pieces 1, 3, 6, 8, 10, 18, 20 Color E: Mid-body and Inner Frame (Medium Taupe), pieces 29, 38, 39, plus four lengths of frame Color F: Crest (Teal Green), piece 27 Color G: Main Body and Balsa Trim (Plum Brown), pieces 30, 32, 36, 40, 41,43 Color H: Dark Body (Dark Brown), pieces 31, 34, 35, 37 Color I: Tail, Wing. Legs (Dark Gray), pieces 45, 46, 47, 48, 52, 53 Color J: Head and Neck (Deep Black), pieces 22. 25, 49 Color K: Reeds (Very Light Creamy Yellow), pieces 2. 4. 5, 7, 9 Color L: Outer Frame (Very Light Gray), four lengths of frame protruding front "lip" when nailing the outer frame in place. Use two to three nails on each of the four corners (see Fig. 3), and touch up the raw ends with the leftover outer frame paint. For the trim, use the 1/4" balsa strips. Paint them according to the Painting Table, but do not wipe. Begin with the bottom piece, aligning it edge to edge, then repeat with the top piece. Make the side pieces to fit. Use glue sparingly, and hold the balsa in place with straight pins until dry. Attach two 3/4" screws to the back of the board 5" from the top and add a sturdy hanging wire. Your Woodscape will be a guaranteed attention-getter, so display it in a prominent area of your home! tj Layout Guide Fasten with 1-1/4"-long finishing nails Outside edge of strips should be flush with the backer board Fasten with 3/4" finishing nails 1/4" balsa trim Backer board 1-1/2" of backer board showing Picture Bottom Fig, 3. Attaching the outer frame pieces. Fig. 2. Assembly of the inner frame. |


