Creative Woodworks & crafts 1998-07, страница 40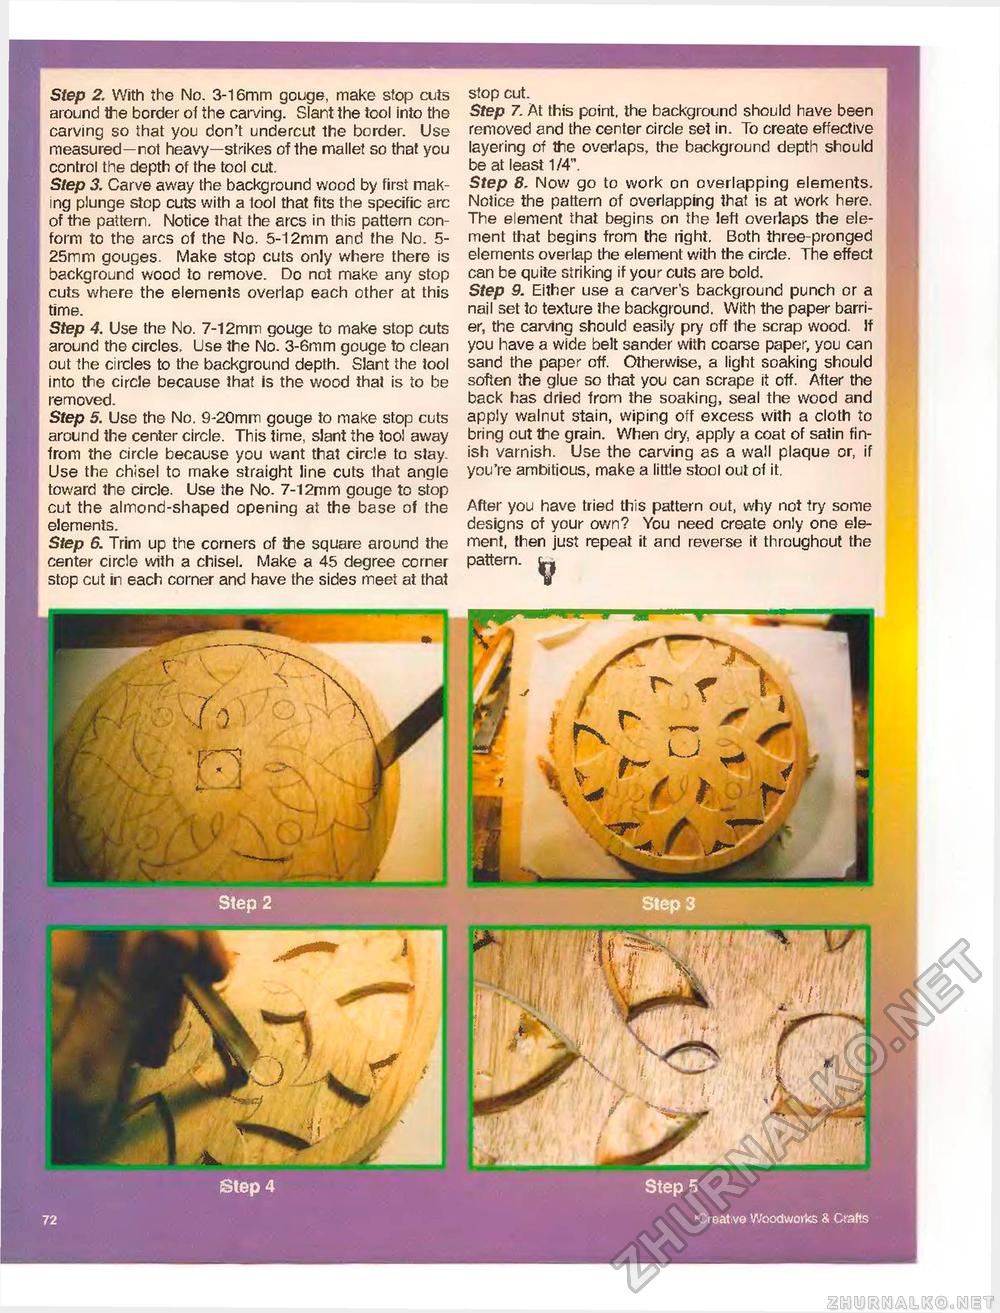
Step 2. With the No. 3-16mm gouge, make stop cuts around the border of the carving. Slant the tool into the carving so that you don't undercut the border. Use measured—not heavy—strikes of the mallet so that you control the depth of the tool cut. Step 3. Carve away the background wood by first making plunge stop cuts with a tool that fits the specific arc of the pattern. Notice that the arcs in this pattern conform to the arcs of the No. 5-12mm and the No. 5-25mm gouges. Make stop cuts only where there is background wood to remove. Do not make any stop cuts where the elements overlap each other at this time. Step 4. Use the No. 7-12mm gouge to make stop cuts around the circles. Use the No. 3-6mm gouge to clean out the circles to the background depth. Slant the tool into the circle because that Is the wood thai is to be removed. Step 5. Use the No. 9-2Gmm gouge to make stop cuts around the center circle. This time, slant the tool away from the circle because you want that circle to stay-Use the chisel to make straight line cuts that angle toward the circle. Use the No. 7-12mm gouge to stop cut the almond-shaped opening at the base of the elements. Step 6. Trim up the corners of the square around the center circle with a chisel. Make a 45 degree corner stop cut in each corner and have the sides meet at that stop cut. Step 7. At this point, the background should have been removed and the center circle set in. To create effective layering of the overlaps, the background depth should be at least 1/4". Step 8', Now go to work on overlapping elements. Notice the pattern of overlapping that is at work here. The element that begins on the left overlaps the element that begins from the right. Both three-pronged elements overlap the element with the circle. The effect can be quite striking if your cuts are bold. Step 9. Either use a carver's background punch or a nail set to texture the background. With the paper barrier, the carving should easily pry off the scrap wood. If you have a wide belt sander with coarse paper, you can sand the paper off. Otherwise, a light soaking should soften the glue so that you can scrape it off. After the back has dried from the soaking, seal the wood and apply walnut stain, wiping off excess with a cloth to bring out the grain. When dry, apply a coat of satin finish varnish. Use the carving as a wall plaque or, if you're ambitious, make a little stool out of it. After you have tried this pattern out, why not try some designs of your own? You need create only one element, then just repeat it and reverse it throughout the pattern, u. 7 D Step 4 Step 3 , 'li'f^ \ I V u w. am i' I - n Step 5 "Creative Woodworks & Crafts |


