Creative Woodworks & crafts 1998-07, страница 59
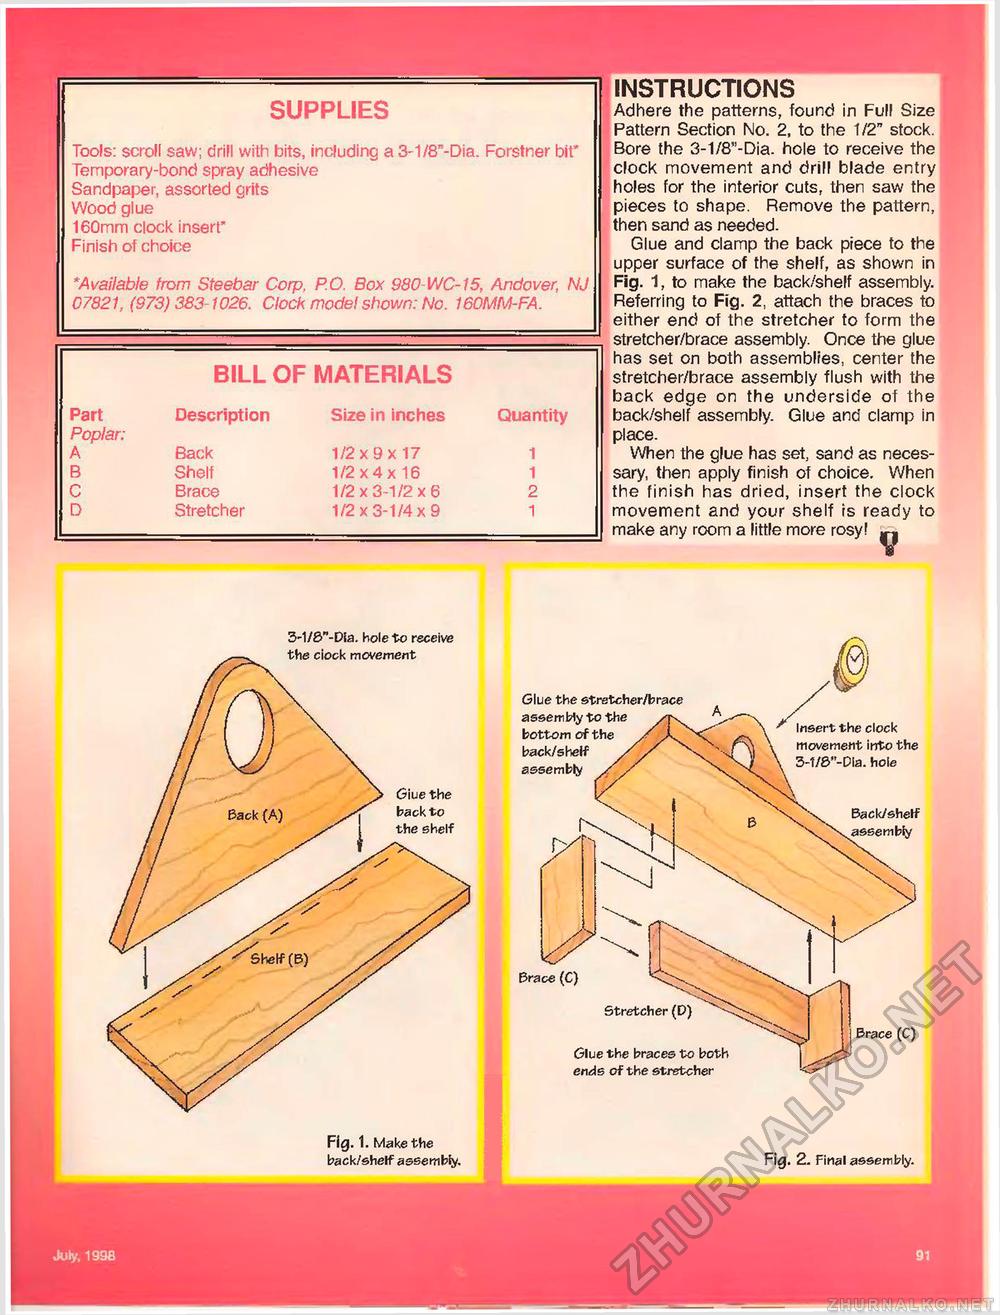
BILL OF MATERIALSDescription Size in inches Quantity Back Shelf Brace Stretcher INSTRUCTIONSAdhere the patterns, found in Full Size Pattern Section No. 2, to the 1/2" stock. Bore the 3-1/8"-Dia. hole to receive the clock movement and drill blade entry holes for the interior cuts, then saw the pieces to shape. Remove the pattern, then sand as needed. Glue and clamp the back piece to the upper surface of the shelf, as shown in Fig. 1, to make the back/shelf assembly. Referring to Fig. 2, attach the braces to either end of the stretcher to form the stretcher/brace assembly. Once the glue has set on both assemblies, center the stretcher/brace assembly flush with the back edge on the underside of the back/shelf assembly. Glue and clamp in place. When the glue has set, sand as necessary, then apply finish of choice. When the finish has dried, insert the clock movement and your shelf is ready to make any room a little more rosy! V *Available from Steebar Corp, P.O. Box 980-WC-15, Andover, NJ 07821, (973) 383-1026. Clock model shown: No. 160MM-FA. Temporary-bond spray adhesive Sandpaper, assorted grits Wood glue 160mm clock insert* Finish of choice 3-1/£>"-Dia. hole to receive the ciock movement G iuethe back to the shelf Glue the stretcher/brace assembly to the bottom of the back/shelf assembly Brace (C) Stretcher (D) Glue the braces to both ends of the stretcher Insert the clock movement into the 3-1/8"-Dla. hole BacWshetf assembly Brace (C) Fig. 1. Make the back/shelf assembly. Fig. 2. Final assembly. |


