Creative Woodworks & crafts 1998-07, страница 61
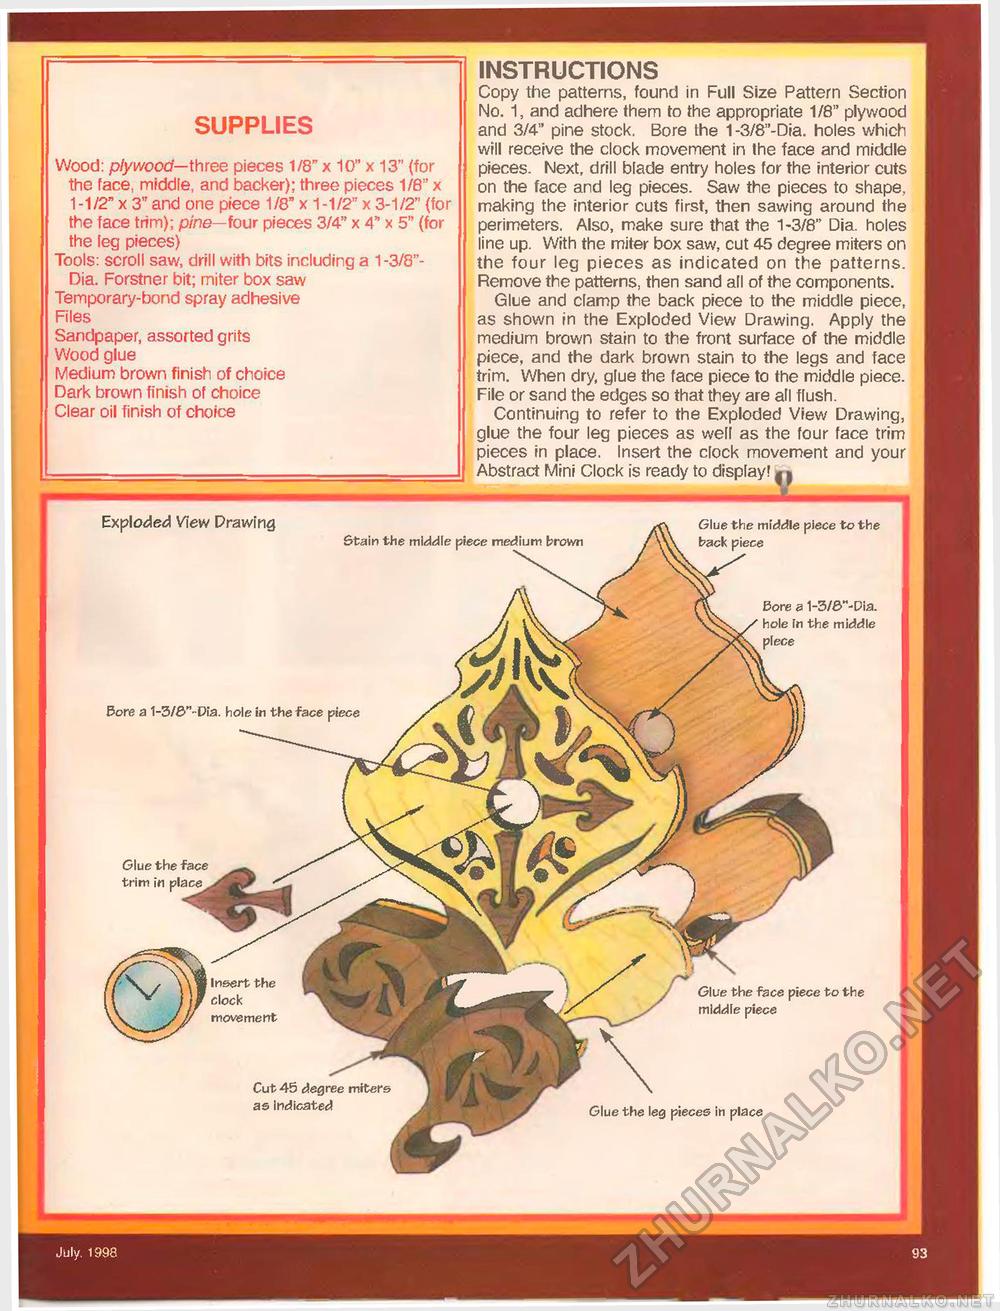
SUPPLIESWood: plywood— three pieces 1/8" x 10" x 13" (for the face, middle, and backer); three pieces 1/8" x 1 -1/2" x 3" and one piece 1/8" x 1 -1/2" x 3-1/2" {for the face trim); pine—four pieces 3/4" x 4" x 5" (for the leg pieces) Tools: scroll saw, drill with bits including a 1-3/8"- Dia. Forstner bit; miter box saw Temporary-bond spray adhesive Files Sandpaper, assorted grits Wood glue Medium brown finish of choice Dark brown finish of choice Clear oil finish of choice INSTRUCTIONSCopy the patterns, found in Full Size Pattern Section No. 1, and adhere them to the appropriate 1/8" plywood and 3/4" pine stock. Bore the 1 -3/8"-Dia. holes which will receive the clock movement in the face and middle pieces. Next, drill blade entry holes for the interior cuts on the face and leg pieces. Saw the pieces to shape, making the interior cuts first, then sawing around the perimeters. Also, make sure that the 1-3/8" Dia. holes line up. With the miter box saw, cut 45 degree miters on the four leg pieces as indicated on the patterns. Remove the patterns, then sand all of the components. Glue and clamp the back piece to the middle piece, as shown in the Exploded View Drawing. Apply the medium brown stain to the front surface of the middle piece, and the dark brown stain to the legs and face trim. When dry, glue the face piece to the middle piece. File or sand the edges so that they are all flush. Continuing to refer to the Exploded View Drawing, glue the four leg pieces as well as the four face trim pieces in place. Insert the clock movement and your Abstract Mini Clock is ready to display! ( Exploded View Drawing Stain the middle piece medium brown Glue the middle piece to the back piece Bore a 1-3/£>"-Dia. hole In the middle piece Bore a 1-3/&"-D!a. hole in the face piece Glue the face trim in Cut 45 degree miters as indicated Glue the face piece to the middle piece Glue the leg pieces in place July. 1998 93 |


