Creative Woodworks & crafts 1998-09, страница 45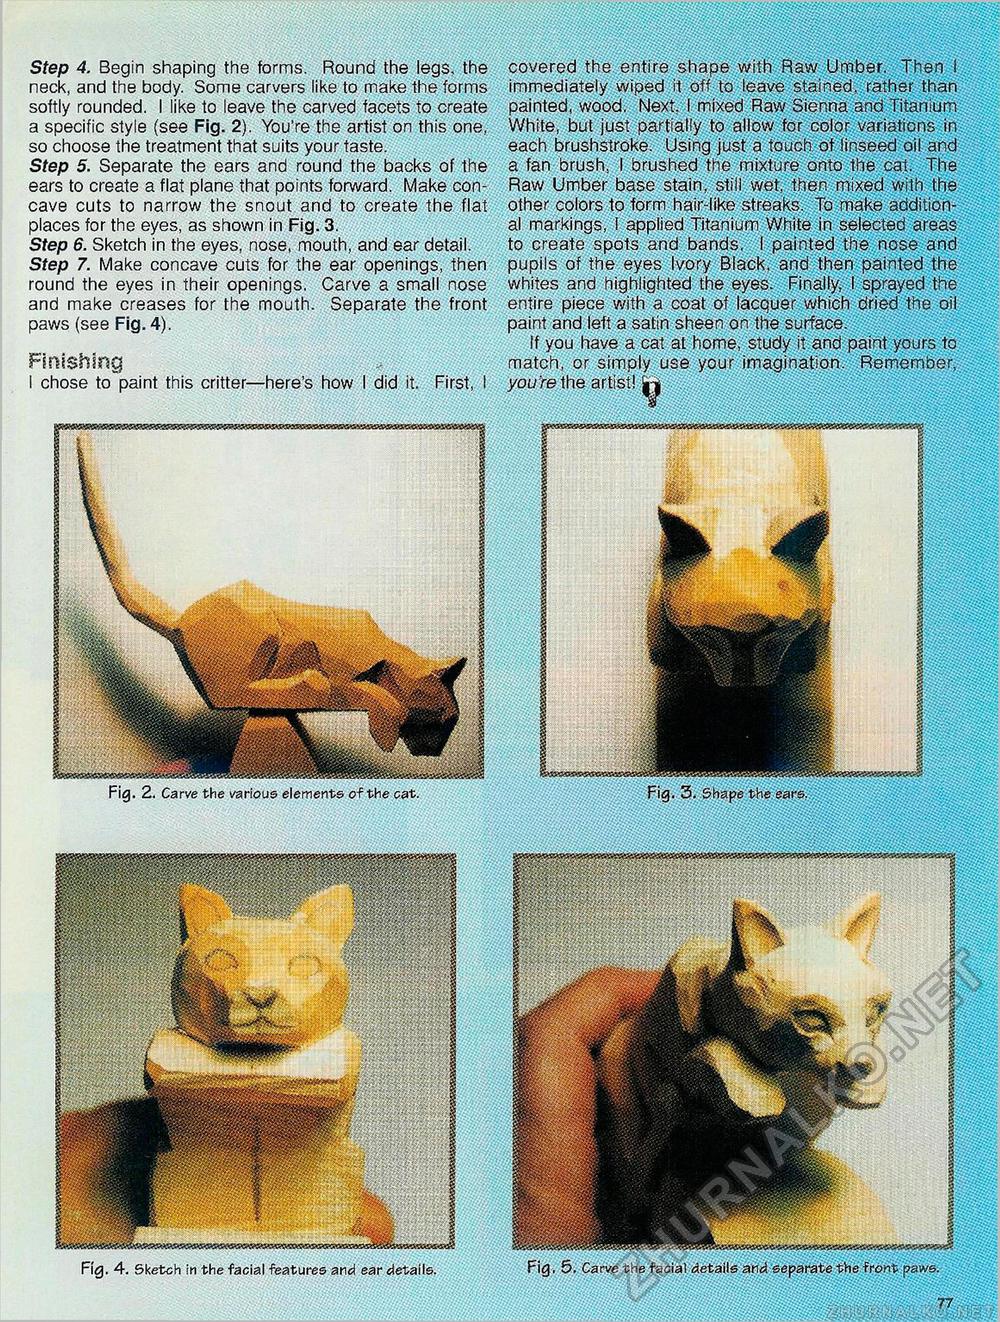
covered the entire shape with Raw Umber. Then i immediately wiped it off to leave stained, rather than painted, wood. Next. I mixed Raw Sienna and Titanium White, but just partially to allow for color variations in each brushstroke. Using just a touch of linseed oil and a fan brush, I brushed the mixture onto the cat. The Raw Umber base stain, still wet, then mixed with the other colors to form hair-like streaks. To make additioh-al markings, I applied Titanium White in selected areas to create spots and bands. I painted the nose and pupils of the eyes Ivory Black, and then painted the whites and highlighted the eyes. Finally, I sprayed the entire piece with a coat of lacquer which dried the oil paint and left a satin sheen on the surface. If you have a cat at home, study it and paint yours to match, or simply use your imagination. Remember, you're the artist! |r| Step 4. Begin shaping the forms. Round the legs, the neck, and the body. Some carvers like to make the forms softly rounded. I like to leave the carved facets to create a specific style (see Fig. 2). You're the artist on this one, so choose the treatment that suits your taste. Step 5. Separate the ears and round the backs of the ears to create a flat plane that points forward. Make concave cuts to narrow the snout and to create the flat places for the eyes, as shown in Fig. 3. Step 6. Sketch in the eyes, nose, mouth, and ear detail. Step 7. Make concave cuts for the ear openings, then round the eyes in their openings. Carve a small nose and make creases for the mouth. Separate the front paws (see Fig. 4). Finishing I chose to paint this critter—here's how I did it. First, I Fig. 2. Carve the various elements of the oat. /.v.;/.: " Fig, 5. Carve the facial details and separate the front paws. Fig. 4. Sketch in the facial features and ear details. |


