Creative Woodworks & crafts 1999-01, страница 26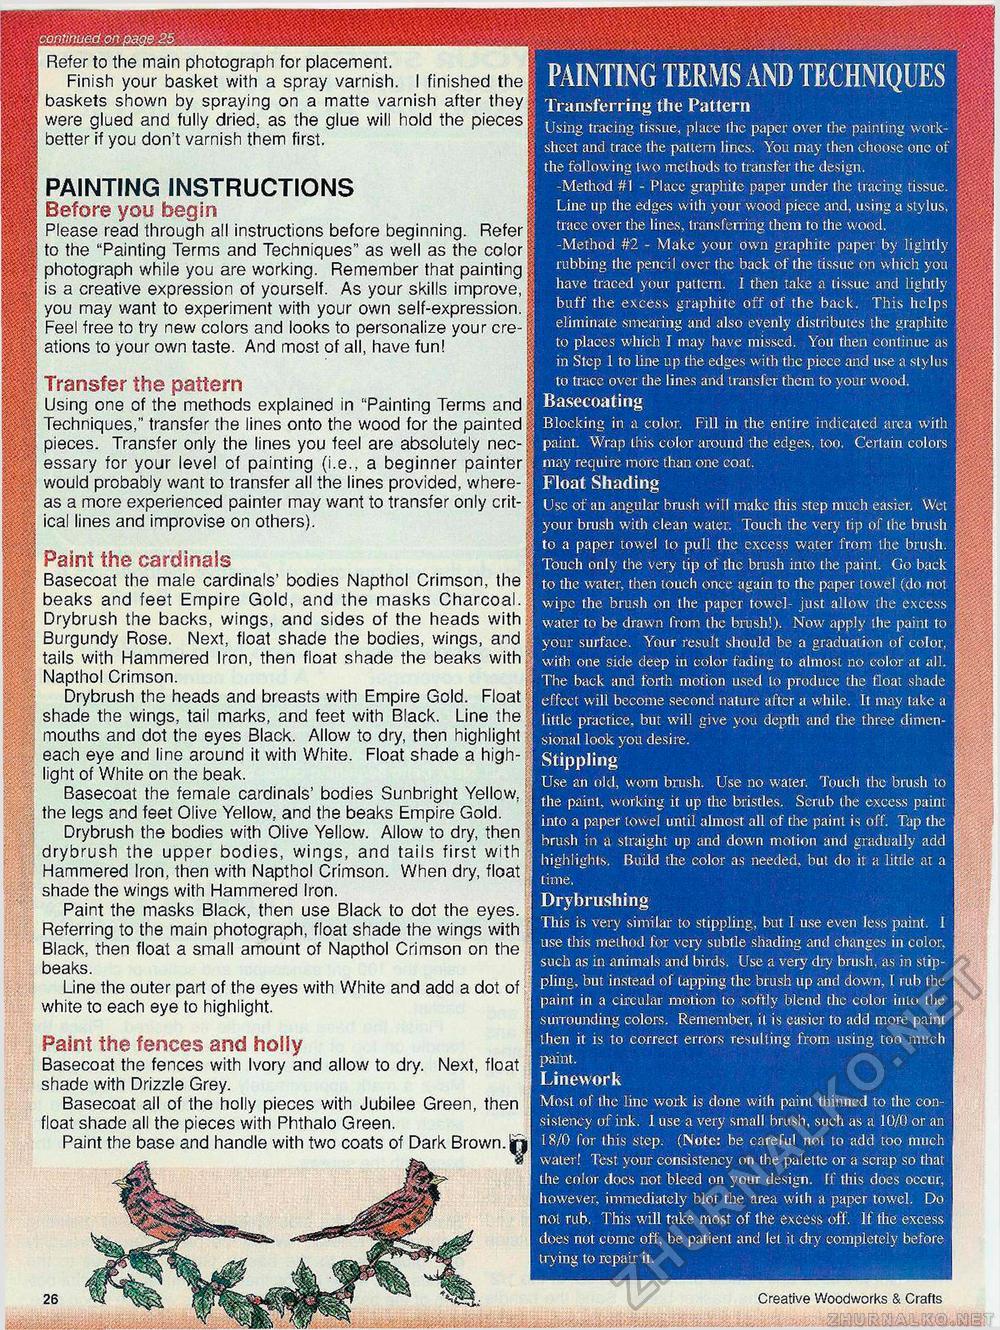
continued on page 25 Transferring the Pattern Using tracing tissue, place flic paper over the painting worksheet and trace the pattern lines. You may then choose one of the following two methods to transfer the design. -Method #1 - Place graphite paper under the tr acing tissue. Line up the edges with your wood piece and, using a stylus, trace over the lines, transferring them to the wood. -Method #2 - Make your own graphite paper by lightly rubbing the pencil over the back of the tissue on which you have traced your pattern. I then take a tissue and lightly buff the excess graphite off of the back. This helps eliminate smearing and also evenly distributes the graphite to places which I may have missed. You then continue as in Step 1 to line up the edges with the piece and use a stylus to trace over the lines and transfer them to your wood. Basecoating Blocking in a color. Fill in the entire indicated area with paint. Wrap this color around the edges, too. Certain colors may require more than one coat. Float Shading Use of an angular brush will make this step much easier, Wet your brush with clean water. Touch the very tip of the brush to a paper towel to pull the excess water from the brush. Touch only the very tip of the brush into the paint. Go back to the water, then touch once again to the paper towel (do not wipe the brush on the paper towel- just allow the excess water to be drawn from the brush!). Now apply the paint to your surface. Your result should be a graduation of color, with one side deep in color fading to almost no color at all. The back and forth motion used to produce the float shade effect will become second nature after a while. It may take a little practice, but will give you depth and the three dimensional look you desire. Stippling Use an old, worn brush. Use no water. Touch the brush to the paint, working it up the bristles. Scrub the excess paint into a paper towel until almost all of the paint is off. Tap the brush in a straight up and down motion and gradually add highlights. Build the color as needed, but do it a little at a time. Drybrushing This is very similar to stippling, but I use even less paint. I use this method for very subtle shading and changes in color, such as in animals and birds. Use a very dry brush, as in stippling, but instead of lapping the brush up and down, I rub the paint in a circular motion to softly blend the color into the surrounding colors. Remember, it is easier to add more paint then it is to correct errors resulting from using too much paint. Linework Most of the line work is done with paint thinned to the consistency of ink. i use a very small brush, such as a 10/0 or an 18/0 for this step. (Note: be careful not to add too much water! Test your consistency on the palette or a scrap so that the color docs not bleed on your design. If this does occur, however, immediately blot the area with a paper towel. Do tioi rub. This will take most of the excess off. If the excess does not come off, be patient and let it dry completely before trying to repair it. Refer to the main photograph for placement. Finish your basket with a spray varnish. I finished the baskets shown by spraying on a matte varnish after they were glued and fully dried, as the glue will hold the pieces better if you don't varnish them first. painting instructions Before you begin Please read through all instructions before beginning. Refer to the "Painting Terms and Techniques" as well as the color photograph while you are working. Remember that painting is a creative expression of yourself. As your skills improve, you may want to experiment with your own self-expression. Feel free to try new colors and looks to personalize your creations to your own taste. And most of all, have fun! Transfer the pattern Using one of the methods explained in "Painting Terms and Techniques," transfer the lines onto the wood for the painted pieces. Transfer only the lines you feel are absolutely necessary for your level of painting (i.e., a beginner painter would probably want to transfer all the lines provided, whereas a more experienced painter may want to transfer only critical lines and improvise on others). Paint the cardinals Basecoat the male cardinals' bodies Napthol Crimson, the beaks and feet Empire Gold, and the masks Charcoal. Drybrush the backs, wings, and sides of the heads with Burgundy Rose. Next, float shade the bodies, wings, and tails with Hammered Iron, then float shade the beaks with Napthol Crimson. Drybrush the heads and breasts with Empire Gold. Float shade the wings, tail marks, and feet with Black. Line the mouths and dot the eyes Black. Allow to dry, then highlight each eye and line around it with White. Float shade a highlight of White on the beak. Basecoat the female cardinals' bodies Sunbright Yellow, the legs and feet Olive Yellow, and the beaks Empire Gold. Drybrush the bodies with Olive Yellow. Allow to dry, then drybrush the upper bodies, wings, and tails first with Hammered Iron, then with Napthol Crimson. When dry, float shade the wings with Hammered Iron. Paint the masks Black, then use Black to dot the eyes. Referring to the main photograph, float shade the wings with Black, then float a small amount of Napthol Crimson on the beaks. Line the outer part of the eyes with White and add a dot of white to each eye to highlight. Paint the fences and holly Basecoat the fences with Ivory and allow to dry. Next, float shade with Drizzle Grey. Basecoat all of the holly pieces with Jubilee Green, then float shade all the pieces with Phthalo Green. Paint the base and handle with two coats of Dark Brown.fi Creative Woodworks & Crafts |


