Creative Woodworks & crafts 1999-01, страница 27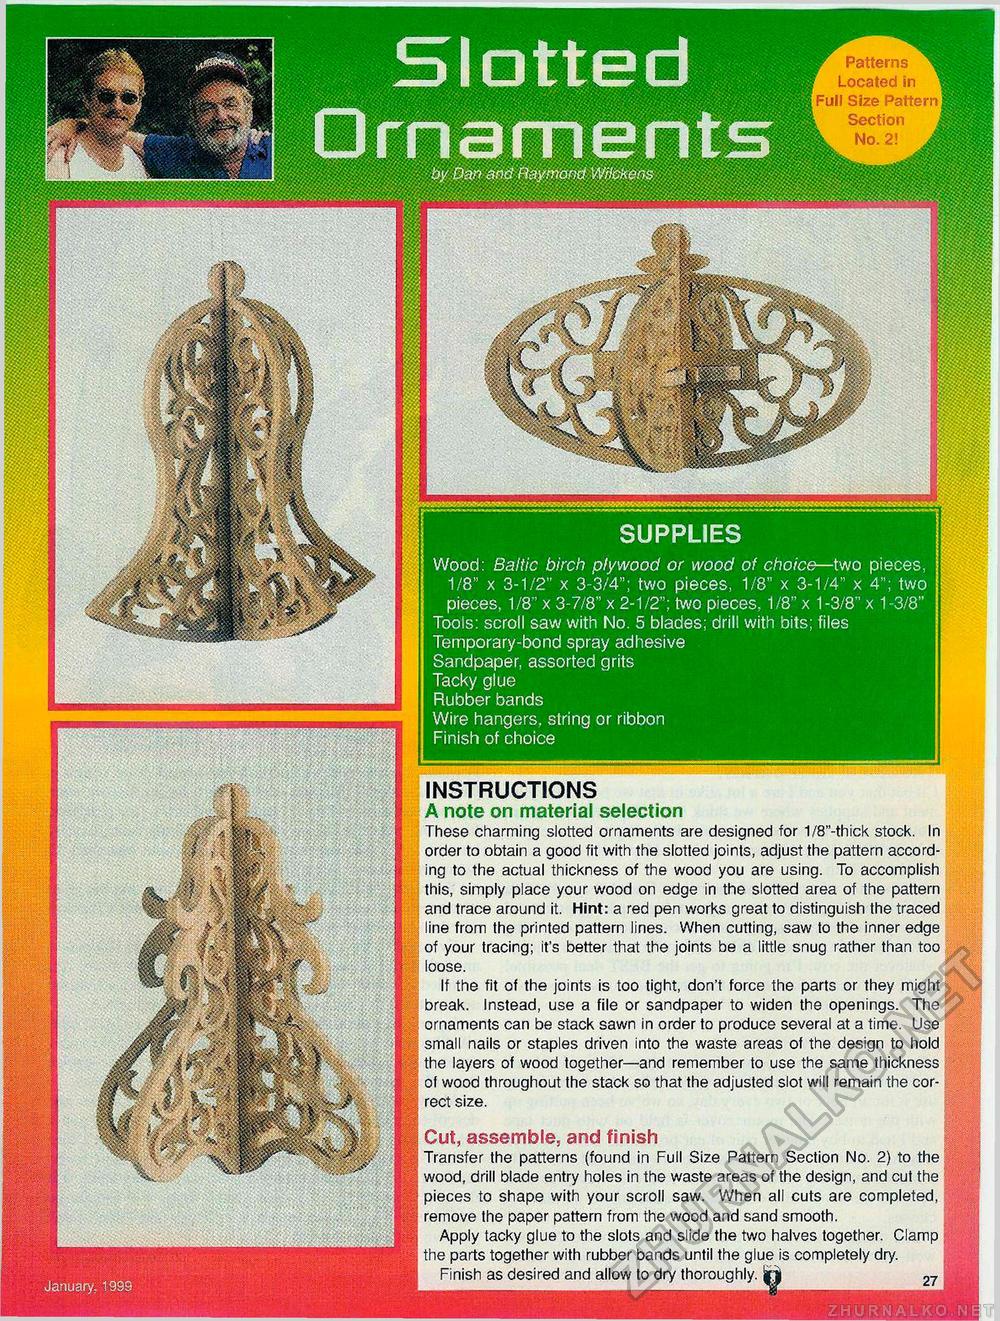
by Dm arid Raymond Wtfckens ii SUPPLIES Wood: Baltic birch plywood or wood of choice—two pieces, 1/8" x 3-1/2" x 3-3/4"; two pieces, 1/8" x 3-1/4" x 4"; two pieces, 1/8" x 3-7/8" x 2-1/2"; two pieces, 1/8" x 1-3/8" x 1-3/8" Tools: scroll saw with No. 5 blades; drill with bits; files Temporary-bond spray adhesive Sandpaper, assorted grits Tacky glue Rubber bands Wire hangers, string or ribbon Finish of choice instructions A note on material selection These charming slotted ornaments are designed for 1/8"-thick stock. In order to obtain a good fit with the slotted joints, adjust the pattern according to the actual thickness of the wood you are using. To accomplish this, simply place your wood on edge in the slotted area of the pattern and trace around it. Hint: a red pen works great to distinguish the traced >/j line from the printed pattern lines. When cutting, saw to the inner edge of your tracing; it's better that the joints be a little snug rather than too loose. If the fit of the joints is too tight, don't force the parts or they might break. Instead, use a file or sandpaper to widen the openings. The ornaments can be stack sawn in order to produce several at a time. Use small nails or staples driven into the waste areas of the design to hold the layers of wood together—and remember to use the same thickness of wood throughout the stack so that the adjusted slot will remain the correct size. i Cut, assemble, and finish U Transfer the patterns (found in Full Size Pattern Section No. 2) to the 7 wood, drill blade entry holes in the waste areas of the design, and cut the pieces to shape with your scroll saw. When all cuts are completed, ■p remove the paper pattern from the wood and sand smooth. Apply tacky glue to the slots and slide the two halves together. Clamp the parts together with rubber bands until the glue is completely dry. Finish as desired and allow to dry thoroughly. |


