Creative Woodworks & crafts 1999-01, страница 57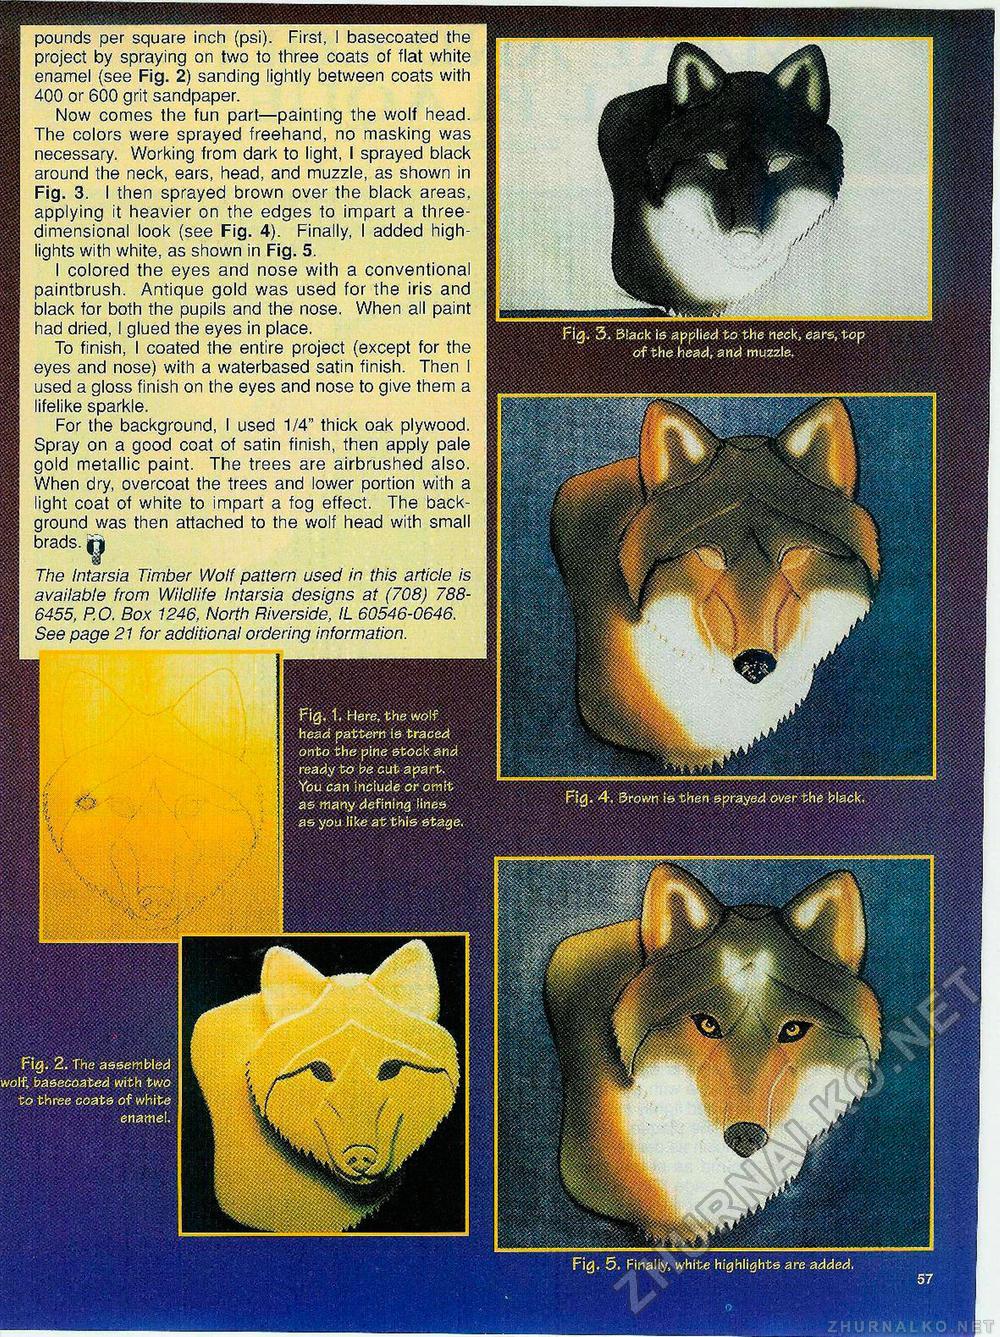
Fig. 3. Black is applied to the neck, ears, top of the head, and muzzle. Fig. 1. Here, the wolf head pattern is traced onto the pine stock and ready to be cut apart. You can include or omit as many defining fines as you lite at this stage. Fig. 4. Brown is then sprayed over the black. Fig. 2. The assembled wolf, basecoated with two to three coats of white enamel. Fig. 5. Finally, white highlights are added, pounds per square inch (psi). First, I basecoated the project by spraying on two to three coats of flat white enamel (see Fig. 2) sanding lightly between coats with 400 or 600 grit sandpaper. Now comes the fun part—painting the wolf head. The colors were sprayed freehand, no masking was necessary. Working from dark to light, I sprayed black around the neck, ears, head, and muzzle, as shown in Fig. 3. I then sprayed brown over the black areas, applying it heavier on the edges to impart a three-dimensional look (see Fig. 4). Finally, I added highlights with white, as shown in Fig. 5. I colored the eyes and nose with a conventional paintbrush. Antique gold was used for the iris and black for both the pupils and the nose. When all paint had dried, I glued the eyes in place. To finish, I coated the entire project (except for the eyes and nose) with a waterbased satin finish. Then I used a gloss finish on the eyes and nose to give them a lifelike sparkle. For the background, I used 1/4" thick oak plywood. Spray on a good coat of satin finish, then apply pale gold metallic paint. The trees are airbrushed also. When dry, overcoat the trees and lower portion with a light coat of white to impart a fog effect. The background was then attached to the wolf head with small brads. rjj The Intarsia Timber Wolf pattern used in this article is available from Wildlife Intarsia designs at (708) 788-6455, P.O. Box 1246, North Riverside, IL 60546-0646. See page 21 for additional ordering information. |


