Creative Woodworks & crafts 1999-10, страница 8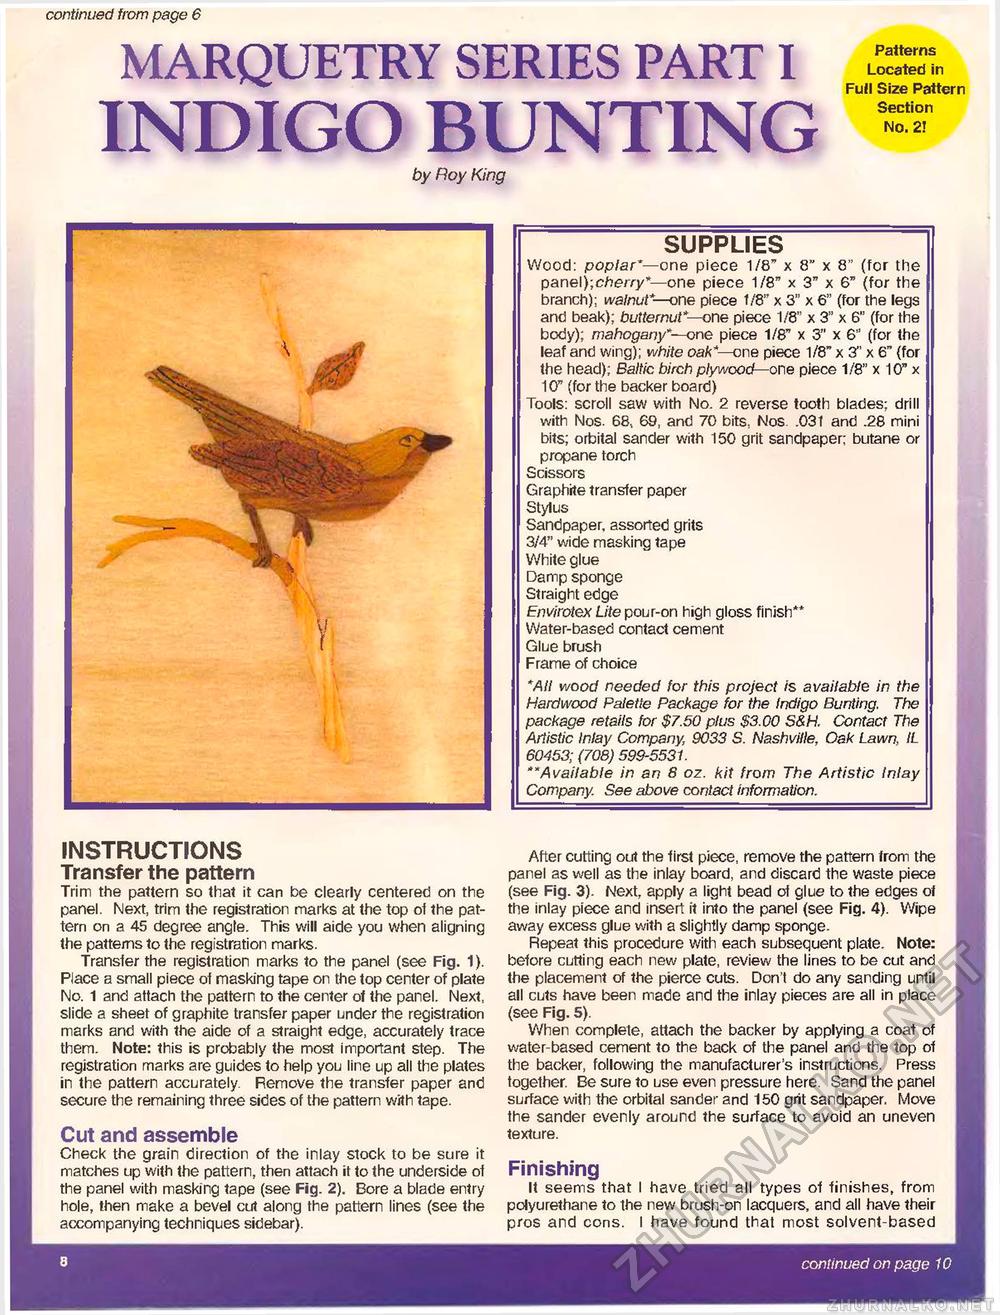
continued from page 6 MARQUETRY SERIES PART I ™ ^ Full Size Pattern INDIGO BUNTING = by Roy King SUPPLIES Wood: poplar*—one piece 1/8" x 8" x 8" (for the pane\);cherry*—one piece 1/8" x 3" x 6" (for the branch); walnut*—one piece 1/8" x 3" x 6" (for the legs and beak); butternut*—one piece 1/8" x 3" x 6" (for the body); mahogany"—one piece 1/8" x 3" x 6" (for the leaf and wing); white oak*—one piece 1/8" x 3" x 6" (for the head); Baltic birch plywood—one piece 1/8" x 10" x 10" (for the backer board) Tools: scroll saw with No. 2 reverse tooth blades; drill with Nos. 68, 69, and 70 bits, Nos .031 and .28 mini bits; orbital sander with 150 grit sandpaper; butane or propane torch Scissors Graphite transfer paper Stylus Sandpaper, assorted grits 3/4" wide masking tape White glue Damp sponge Straight edge Envirotex Lite pour-on high gloss finish** Water-based contact cement Glue brush Frame of choice *AII wood needed for this project is available in the Hardwood Palette Package for the Indigo Bunting. The package retails for $7.50 plus $3.00 S&H. Contact The Artistic Inlay Company, 9033 S. Nashville, Oak Lawn, IL 60453; (708) 599-5531. "Available in an 8 oz. kit from The Artistic Inlay Company. See above contact information. INSTRUCTIONS Transfer the pattern Trim the pattern so that it can be clearly centered on the panel. Next, trim the registration marks at the top of the pattern on a 45 degree angle. This will aide you when aligning the patterns to the registration marks. Transfer the registration marks to the panel (see Fig. 1). Place a small piece of masking tape on the top center of plate No. 1 and attach the pattern to the center of the panel. Next, slide a sheet of graphite transfer paper under the registration marks and with the aide of a straight edge, accurately trace them. Note: this is probably the most important step. The registration marks are guides to help you line up all the plates in the pattern accurately. Remove the transfer paper and secure the remaining three sides of the pattern with tape. Cut and assemble Check the grain direction of the inlay stock to be sure it matches up with the pattern, then attach it to the underside of the panel with masking tape (see Fig. 2). Bore a blade entry hole, then make a bevel cut along the pattern lines (see the accompanying techniques sidebar). 8 After cutting out the first piece, remove the pattern from the panel as well as the inlay board, and discard the waste piece (see Fig. 3). Next, apply a light bead of glue to the edges of the inlay piece and insert it into the panel (see Fig. 4). Wipe away excess glue with a slightly damp sponge. Repeat this procedure with each subsequent plate. Note: before cutting each new plate, review the lines to be cut and the placement of the pierce cuts. Don't do any sanding until all cuts have been made and the inlay pieces are all in place (see Fig. 5). When complete, attach the backer by applying a coat of water-based cement to the back of the panel and the top of the backer, following the manufacturer's instructions. Press together. Be sure to use even pressure here. Sand the panel surface with the orbital sander and 150 grit sandpaper. Move the sander evenly around the surface to avoid an uneven texture. Finishing It seems that I have tried all types of finishes, from potyurethane to the new brush-on lacquers, and all have their pros and cons. I have found that most solvent-based continued on page 10 |


