Creative Woodworks & crafts 2000-01, страница 10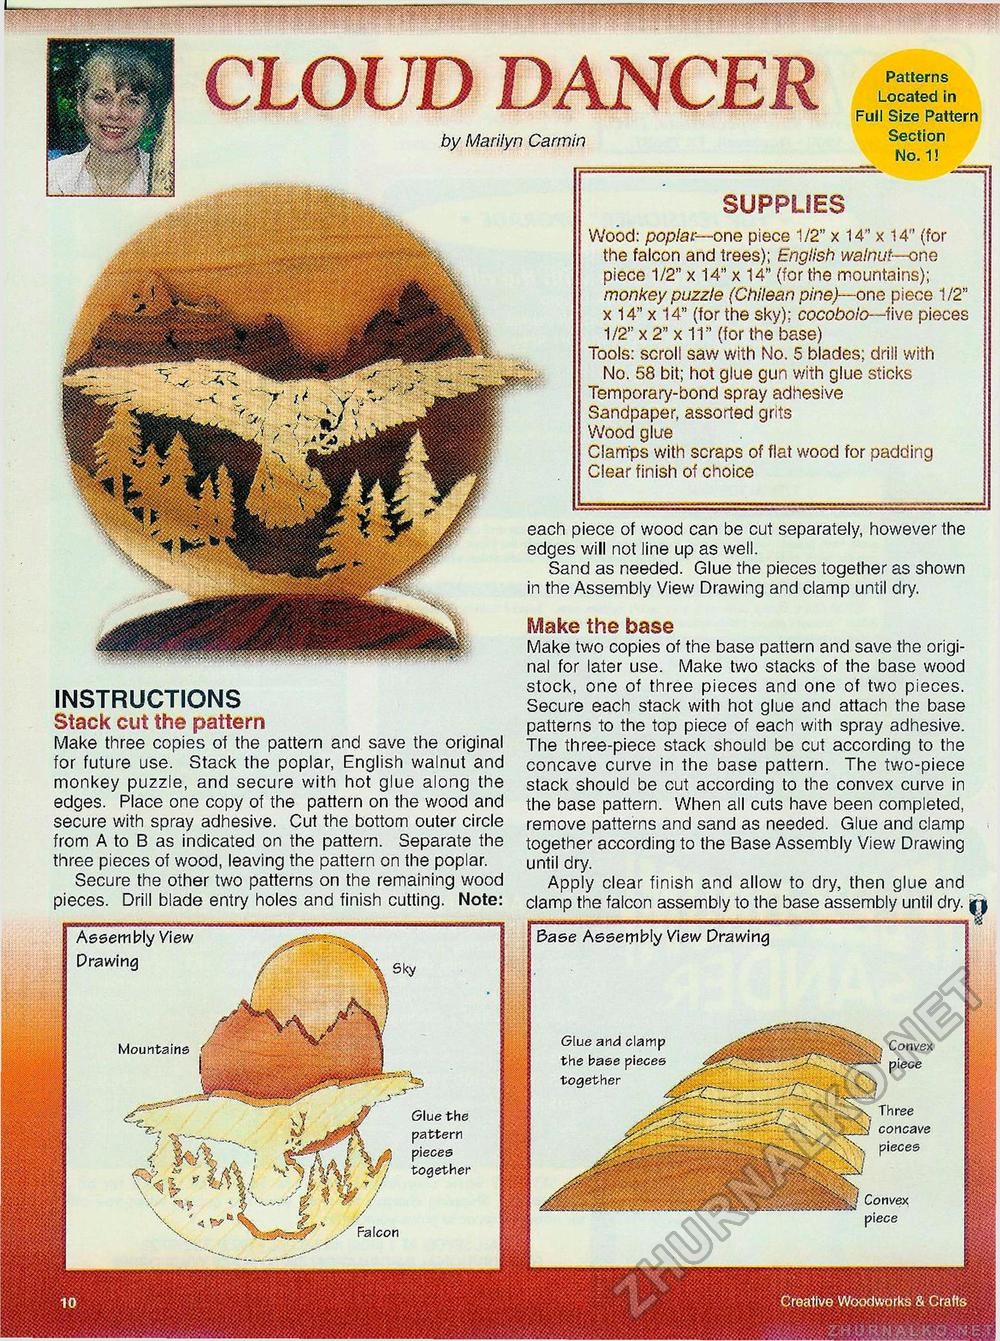
Base Assembly View Drawing Assembly View Drawing Glue and clamp the base pieces together fe^ Convex piece Mountains Three concave Glue the pattern pieces together pieces I Convex piece Falcon CLOUD DANCER £>y Marilyn Carmin Patterns Located in Full Size Pattern Section No. 1! SUPPLIES INSTRUCTIONS Stack cut the pattern Make three copies of the pattern and save the original for future use. Stack the poplar, English walnut and monkey puzzle, and secure with hot glue along the edges. Place one copy of the pattern on the wood and secure with spray adhesive. Cut the bottom outer circle from A to B as indicated on the pattern. Separate the three pieces of wood, leaving the pattern on the poplar. Secure the other two patterns on the remaining wood pieces. Drill blade entry holes and finish cutting. Note: Make the base Make two copies of the base pattern and save the original for later use. Make two stacks of the base wood stock, one of three pieces and one of two pieces. Secure each stack with hot glue and attach the base patterns to the top piece of each with spray adhesive. The three-piece stack should be cut according to the concave curve in the base pattern. The two-piece stack should be cut according to the convex curve in the base pattern. When all cuts have been completed, remove patterns and sand as needed. Glue and clamp together according to the Base Assembly View Drawing until dry. Apply clear finish and allow to dry, then glue and clamp the falcon assembly to the base assembly until dry. Wood: poplar—one piece 1/2" x 14" x 14" (for the falcon and trees); English walnut—one piece 1/2" x 14" x 14" (for the mountains); monkey puzzle (Chilean pine)—one piece 1/2" x 14" x 14" (for the sky): cocoboio—^five pieces 1/2" x 2" x 11" (for the base) Tools: scroll saw with No. 5 blades; drill with No. 58 bit; hot glue gun with glue sticks Temporary-bond spray adhesive Sandpaper, assorted grits Wood glue Clamps with scraps of flat wood for padding Clear finish of choice each piece of wood can be cut separately, however the edges will not line up as well. Sand as needed. Glue the pieces together as shown in the Assembly View Drawing and clamp until dry. |


