Creative Woodworks & crafts 2000-01, страница 14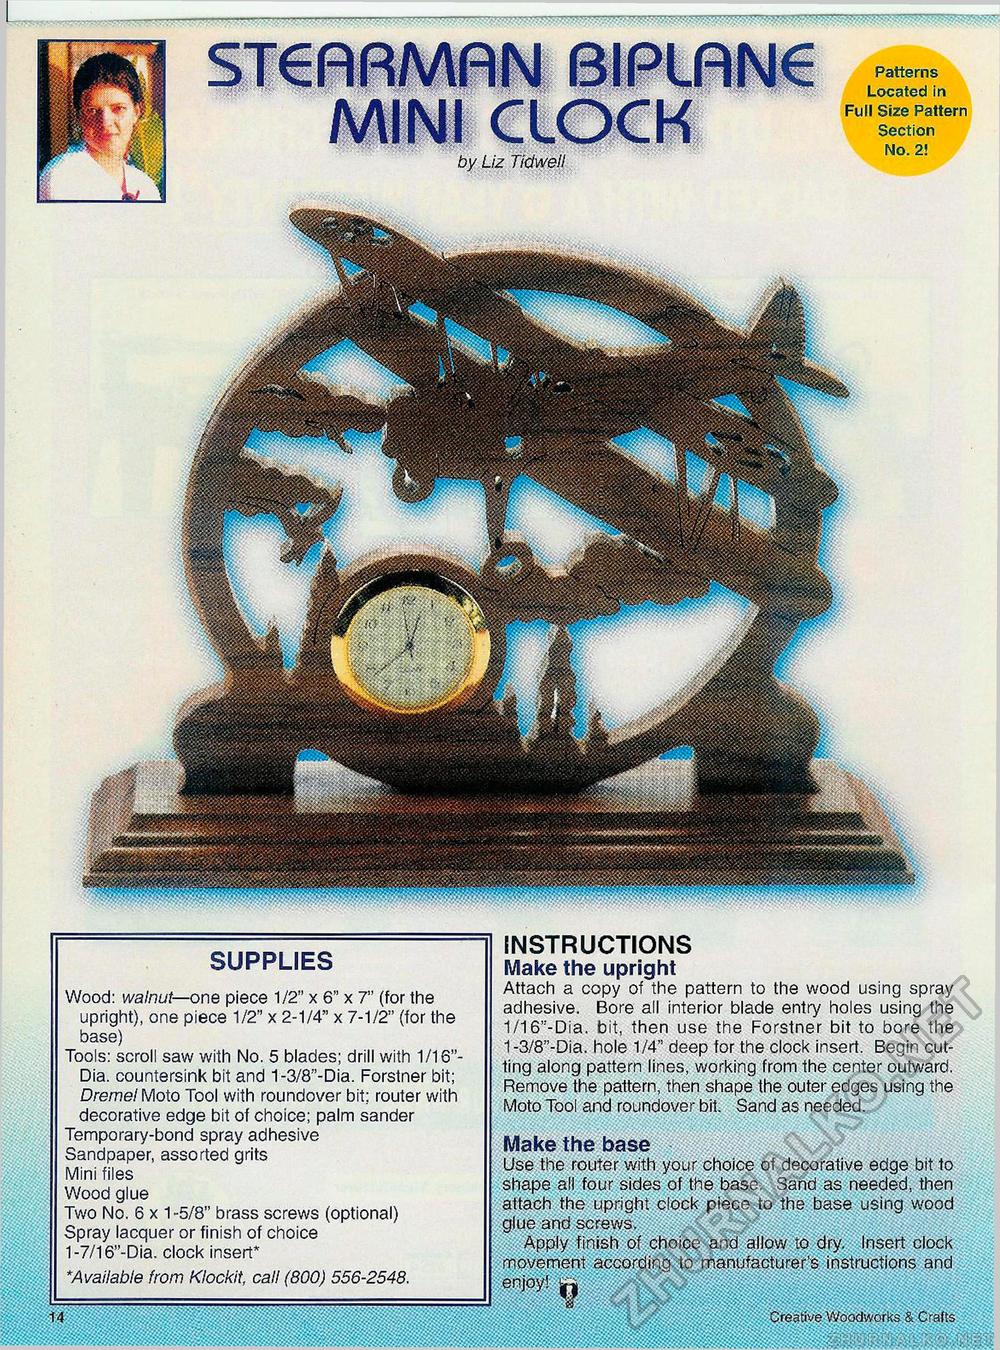
r Fll I by Liz Tidwell Patterns Located ir» Full Size Pattern Section No. 2! SUPPLIES Wood: walnut—one piece 1/2" x 6" x 7" (for the upright), one piece 1/2" x 2-1/4" x 7-1/2" (for the base) Tools: scroll saw with No. 5 blades; drill with 1/16"-Dia. countersink bit and 1-3/8"-Dia. Forstner bit; Dremel Moto Tool with roundover bit: router with decorative edge bit of choice; palm sander Temporary-bond spray adhesive Sandpaper, assorted grits Mini files Wood glue Two No. 6 x 1-5/8" brass screws (optional) Spray lacquer or finish of choice 1 -7/16"-Dia. clock insert* *Available from Klockit, call (800) 556-2548. 14 INSTRUCTIONS Make the upright Attach a copy of the pattern to the wood using spray adhesive. Bore all interior blade entry holes using the 1/16''-Dia. bit, then use the Forstner bit to bore the 1-3/8"-Dia. hole 1/4" deep for the clock insert. Begin cutting along pattern lines, working from the center outward. Remove the pattern, then shape the outer edges using the Moto Tool and roundover bit. Sand as needed. Make the base Use the router with your choice of decorative edge bit to shape all four sides of the base. Sand as needed, then attach the upright clock piece to the base using wood glue and screws. Apply finish of choice and allow to dry. Insert clock movement according to manufacturer's instructions and enjoy! SBSSSSSSaSSSSi mmm Creative Woodworks & Crafts |


