Creative Woodworks & crafts 2000-01, страница 40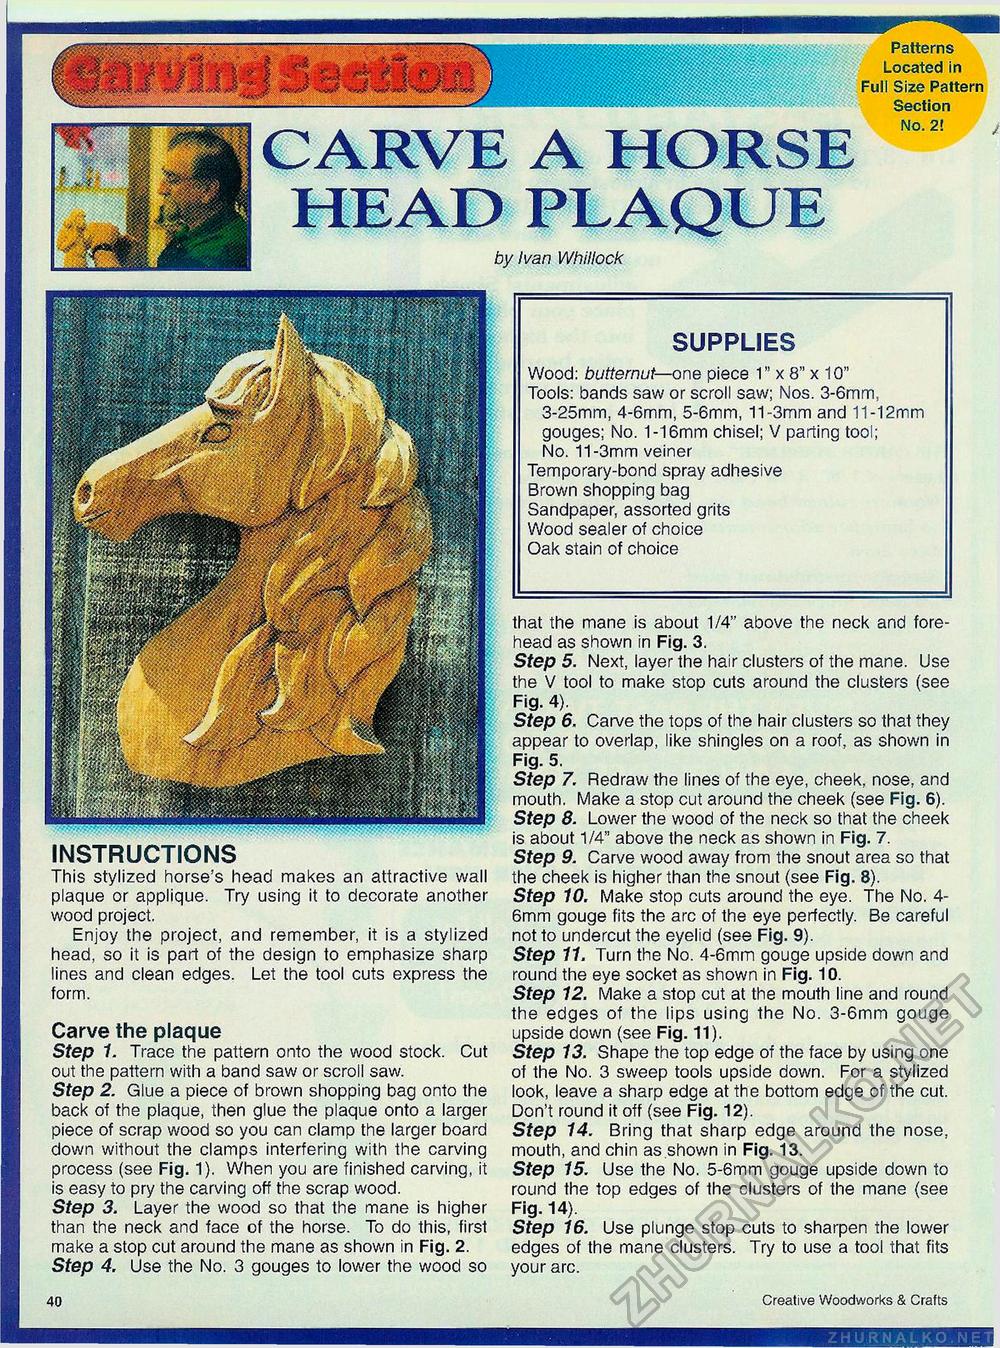
CARVE A HORSE by Ivan Whillock SUPPLIES Wood: butternut— one piece 1" x 8" x 10" Tools: bands saw or scroll saw; Nos. 3-6mm, 3-25mm, 4-6mm, 5-6mm, 11-3mm and 11-12mm gouges; No. 1-16mm chisel; V parting tool; No. 11-3mm veiner Temporary-bond spray adhesive Brown shopping bag Sandpaper, assorted grits Wood sealer of choice Oak stain of choice INSTRUCTIONS This stylized horse's head makes an attractive wall plaque or applique. Try using it to decorate another wood project. Enjoy the project, and remember, it is a stylized head, so it is part of the design to emphasize sharp lines and clean edges. Let the tool cuts express the form. Carve the plaque Step 1. Trace the pattern onto the wood stock. Cut out the pattern with a band saw or scroll saw. Step 2. Glue a piece of brown shopping bag onto the back of the plaque, then glue the plaque onto a larger piece of scrap wood so you can clamp the larger board down without the clamps interfering with the carving process (see Fig. 1). When you are finished carving, it is easy to pry the carving off the scrap wood. Step 3. Layer the wood so that the mane is higher than the neck and face of the horse. To do this, first make a stop cut around the mane as shown in Fig. 2. Step 4. Use the No. 3 gouges to lower the wood so that the mane is about 1/4" above the neck and forehead as shown in Fig. 3. Step 5. Next, layer the hair clusters of the mane. Use the V tool to make stop cuts around the clusters (see Fig. 4). Step 6. Carve the tops of the hair clusters so that they appear to overlap, like shingles on a roof, as shown in Fig. 5. Step 7. Redraw the lines of the eye, cheek, nose, and mouth. Make a stop cut around the cheek (see Fig. 6). Step 8. Lower the wood of the neck so that the cheek is about 1/4" above the neck as shown in Fig. 7. Step 9. Carve wood away from the snout area so that the cheek is higher than the snout (see Fig. 8). Step 10. Make stop cuts around the eye. The No. 4-6mm gouge fits the arc of the eye perfectly. Be careful not to undercut the eyelid (see Fig. 9). Step 11. Turn the No. 4-6mm gouge upside down and round the eye socket as shown in Fig. 10. Step 12. Make a stop cut at the mouth line and round the edges of the lips using the No. 3-6mm gouge upside down (see Fig. 11). Step 13. Shape the top edge of the face by using one of the No. 3 sweep tools upside down. For a stylized look, leave a sharp edge at the bottom edge of the cut. Don't round it off (see Fig. 12). Step 14. Bring that sharp edge around the nose, mouth, and chin as shown in Fig. 13. Step 15. Use the No. 5-6mm gouge upside down to round the top edges of the clusters of the mane (see Fig. 14). Step 16. Use plunge stop cuts to sharpen the lower edges of the mane clusters. Try to use a tool that fits your arc. 14 Creative Woodworks & Crafts |


