Creative Woodworks & crafts 2000-01, страница 41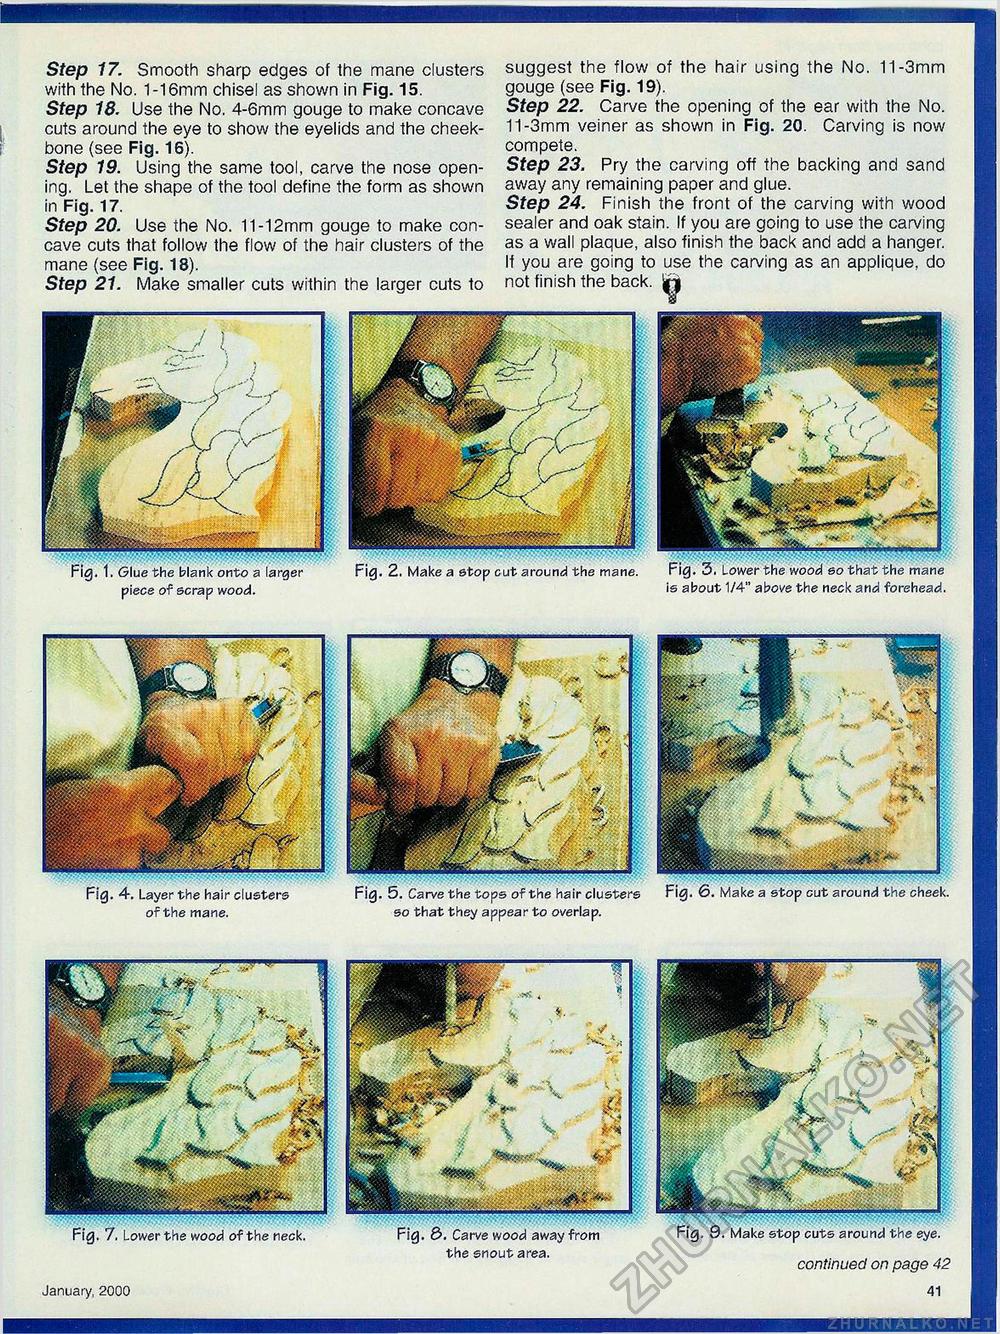
Step 17. Smooth sharp edges of the mane clusters with the No. 1-16mm chisel as shown in Fig. 15. Step 18. Use the No. 4-6mm gouge to make concave cuts around the eye to show the eyelids and the cheekbone (see Fig. 16). Step 19. Using the same tool, carve the nose opening. Let the shape of the tool define the form as shown in Fig. 17. Step 20. Use the No. 11-12mm gouge to make concave cuts that follow the flow of the hair clusters of the mane (see Fig. 18). Step 21. Make smaller cuts within the larger cuts to suggest the flow of the hair using the No. 11-3mm gouge (see Fig. 19). Step 22. Carve the opening of the ear with the No. 11-3mm veiner as shown in Fig. 20. Carving is now compete. Step 23. Pry the carving off the backing and sand away any remaining paper and glue. Step 24. Finish the front of the carving with wood sealer and oak stain. If you are going to use the carving as a wall plaque, also finish the back and add a hanger. If you are going to use the carving as an applique, do not finish the back. piece of scrap wood. Fig. 2. Make a stop cut around the mane. Fig. 3. Lower the wood so that the mane is about 1/4" above the neck and forehead. of the mane. so that they appear to overlap. January, 2000 the snout area. continued on page 42 41 |


