Creative Woodworks & crafts 2000-01, страница 46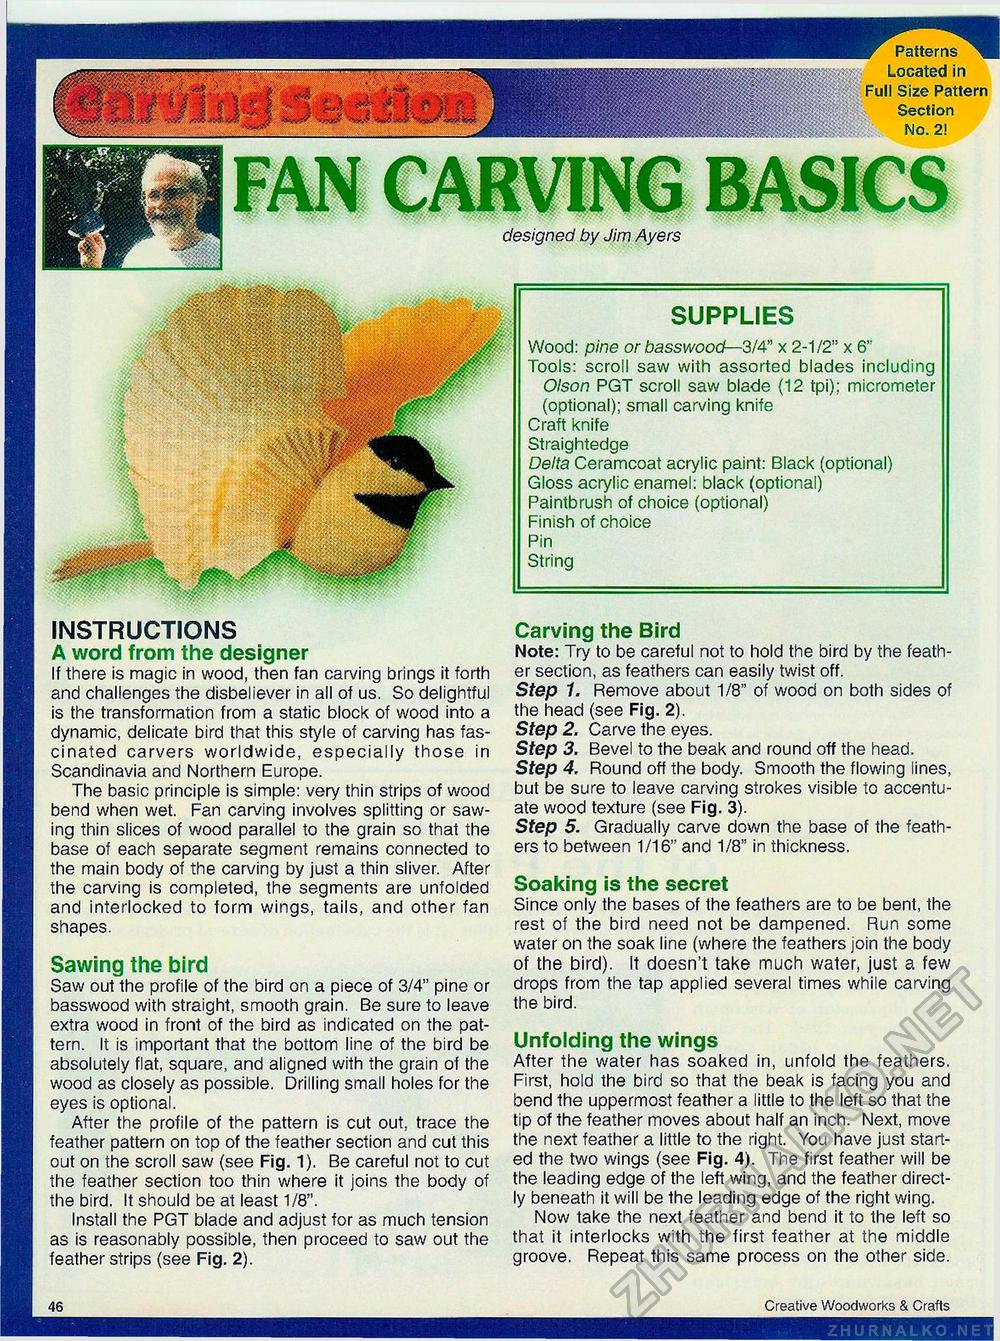
designed by Jim Ayers SUPPLIES Wood: pine or basswood— 3/4" x 2-1/2" x 6" Tools: scroll saw with assorted blades including Olson PGT scroll saw blade (12 tpi); micrometer (optional); small carving knife Craft knife Straightedge Delta Ceramcoat acrylic paint: Black (optional) Gloss acrylic enamel: black (optional) Paintbrush of choice (optional) Finish of choice Pin String INSTRUCTIONS A word from the designer If there is magic in wood, then fan carving brings it forth and challenges the disbeliever in all of us. So delightful is the transformation from a static block of wood into a dynamic, delicate bird that this style of carving has fascinated carvers worldwide, especially those in Scandinavia and Northern Europe. The basic principle is simple: very thin strips of wood bend when wet. Fan carving involves splitting or sawing thin slices of wood parallel to the grain so that the base of each separate segment remains connected to the main body of the carving by just a thin sliver. After the carving is completed, the segments are unfolded and interlocked to form wings, tails, and other fan shapes. Sawing the bird Saw out the profile of the bird on a piece of 3/4" pine or basswood with straight, smooth grain. Be sure to leave extra wood in front of the bird as indicated on the pattern. It is important that the bottom line of the bird be absolutely flat, square, and aligned with the grain of the wood as closely as possible. Drilling small holes for the eyes is optional. After the profile of the pattern is cut out, trace the feather pattern on top of the feather section and cut this out on the scroll saw (see Fig. 1). Be careful not to cut the feather section too thin where it joins the body of the bird. It should be at least 1/8". Install the PGT blade and adjust for as much tension as is reasonably possible, then proceed to saw out the feather strips (see Fig. 2). Carving the Bird Note: Try to be careful not to hold the bird by the feather section, as feathers can easily twist off. Step 1. Remove about 1/8" of wood on both sides of the head (see Fig. 2). Step 2. Carve the eyes. Step 3. Bevel to the beak and round off the head. Step 4. Round off the body. Smooth the flowing lines, but be sure to leave carving strokes visible to accentuate wood texture (see Fig. 3). Step 5. Gradually carve down the base of the feathers to between 1/16" and 1/8" in thickness. Soaking is the secret Since only the bases of the feathers are to be bent, the rest of the bird need not be dampened. Run some water on the soak line (where the feathers join the body of the bird). It doesn't take much water, just a few drops from the tap applied several times while carving the bird. Unfolding the wings After the water has soaked in, unfold the feathers. First, hold the bird so that the beak is facing you and bend the uppermost feather a little to the left so that the tip of the feather moves about half an inch. Next, move the next feather a little to the right. You have just started the two wings (see Fig. 4). The first feather will be the leading edge of the left wing, and the feather directly beneath it will be the leading edge of the right wing. Now take the next feather and bend it to the left so that it interlocks with the first feather at the middle groove. Repeat this same process on the other side. 14 Creative Woodworks & Crafts |


